OSCUP is an open source UART protocolo designed for working with ESP32 ARM Processors. The code well documented helps to figure out how to implement a custom protocol on UART port. With this protocol you can transmit and receive data which are tracked by a fixed preamble. It implements ACK and NACK for each packet sent, for managing errors or lost packets.
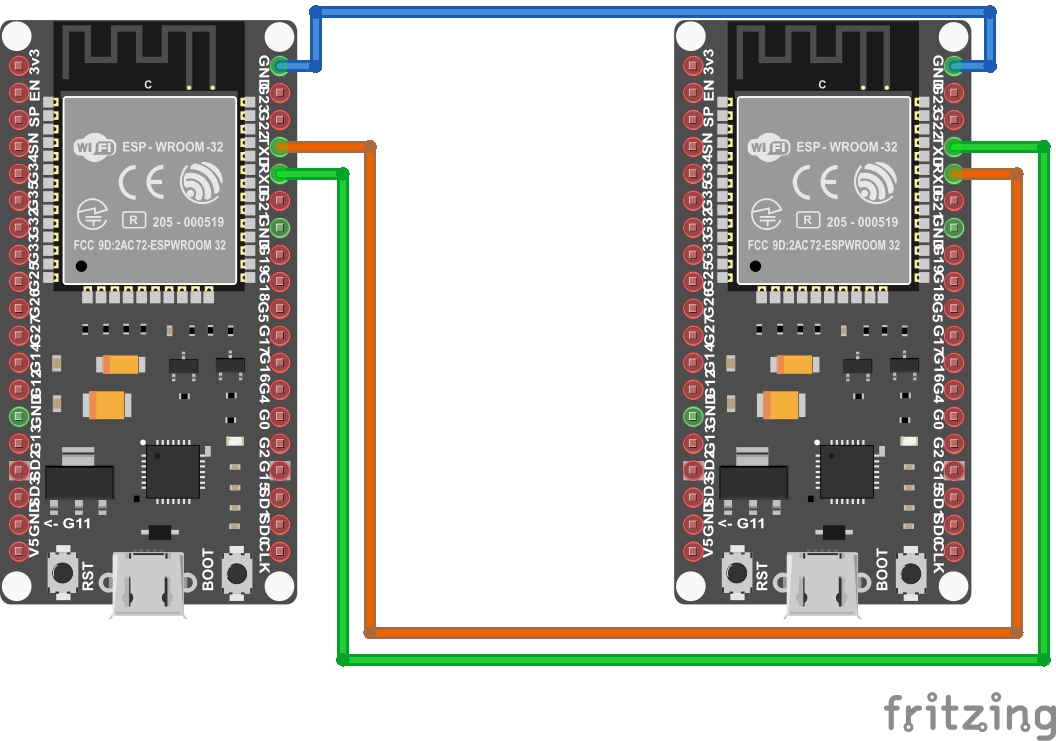
It relies on primitive libraries provided by Espressiff, such as /device/uart.h for interfacing with the low level hardware and functions. The protocol provides two function write and read for sending and receiving data. When you create a new Oscup object you need to pass it an ID which keeps track of the device who sent the packet. Optionally the Oscup object can be istantiated specifying the UART port and the correlated UART TX pin and UART RX pin. By default the communication takes place on UART 0, or rather the USB port.
In fact, it is possible to use OSCUP for a communication between a computer and an ESP32, or between two ESP32.
CommandsEvery time the protocol writes data on UART, it inserts a command inside the packet. The command is mandatory, otherwise you may ask yourself why you want to use a protocol (just use arduino Serial). On the reciever, obviously, you must distinguish between the commands you recieve. There are avaialble 4 main commands:
SHARE: this command indicates that the sender just want to share this data with the receiver (for minor reasons). You can use it if you just want to print data on the other device.CONFIRM: this command indicates that the data that will be sent are a consequence of an action (for example, we pressed a button on device 1, we send data to device 2 and we want that device 2 not only print this data but also store them).ACK: It is used to tell the sender that the receiver has received the packetNACK: It is used to tell the sender that the receiver hasn't received the packet; the sender will try to send it again Obviously, you can configure the action you prefer to undertake each command. We suggest not to use ACK and NACK, as for the other two, the previous indications are only guidelines that we have defined for using those two commands. Also, you can configure new commands on arduino (command = uint8_t) and send them directly in the write function
begin: initializes the UART parameters and forwards it to the control hardware. It is mandatory to call it inside void setup(). It takes the baudrate as the only input parameters which will determine the communication baudrate.write: the write function takes a command "user-defined", the length of the payload and the effective payload, which has a fixed length of 40 bytes. This function writes this data on UART and returns an error code.read: It reads the data incoming and insert them in a packet_t struct, defined in.h file. It returs the lenght of the readed buffer if everything works fine, otherwise a negative error.get_timer: returns the timer's counterget_APB_clk: return the frequency of APB. Usually APB is used to set periphericals frequency on embedded processors.
We are Daniel and Riccardo, both A.I. students at university. We developed this protocol for acquiring data from an ESP32 to do A.I. stuff (check FiremanSam on our Git Repo).
Please consider supporting the project by fixing bugs or adding new feature!


Comments