Hackster is hosting Hackster Holidays, Ep. 7: Livestream & Giveaway Drawing. Watch previous episodes or stream live on Friday!Stream Hackster Holidays, Ep. 7 on Friday!
Pankaj Rai
Published © MIT

NodeMCU-Based IoT Project: Rotating Solar Panel

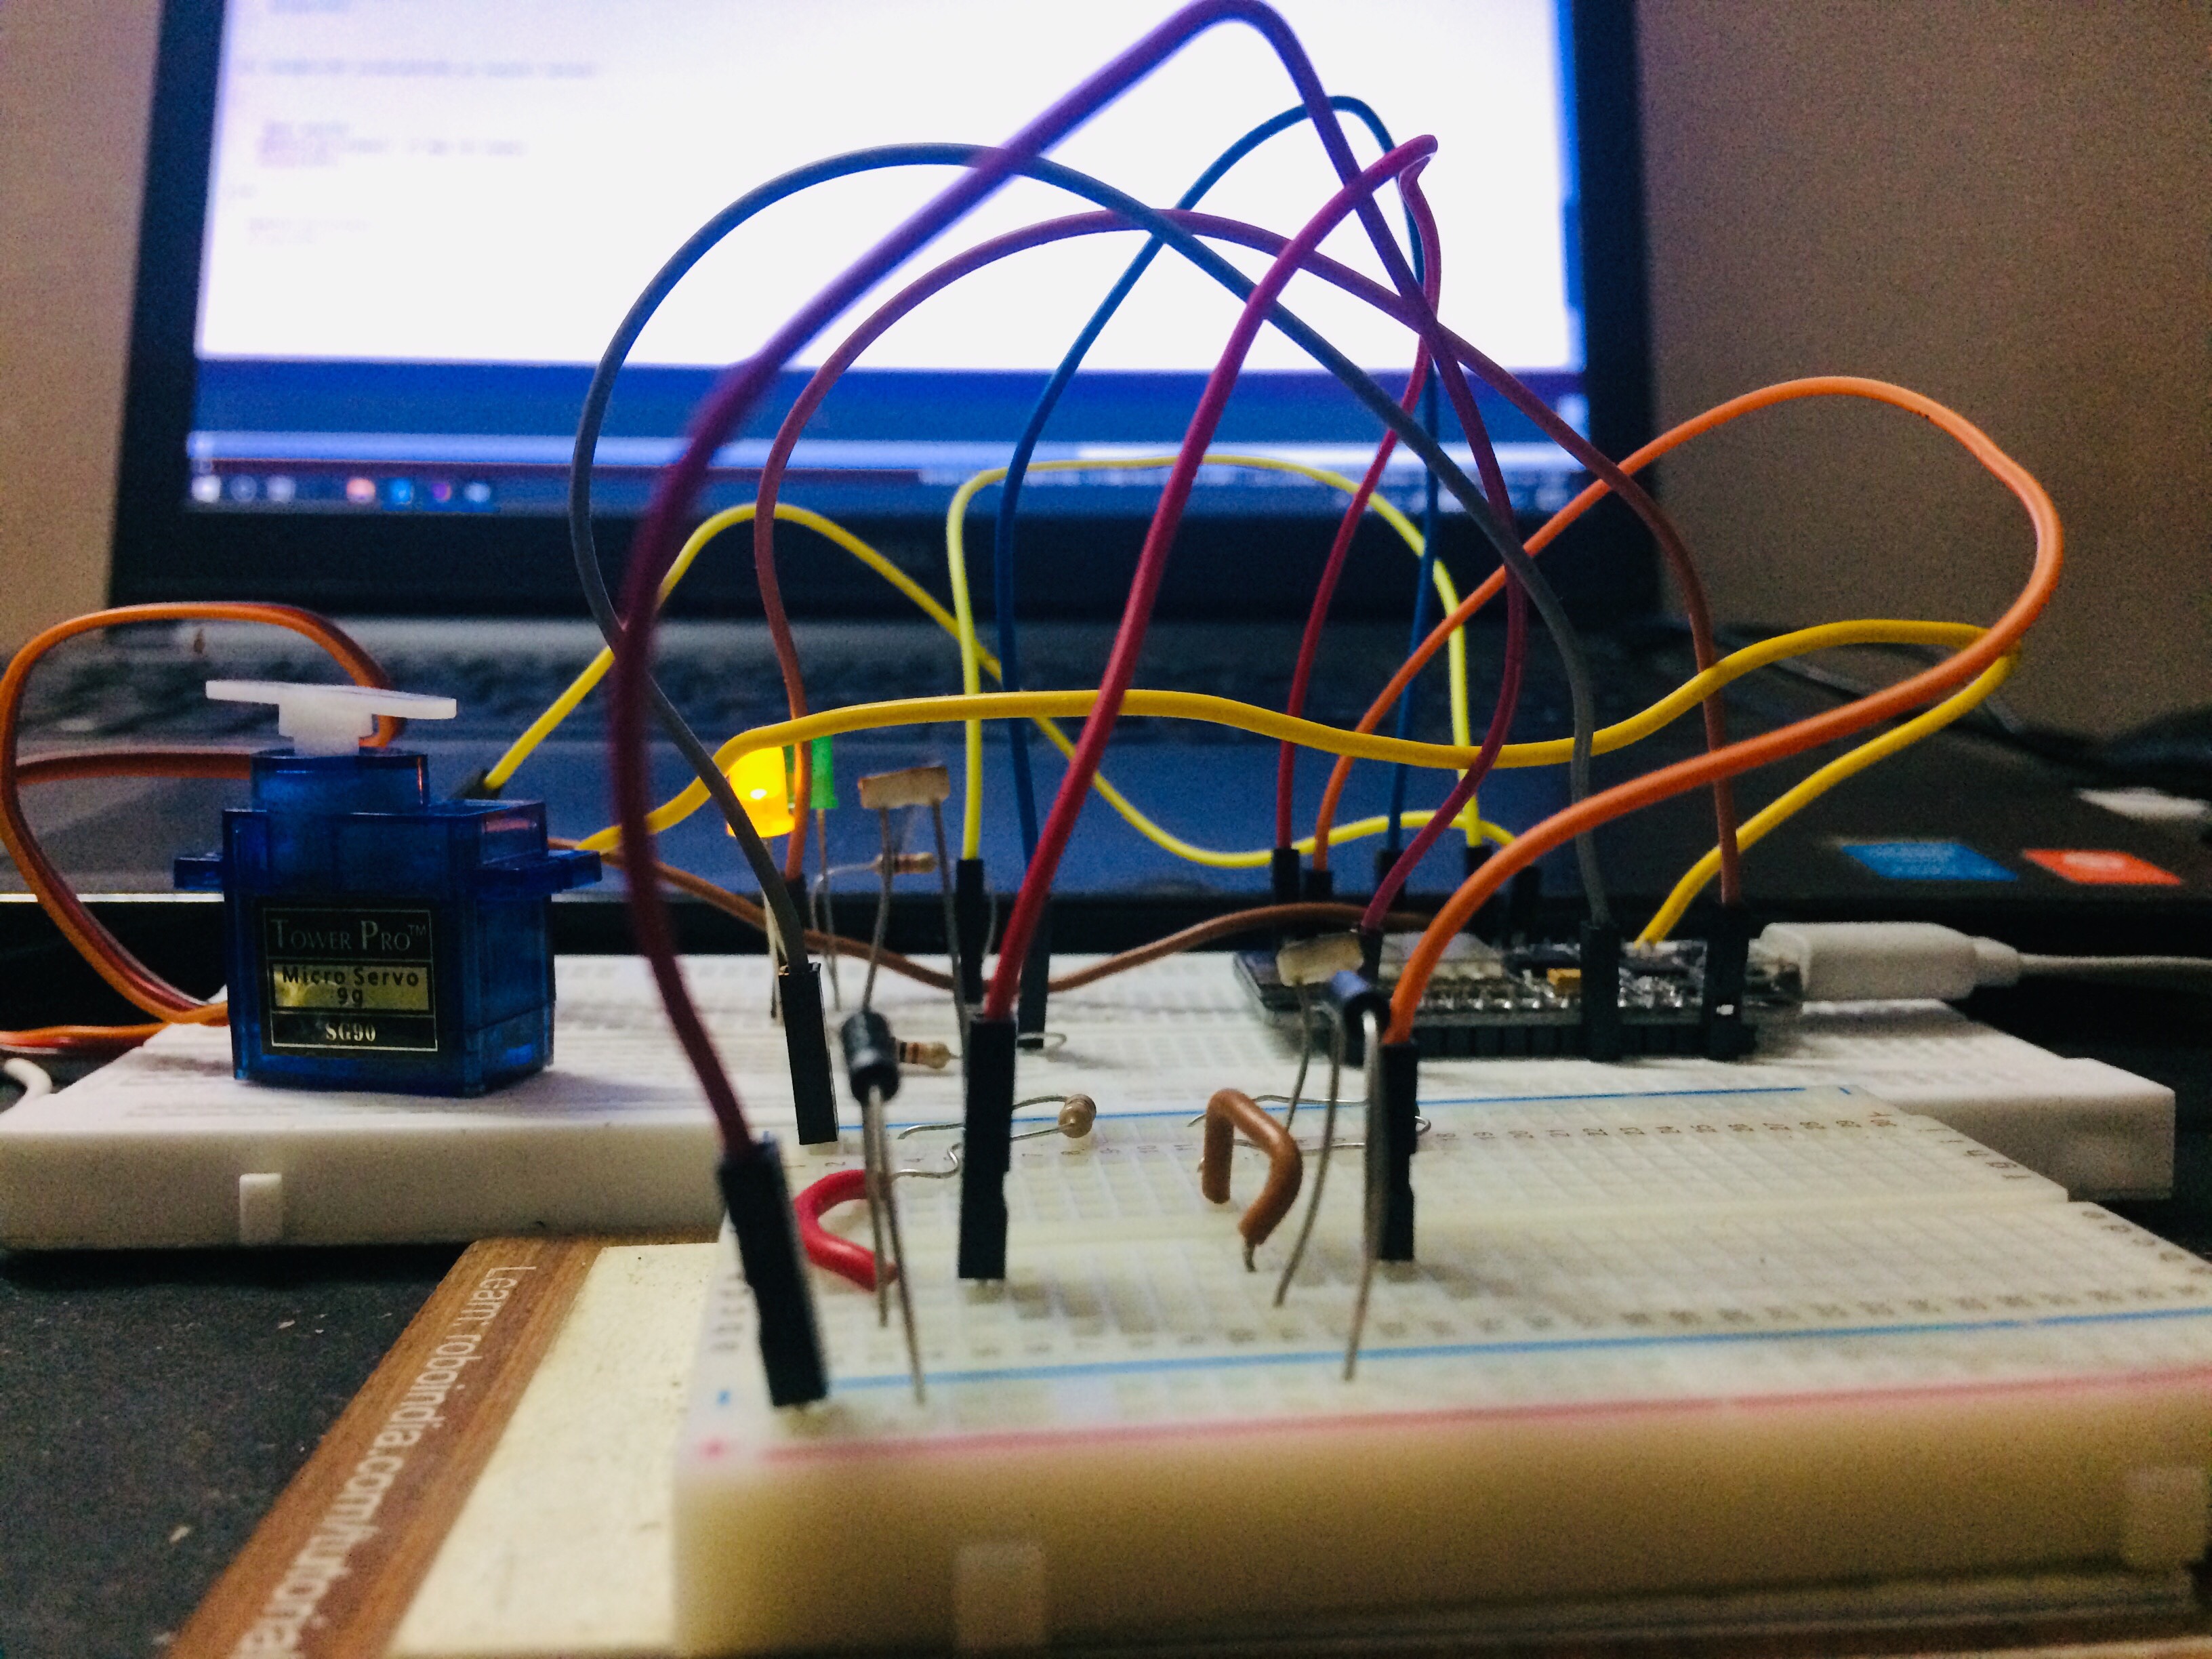
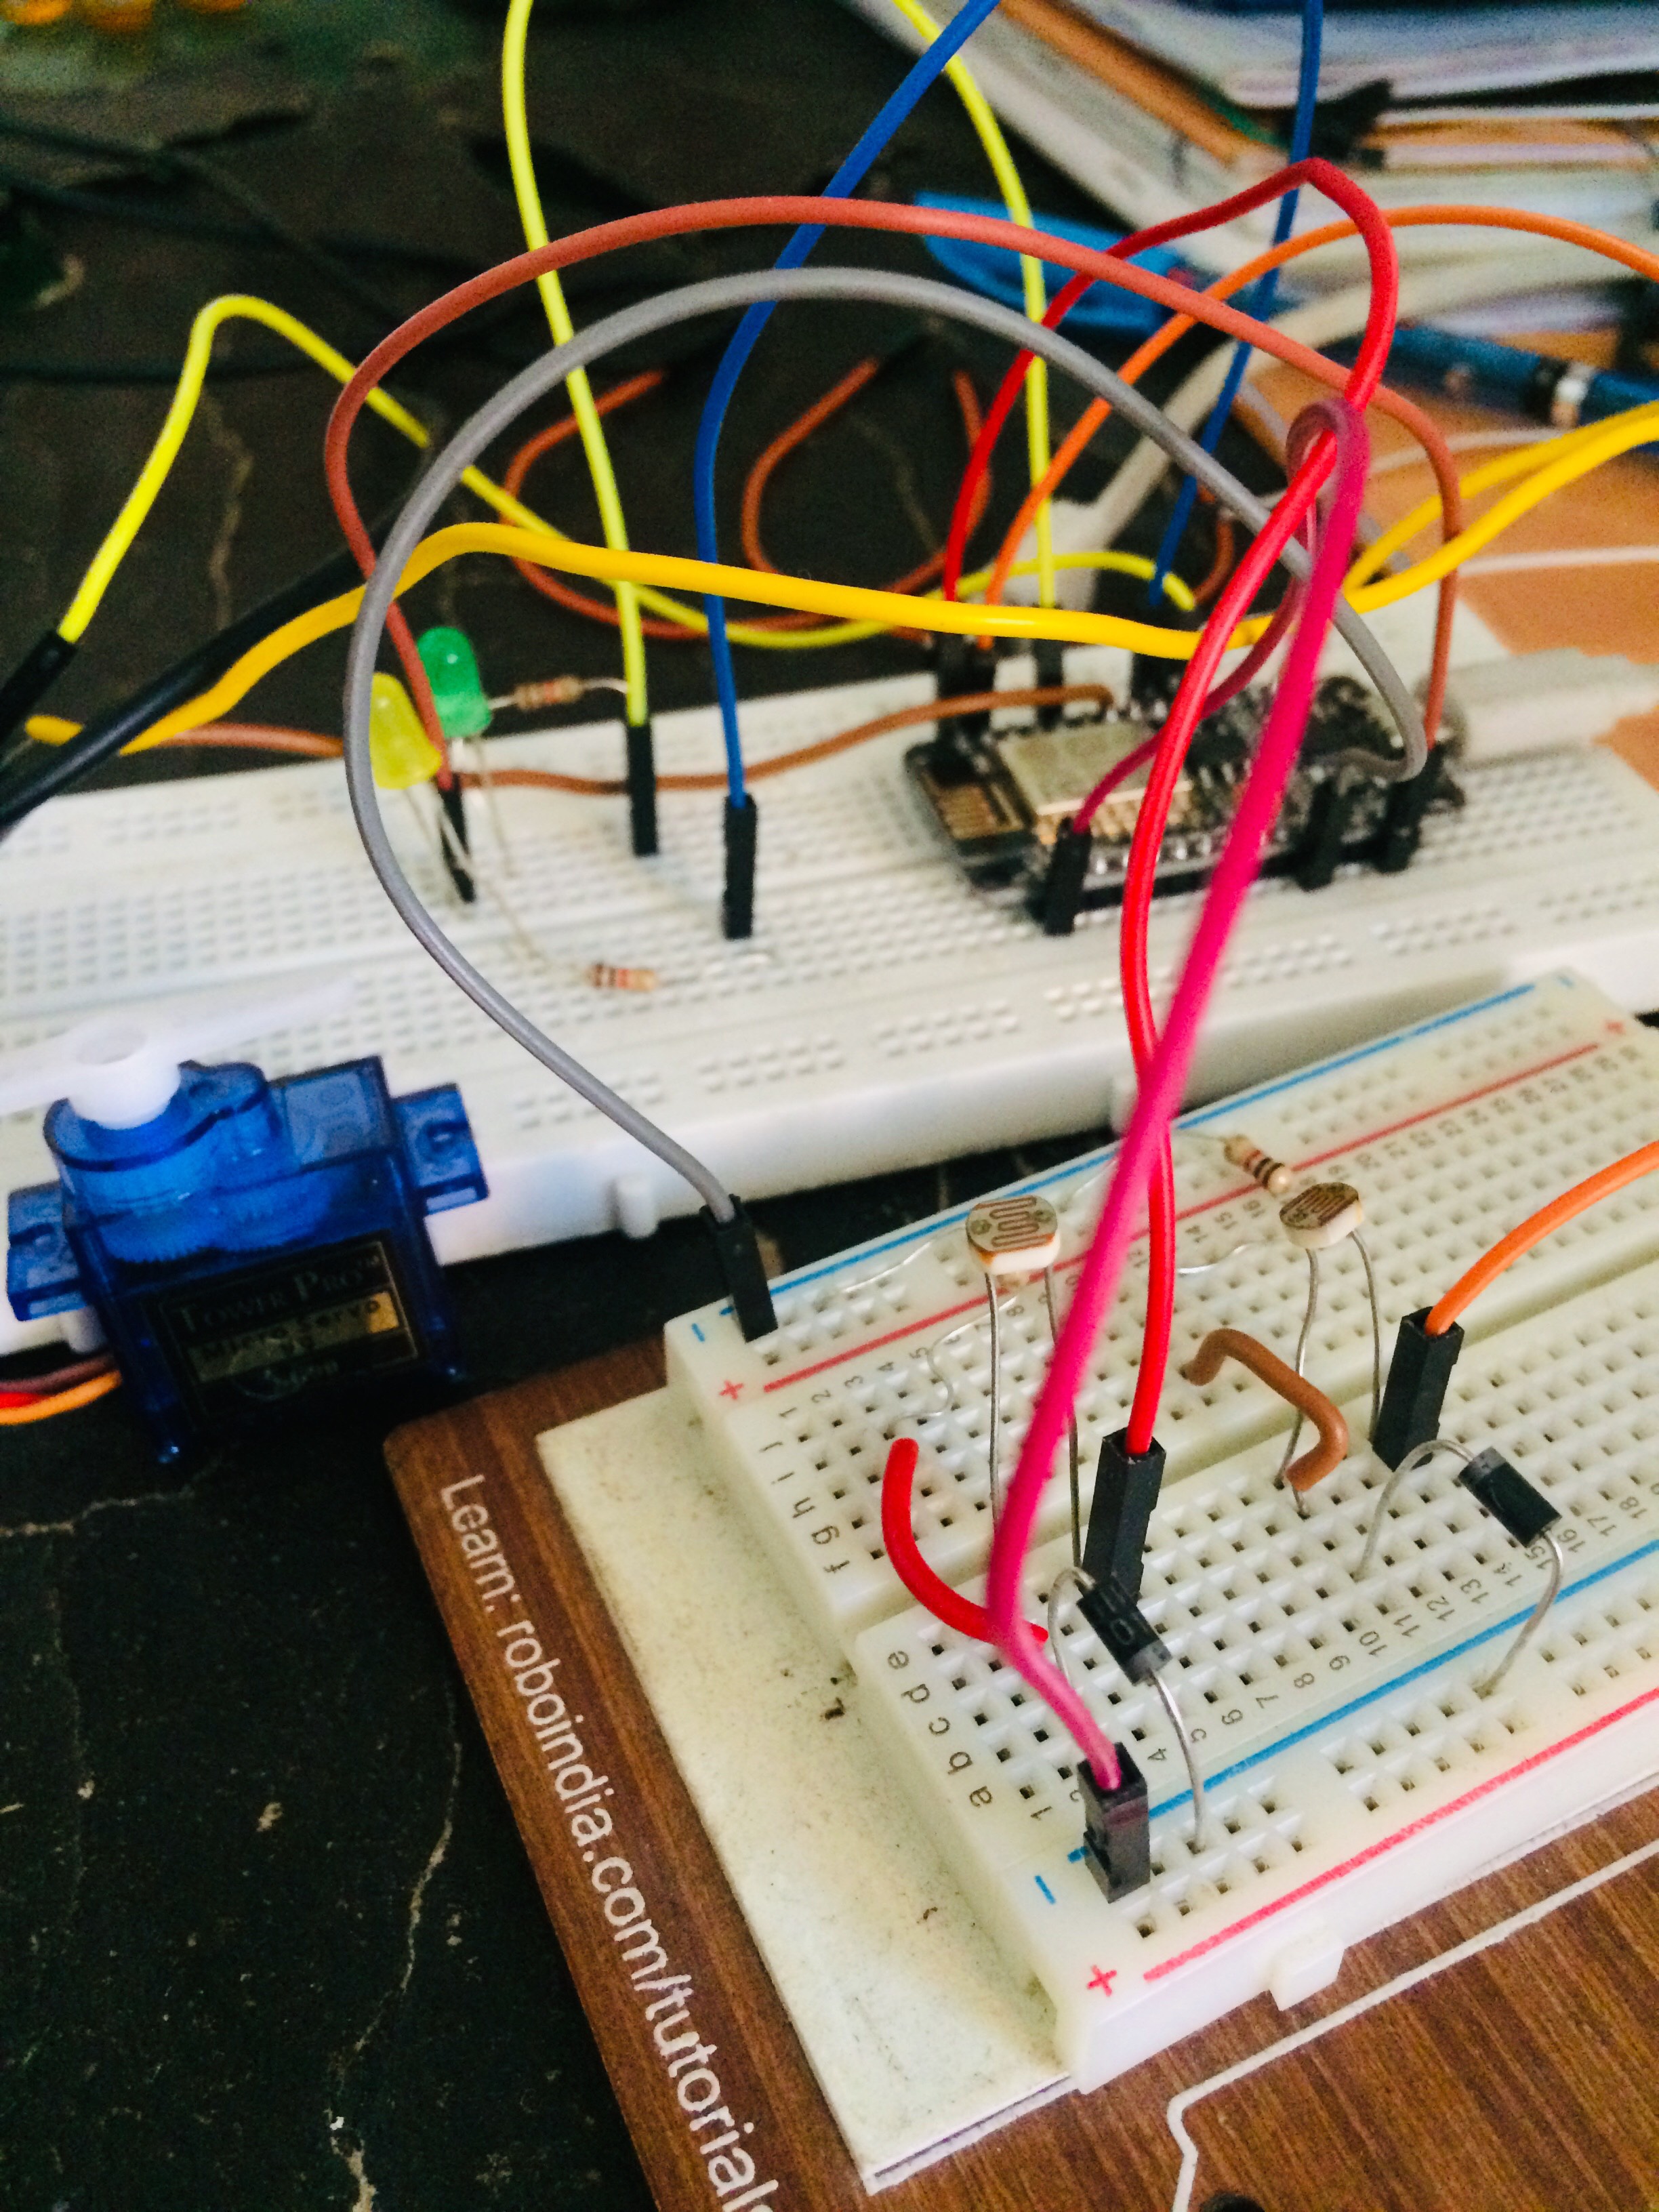
Using two LDRs to get intensities in two direction and then comparing those intensities will rotate the servo motor.

IntermediateFull instructions provided4 hours8,249
NodeMCU-Based IoT Project: Rotating Solar Panel

Things used in this project

Hardware components

NodeMCU ESP8266 Breakout Board
×1
Photo resistor
Photo resistor
×2
SG90 Micro-servo motor
×1
5 mm LED: Red
5 mm LED: Red
×3
1N4007 – High Voltage, High Current Rated Diode
×2
Resistor 1k ohm
Resistor 1k ohm
×4
Breadboard (generic)
×1
Jumper wires (generic)
×15

Software apps and online services

Arduino IDE
Arduino IDE
thingsai.io
impressive!!..easy to use..sample code is given here itself

Story

Read more

Custom parts and enclosures

NodeMCU based project : Rotating Solar Panel

Schematics

NodeMCU based project : Rotating Solar Panel

Here we are using two LDRs to get intensities in two direction which will be mounted on two sides of solar panel, after comparing the intensity in two direction, servo motor will rotate in direction of more intensity of light.
and uploading the intensity1 , intensity2 and position of servo motor to cloud platform which we are using is thingsai.io

Code

NodeMCU based project : Rotating Solar Panel

Arduino
Here we are using two LDRs to get intensities in two direction which will be mounted on two sides of solar panel, after comparing the intensity in two direction, servo motor will rotate in direction of more intensity of light.
and uploading the intensity1 , intensity2 and position of servo motor to cloud platform which we are using is thingsai.io
#include <SoftwareSerial.h>
SoftwareSerial mySerial(12, 13); // RX, TX

#include <ESP8266WiFi.h>          //https://github.com/esp8266/Arduino
#include <DNSServer.h>
#include <ESP8266WebServer.h>
#include "WiFiManager.h"          //https://github.com/tzapu/WiFiManager
#include <WiFiClientSecure.h>

int count=0,i,m,j,k;


#include <Servo.h>      // include library for servo motor
Servo myservo;           
#define ANALOG_INPUT A0
int ledy = 2; // yellow LED, d4
int ledg =12;  // green  LED , d6
int pos;
int value1, value2;


//////////////////////////////////////// ALL DECLARATIONS for CLOUD //////////////////////////////
const char* host = "api.thingsai.io";                                 // OR host = devapi2.thethingscloud.com
const char* post_url = "/devices/deviceData";       // OR /api/v2/thingscloud2/_table/data_ac
const char* time_server = "baas.thethingscloud.com";             //this is to convert timestamp
const int httpPort = 80;
const int httpsPort = 443;
const char*  server = "api.thingsai.io";  // Server URL

char timestamp[10];

WiFiClient client;


/////////////////////////////////////////////////////////////////////////////////////////////////////////
void configModeCallback (WiFiManager *myWiFiManager) 
{
  Serial.println("Entered config mode");             //*-*-*-*-*-*-*-*-*-*-*-*-*-*if control enters this function then net is not connected
  Serial.println(WiFi.softAPIP());                  // "WiFi.softAPIP() is for AP" , "WiFi.localIP() is for STA",
                                                                
  Serial.println(myWiFiManager->getConfigPortalSSID());             //if you used auto generated SSID, print it
}
/////////////////////////////////////// TIMESTAMP CALCULATION function///////////////////////////////////////
int GiveMeTimestamp()
{
  unsigned long timeout = millis();

  while (client.available() == 0)
  {
    if (millis() - timeout > 50000)
    {
      client.stop();
      return 0;
    }
  }

while (client.available())
      {
        String line = client.readStringUntil('\r');                    //indexOf() is a funtion to search for smthng , it returns -1 if not found
        int pos = line.indexOf("\"timestamp\"");                       //search for "\"timestamp\"" from beginning of response got and copy all data after that , it'll be your timestamp
        if (pos >= 0)                                                     
        {
          int j = 0;
          for(j=0;j<10;j++)
          {
            timestamp[j] = line[pos + 12 + j];
          }
        }
      }
}  
////////////////////////////////////////////////////////////////////////////////////////////////////////

void setup() 
{
  //Deifne output pins for Mux (here diode combinations)
  pinMode(ledy, OUTPUT);     
  pinMode(ledg, OUTPUT);     
  pinMode(16, OUTPUT);     // 16 and 5 th pin are connected to LDRs
  pinMode(5, OUTPUT);    //d0= 16, d1 =5 ,,, d0 connected to LDR 1 from left and d1 connected to LDR 2 from left
  
      myservo.attach(13);    // orange pin of servo motor to D7 of nodemcu
     // Serial.begin(115200);   no need of this line  
      myservo.write(0);        // make initial position of servo at 0 degree
      delay(2000);
      
  
  Serial.begin(115200);     //(19200,SERIAL_8E1) - data size = 8 bits , parity = Even , stop bit =  1bit
  mySerial.begin(115200);
  WiFiManager wifiManager;
 
  wifiManager.setAPCallback(configModeCallback);
                                                                                                    
  if(!wifiManager.autoConnect("iPankaj","80518051"))                   //wifiManager.autoConnect("AP-NAME", "AP-PASSWORD"); (OR) wifiManager.autoConnect("AP-NAME"); only ID no password (OR) wifiManager.autoConnect(); this will generate a ID by itself
  {
    Serial.println("failed to connect and hit timeout");     //control comes here after long time of creating Access point "NodeMCU" by NodeMCU and still it has not connected
    //reset and try again, or maybe put it to deep sleep
    ESP.reset();
    delay(1000);
  } 

  //if you come here you have connected to the WiFi
  Serial.println("connected...yeey :");
 
}

void loop() 
{
  //int analogValue = analogRead(outputpin);
{


/////////////////////////////////////// SEND THE QUERY AND RECEIVE THE RESPONSE///////////////////////  
 {
 
  digitalWrite(16, HIGH);   
  digitalWrite(5, LOW);
  delay(1000);
  value1 = analogRead(ANALOG_INPUT);   // Value of the sensor connected to LDR 1 from left
         // no need of these more identated if and else loop if you dont want to see the output in ledg and ledy...
              if(value1>=30)
              {
            
                 digitalWrite(ledy, HIGH);
                 delay(1000);
              }
              else 
              {
                digitalWrite(ledy, LOW);
                 delay(1000);
              }


  digitalWrite(16, LOW);
  digitalWrite(5, HIGH);
  delay(1000);
  value2 = analogRead(ANALOG_INPUT); //Value of the sensor connected to LDR 2 from left
   // here also no need of these "more identated" if and else loop if you dont want to see the output in ledg and ledy...
              if(value2>=30)
              {
            
                 digitalWrite(ledg, HIGH);
                 delay(1000);
              }
              else 
              {
                digitalWrite(ledg, LOW);
                 delay(1000);
              }

//this if condition checks for the day time and then COMPARES the values of both LDRs...accordingly the servo will move to that side...
         if( (value1>=30) &&(value2>=30) && (value1> value2))
         
         {
            
             pos= pos+ 5;   //gets rotated by 5 degree each time ..we may callibrate this pos value according to our use
             myservo.write(pos);  // max 180 degree...here it is limitation for this servo motor..we may have servo motor for 360 degree rotation
             delay(1000);
         }  
         else
         {    
            myservo.write(pos);
            delay(1000); 
         }
        }


  Serial.print("connecting to ");
  Serial.println(host);                          //defined upside :- host = devapi2.thethingscloud.com or 139.59.26.117

///////////////////////////////////// TIMESTAMP CODE SNIPPET /////////////////////////
Serial.println("inside get timestamp\n");
  if (!client.connect(time_server, httpPort)) 
  {
    return;                                                        //*-*-*-*-*-*-*-*-*-*
  }

  client.println("GET /api/timestamp HTTP/1.1");                            //Whats this part doing, i didnt get
  client.println("Host: baas.thethingscloud.com");
  client.println("Cache-Control: no-cache");
  client.println("Postman-Token: ea3c18c6-09ba-d049-ccf3-369a22a284b8");
  client.println();

GiveMeTimestamp();                        //it'll call the function which will get the timestamp response from the server
Serial.println("timestamp receieved");
Serial.println(timestamp);
///////////////////////////////////////////////////////////////////////////////

  Serial.println("inside ThingsCloudPost");

 
String PostValue = "{\"device_id\":  61121696053, \"slave_id\": 2";
         PostValue = PostValue + ",\"dts\":" +timestamp;
   PostValue = PostValue +",\"data\":{\"intensity1\":" + value1 +",\"intensity2\":" + value2 +",\"position\":" + pos +"}"+"}";
  
  
  Serial.println(PostValue);

/* create an instance of WiFiClientSecure */
    WiFiClientSecure client;
    
    Serial.println("Connect to server via port 443");
    if (!client.connect(server, 443)){
        Serial.println("Connection failed!");
    } else {
        Serial.println("Connected to server!");
        /* create HTTP request */

        client.println("POST /devices/deviceData HTTP/1.1");
        client.println("Host: api.thingsai.io");
        //client.println("Connection: close");
        client.println("Content-Type: application/json");
        client.println("cache-control: no-cache");
        client.println("Authorization: Bearer eyJ0eXAiOiJKV1QiLCJhbGciOiJIUzI1NiJ9.IjVhMzBkZDFkN2QwYjNhNGQzODkwYzQ4OSI.kaY6OMj5cYlWNqC2PNTkXs9PKy6_m9tdW5AG7ajfVlY");
        client.print("Content-Length: ");
        client.println(PostValue.length());
        client.println();
        client.println(PostValue);
//////////////////////////////////POSTING the data on to the cloud is done and now get the response form cloud server//////////////////
 Serial.print("Waiting for response ");
        while (!client.available()){
            delay(50); //
            Serial.print(".");
        }  
        /* if data is available then receive and print to Terminal */
        while (client.available()) {
            char c = client.read();
            Serial.write(c);
        }

        /* if the server disconnected, stop the client */
        if (!client.connected()) {
            Serial.println();
            Serial.println("Server disconnected");
            client.stop();
        }
    }
Serial.println("//////////////////////    THE END     /////////////////////");
delay(3000);
}
}

Credits

Pankaj Rai
10 projects • 33 followers
B.Tech (Electronics and communication Engineering), Enthusiastic about IOT , Robotics and Automation technologies. (Mb. - 9872647369)

Comments