

Hardware components | ||||||
 |
| × | 1 | |||
| × | 1 | ||||
| × | 1 | ||||
| × | 1 | ||||
| × | 1 | ||||
| × | 1 | ||||
We have seen in the previous chapter that we can easily read data from the Energy Analyzer with MiniIOEx. Because MiniIOEx-3G is an industrial development card, it is designed for use in industrial environments. When it comes to industrial environments, mind motor control and applications come first. In this application, we will try to drive the motor by giving reference values via RS485 to the motor driver. RS485 will be used again in this study.
Therefore, we assume that the following libraries are installed:
- serial
- pymodbus
you can install them by looking at the previous example. You should check "Raspi-config" that the serial port settings are open. Our goal here is to give the speed reference to the motor driver and to control this speed through Raspberry Pi 3 B+.
The following equipment was used in this study:be
- ABB ACH550 3P 400V 7.5kW Motor Driver
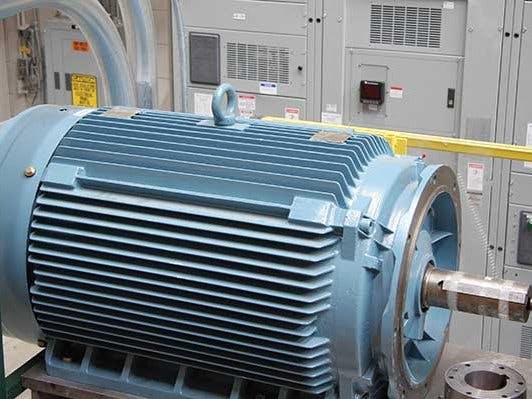
- Siemens 2kW 3P 400V 1500rpm AC Motor
- Raspberry Pi 3 B+
- MiniIOEx-3G
- Phoenix Contact UNO Power 230V/24V Power Supply
IMPORTANT NOTE
Perform motor and driver connections with an experienced electrician. It should not be forgotten that there is a danger of death at 400V
After setting the motor parameters of the ABB Driver, we need to enter the "Communication Parameter" settings. The corresponding parameter setting is available in the driver's manual. After setting the parameters, we are installing the RS485 terminals of the MiniIOEx in the ABB Motor Drive.
We create a file called "abb.py" on the terminal screen and we need to grant all rights to use serial port and IO operations in this file. If we write in the terminal we can give these rights by "chmod + x abb.py" command. If the driver's motor connections and communication connections are completed, we can switch to the corresponding software. When we read the manual page of our driver, we are registering the relevant registers and we need to check what information they contain. Although the drive consumes a lot of information from the consumed energy to the saved energy etc., we will only use the following parameters in our software:
- Motor Speed[rpm]
- Motor Current[A]
- Motor Power[kW]
- Driver DC Bus Voltage[V]
- Driver Temperature [Celcius]
We can retrieve these values by querying the relevant registers. We only used the Motor Speed variable in our sample software. Other information can also be taken from the code. The Motor Temperature parameter is important for this information. In general, motor drivers can only operate for a certain time at a certain temperature. This value should be continuously checked for unintentional stops and if the temperature is too high (operating temperature is usually 40 °C max), the driver can be taken care of or the environmental conditions can be changed.
We read data via RS485 with the energy analyzer, but we did not write any data on the analyzer. In this example, there is also how to write data via Modbus.
client = ModbusClient(method = 'rtu', port = '/dev/ttyS0',baudrate = 9600,timeout = 1,parity = 'N')
client.connect()
try:
    result = client.read_holding_registers(100,20,unit = 0x01)
    print("Motor Speed : {}".format(result.registers[2]))
We were questioning the '0' register while reading the data on the analyzer, but since the ACH550 driver told us that we could read from the 100th Register, we made 20 register's from the 100th register. The return value of the function ".read_holding_registers" contains all the variables mentioned above in the 'result' array. In the 100.register, because of the Speed Variable, the result [0] will give us the instant speed variable in subsequent queries.
After the first interrogation, the program decides whether to start the engine by looking at the variables. Since we have a simple example here, we have not checked these variables. For example, the motor start temperature, DC bara voltage can be controlled, and if these values are not within the desired range, the motor should not start.
General flow diagram of the program:
- Read motor and drive parameters
- "Driver start" refer to the first conditions
- "Driver start"
- Driver motor speed reference sending as [Hz] type
- Increase motor speed reference
- Pull motor speed reference to 0 Hz
- Bring the drive to the stop state
In the first step we read the motor and drive parameters. Now we have to start the drive.
In the analyzer we mentioned that we were just reading and writing here. We can perform the typing operation using the following function:
result = client.write_registers(REGISTER_ADRESS,REGISTER_REF,unit = UNITID)
With this function, we can perform the desired write operation. First we need to perform the driver start operation in register 0 and not send the motor speed reference still. We can do all of this with the "write_registers" function.
Driver Start Bit Reference Values Initial Status:
First of all references to the table should be sent. Since we send references as DECIMAL, the value of DECIMAL in this table is 1278.
result = client.write_registers(0,1278,unit = 1)
After that, we will make the Start bit True, making the motor driver work.
Driver Start Bit Reference Values Second Condition:
[0].0 Since the value of the start bit changes, the reference value we send to the register will increase.
result = client.write_registers(0,1279,unit = 1)
After this reference value, the motor drive will be ready for external reference. First we do not want to make all bits true. Therefore we gradually activated the motor drive. Now let's send the motor speed reference again using the "write_registers"function.
result = client.write_registers(1,speedRef,unit = 1)
The ABB Motor document Indicates that there is a "Speed Reference" register in the driver's No. 1 register. We can increase the "speedRef" variable to speed up the motor. We specified that the speed reference parameter of the AC Motor drive is "Hz".
Increases speedRef by 10, 000 in each cycle to speed up the engine.
myCounter = 5
speedRef = 0
while myCounter:
    result = client.write_registers(1,speedRef,unit = 1)
    time.sleep(1)
    result = client.read_holding_registers(100,20,unit = 0x01)
    print("Motor Speed : {} ".format(result.registers[0]))
    myCounter = myCounter - 1
    speedRef = speedRef + 10000
    time.sleep(10) #you should use time-sleep for Modbus comm.
When we run the program, we get the speed values as follows:
As seen in the above screen display, the motor speed is gradually increased in rpm and then gradually decreased. Due to the slip of the AC motor, the maximum speed rises to 1476 rpm not 1500. The motor was rotated and stopped in the FORWARDdirection by the ABB driver. It is possible to do all of these easily by using PYTHON language. Very good graphics can be developed by developing the program, the data can be sent to the WEB or the program can be run from the WEB in various situations.
Below you will find the code needed to control the ABB ACH550 Motor drive.
import serial
import pymodbusfrom pymodbus.pdu
import ModbusRequestfrom pymodbus.client.sync
import ModbusSerialClient as ModbusClient
from pymodbus.transaction import ModbusRtuFramer
import time
client = ModbusClient(method = 'rtu', port = '/dev/ttyS0',baudrate = 9600,timeout = 1,parity = 'N')
client.connect()
try:
    result = client.read_holding_registers(100,20,unit = 0x01)
    print("Motor Speed : {}".format(result.registers[2]))
    time.sleep(1)
    #start bit  0
    result = client.write_registers(0,1278,unit = 1)
    time.sleep(1)
    #start bit  1
    result = client.write_registers(0,1279,unit = 1)
    time.sleep(1)
    #after start operation
    print("operation starts:")
    myCounter = 5
    speedRef = 0
    while myCounter:
        result = client.write_registers(1,speedRef,unit = 1)
        time.sleep(1)
        result = client.read_holding_registers(100,20,unit = 0x01)
        print("Motor Speed : {} ".format(result.registers[0]))
        myCounter = myCounter - 1
        speedRef = speedRef + 10000
        time.sleep(10)
    #Stop Operation
    #speed ref will be 0 rpm
    time.sleep(5)
    result = client.write_registers(1,0,unit = 1)
    time.sleep(20)
    result = client.read_holding_registers(100,20,unit = 0x01)
    print("Motor Speed : {}".format(result.registers[0]))
    #driver start bit will be 0 and driver will stop
    result = client.write_registers(0,0,unit = 1)
    result = client.read_holding_registers(100,20,unit = 0x01)
    print("Motor Speed : {}".format(result.registers[0]))
except:
    pass
time.sleep(1)
client.close()
The original code can be found by : https://github.com/pe2a/miniIOEx3G/blob/master/README.md#sample-4--ac-motor-control-by-using--ac-motor-driver-with-miniioex-rs485
Modbus communication can be turned off by the ".close ()" function.
client.close()
I tried to show how the abb motor drive can be controlled via modbus. Raspberry Pi gives us the perfect privilege in software. Using languages such as Python / C / C ++ in the field of automation ensures that the works that might be done are more qualified and more integrated into the WEB.
With your machine learning and artificial intelligence libraries, your project can become much more useful and modern. It is impossible to make conventional automation PLCs. So, learn Raspberry Pi and save your money and future :) With MiniIOEx and Raspberry Pi in together can be used in many places. This allows you to make low / cost and quality projects.

Comments
Please log in or sign up to comment.