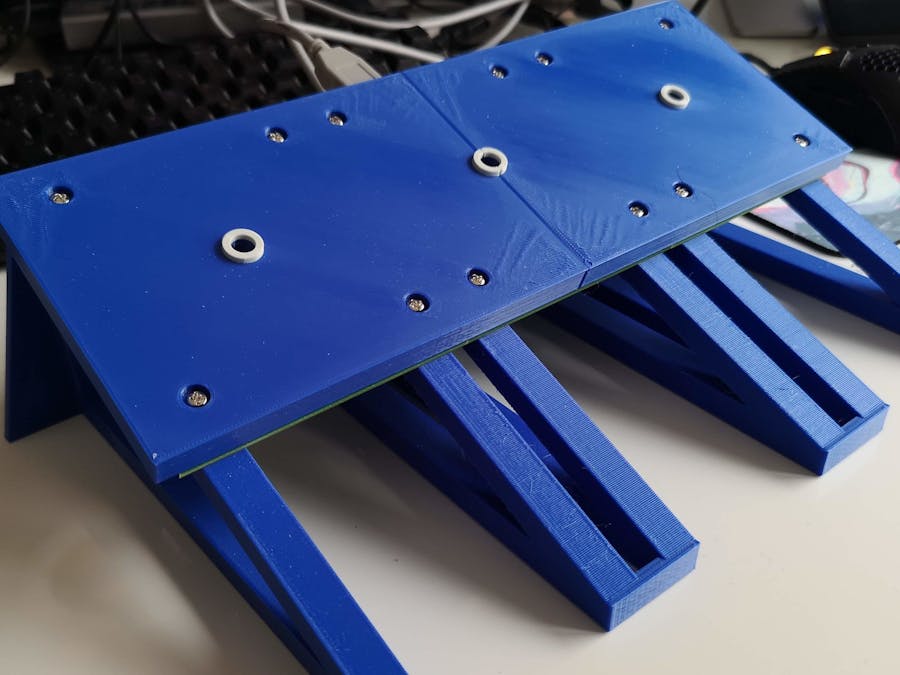
As you may have noticed, I often make videos about programming and the various projects I'm working on. While recording, I always have a script that I am reading from. The thing is, I often have to either stop recording to scroll the script or move my hand to the mouse. I wanted to find a way to scroll without having to remove one of my hands from the video frame and risk losing my concentration while filming. Here comes ToeTap: A human interface device for your toes.
ToeTap is a minimalist USB keyboard and mouse that you control by tapping your toes. It's designed to be used as a foot pedal for gamers, video makers and editors or anyone who wants to keep their hands free while working in front of a computer. I use it to scroll through my script while recording videos because I hate moving my hand away just to scroll. It shows a bit on the video and it's annoying. You can easily adjust it to perform any keyboard or mouse action you want. With up to 3 inputs and no moving parts, it's a simple and reliable tool that you can use to improve your workflow.Compared to commercial foot pedals, ToeTap is probably slightly cheaper if you know how to solder and can program an Arduino. It's also infinitely more customizable since, you know, it's open source.
This is the first hardware project I have made in a long time and I am very happy with the results. I am especially satisfied with how some things turned out, so let me tell you more about them.The first one is the PCB. PCB manufacturing services that cater to hobbyists, like PCBWay, offer PCBs at very competitive prices if the board is up to 10 by 10 centimeters in dimensions. Additionally, design software such as Eagle, have a free version that allows you to design boards of around that size too. As a result, I wanted to my PCB to not exceed that 10 by 10 centimeters limit. The problem is that since ToeTap is meant to be used with your feet, it needs to be big enough to be usable.
I solved this problem by designing the PCB in a way that it can be soldered together with two other identical PCBs to form a larger one. Each PCB comes with castellated edges that allow you to solder the PCBs together. This allows the boards to communicate electrically and form a single unit mechanically. Soldering PCBs side by side feels fragile, but it is actually surprisingly strong. Just make sure to put enough solder.
Using the same PCB for multiple boards talking to each other, requires some quirks at the design stage. One of them is solder pads that allow you to route the signals of the input sensors to the microcontroller of the middle PCB. In other words, all you need to do is solder the boards together and one solder pad on each of the "side PCBs".PCBWay did a great job manufacturing the boards and was kind enough to sponsor this project. They do charge a bit more for boards with castellated holes, but it's not that much and certainly worth it. I placed my order on a Sunday night and the boards arrived on Friday. I have ordered many times from them and I am always impressed by the quality and speed of their work.
Then there is the 3D printed case. My 3D printer is out of commission and wasn't large enough to begin with anyway. Instead, I "outsourced" both design and manufacturing to my father in Greece, who does happen to have a pretty decent 3D printer and also enjoys making things. The case turned out very sturdy and lovely. It's a simple design that fits the PCBs perfectly. The design is available on TinkerCAD, so you can easily modify it to fit your needs.
Code-wise, ToeTap is reading the values of up to 3 photoresistors and uses them to trigger keyboard or mouse actions. Once you place your foot on the photoresistor, the voltage changes and the microcontroller detects it. The software is designed to be easily customizable, so you can change the keybindings and the sensitivity of the ToeTap to suit your needs. Using photoresistors means you need some light in the room, but that's not a problem for me at least. I chose the particular sensors because they are cheap and very easy to source. They also don't require any moving parts that increase complexity and failure points.
You can find all code and design files on the project's GitHub repository: platisd/toetap
The above article was originally published on platis.solutions.


_t9PF3orMPd.png?auto=compress%2Cformat&w=40&h=40&fit=fillmax&bg=fff&dpr=2)


Comments
Please log in or sign up to comment.