

Hardware components | ||||||
_ztBMuBhMHo.jpg?auto=compress%2Cformat&w=48&h=48&fit=fill&bg=ffffff) |
| × | 1 | |||
 |
| × | 1 | |||
 |
| × | 1 | |||
 |
| × | 1 | |||
 |
| × | 1 | |||
 |
| × | 1 | |||
Software apps and online services | ||||||
 |
| |||||
 |
| |||||
| ||||||
| ||||||
| ||||||
| ||||||
Sound Navigation and Ranging or SONAR for short is an old system developed for navigation purposes which date way back to the 1490s, times of great multitalented personality Leonardo da Vinci, who is believed to be the first person to make use of the technology. Passive SONAR systems developed in 1918, were successfully used during World War I by armies of various nations to counter the increasing threat of their enemy's submarine warfare. This is one of the most significant uses of SONAR.
After that SONAR System was developed more and more and to this time it is still developing. SONAR soul principle is based on the sound which is nothing but vibrations of the air column. The Smart Sonar System uses an Ultrasonic sensor for this purpose. An Ultrasonic sound is a higher frequency sound than the upper audible limit ( ≥ 20, 000 Hz ) of human hearing. Other sensors such as microwave sensors, photoelectric sensors, Passive Infrared (PIR) Sensor, noise detectors, etc. can also be used for this purpose. This particular project is a take on integrating Automation which is modern technology and an old school technique such as SONAR.
The applications of SONAR are endless such as defense, underwater navigation, medical imaging, and metallurgy. But this project primarily focuses on detecting objects or enemies and alerting the user through a messaging app when an object or enemy is within range.
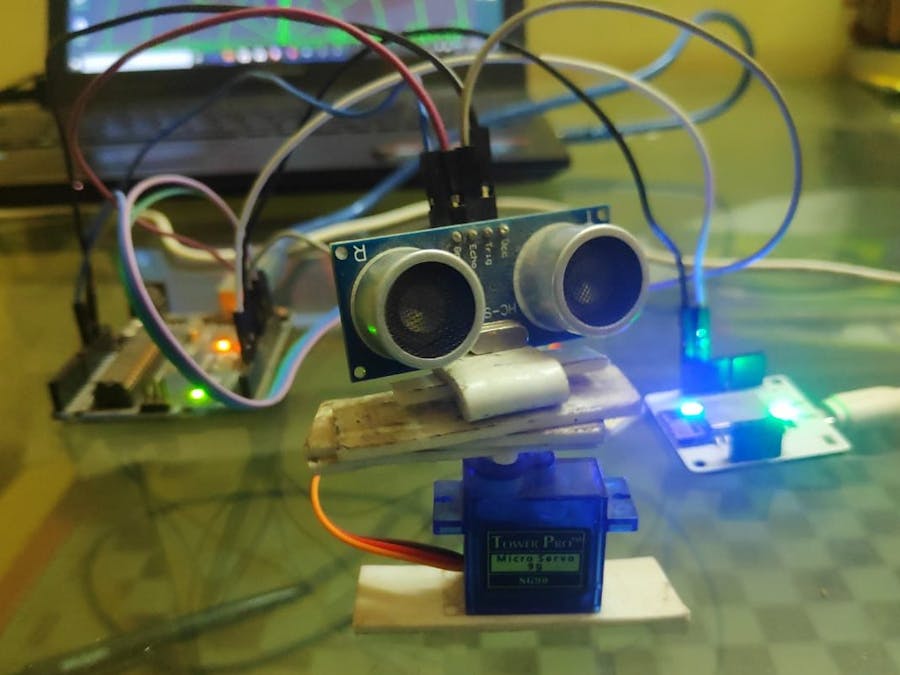
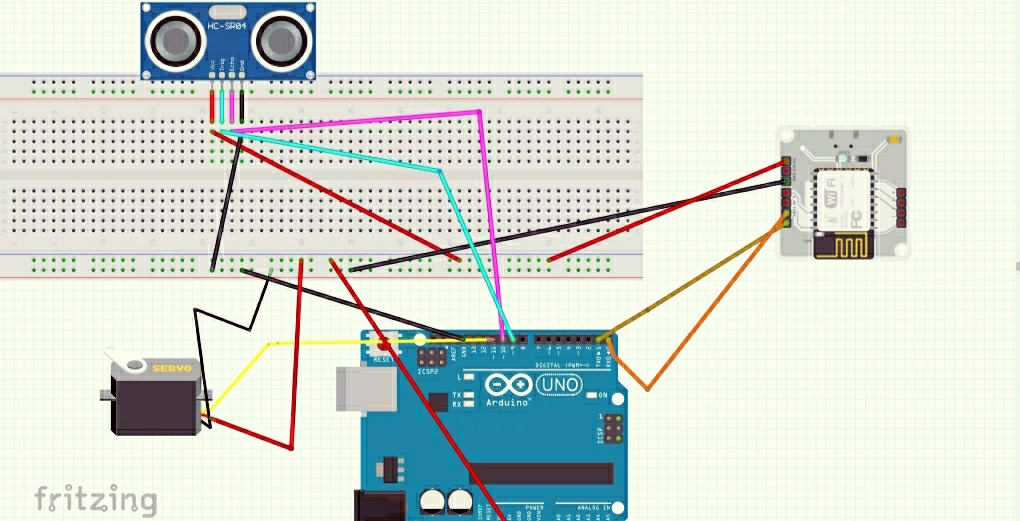
2. Hardware ConfigurationSteps to set-up hardware connection for the project.
1. Plug-in the Arduino Uno into a PC/Laptop.
2. Power on the Bolt IoT Wifi module, Servo Motor, and Ultrasonic sensor using 5V supply on the Arduino UNO using a breadboard.
3. Connect the Trigger pin of the Ultrasonic sensor to the 9th digital pin of Arduino.
4. Connect the Echo pin of the Ultrasonic sensor to the 10th digital pin of Arduino.
5. Connect the Signal Pin of the Servo motor to the 11th digital pin of Arduino.
6. Connect Rx and Tx pin of the Bolt IoT WiFi module to the Tx and Rx pin of the Arduino UNO respectively.
7. Provide Ground to all connections through the GND pin of the Arduino on the breadboard.
8. Recheck all the connections and boom! You are good to go!
P.S:
- You can also power Servo motor using the 3V3 pin on Arduino.
- You can simply power on the Bolt IoT WiFi module using a simple USB cable.
- Please check the COM port is properly selected eg. COM3 or COM5 before verifying the code and uploading it. You can check it in Tools >> Port in Arduino IDE.
You can easily set-up the Bolt IoT WiFi module using theBolt IoT Wifi application and following the steps mentioned in the training.
Please refer to Bolt IoT training for the in-depth explanation regarding this. https://trainings.boltiot.com/
5. Creating a Mailgun account for Email Alerts.Please refer to Bolt IoT training for the in-depth explanation regarding this. https://trainings.boltiot.com or head over to https://www.mailgun.com/ Sign-Up to create your own domain.
6. Setting up the Configuration(s) File.Please refer to Bolt IoT training for the in-depth explanation regarding this. The codes are given in the code section.
7. Software ConfigurationSteps to set-up software connection.
I have used two libraries from Arduino IDE which are in-built
1. #include <Servo.h>
2. #include <SoftwareSerial.h>
#include <Servo.h> is the library used to control the servo motor and rotate it to and fro with the desired angle and speed.
#include <SoftwareSerial.h> is used to establish a serial communication (software) between the Bolt IoT WiFi Module and the Arduino UNO.
3. Run the Arduino code for the servo motor.
4. Set threshold to the desired value ( Threshold = 120 in my case ) in the configuration file.
5. Run the Python code for Telegram (alert messaging app) and Mailgun ( Email alert) on any operating system having In-Built python such as Ubuntu (terminal) or download Ubuntu or Linux Os through virtual machines such VMWare or VirtualBox to run them on your windows host machine.
6. Or you can just visit https://cloud.digitalocean.com/ to create droplets and use these OS online.
6. If you face any difficulty while performing the above steps watch Bolt IoT training videos again or reach out on Bolt IoT forum.
P.S: Complete Codes are provided in the Code section.
8. Processing App OutputVisualization and Mapping ( Angles in (degrees) v.s Distance (in c.m) )
Run the code in the processing app and the output window will show this:-


Comments
Please log in or sign up to comment.