It’s funny how small things sometimes can be so hard to remember. Stuff like watering your plants, putting your phone in silent mode during a meeting and locking the bathroom door.
Plants may die, colleagues may glare and the embarrassment of bathroom blunders may wear off. But there are situations where those small errors can be seriously bad. A small, but potentially fatal error, is forgetting to turn your bike lights on, and drivers failing to see cyclists is one of the most common reasons for bike accidents.
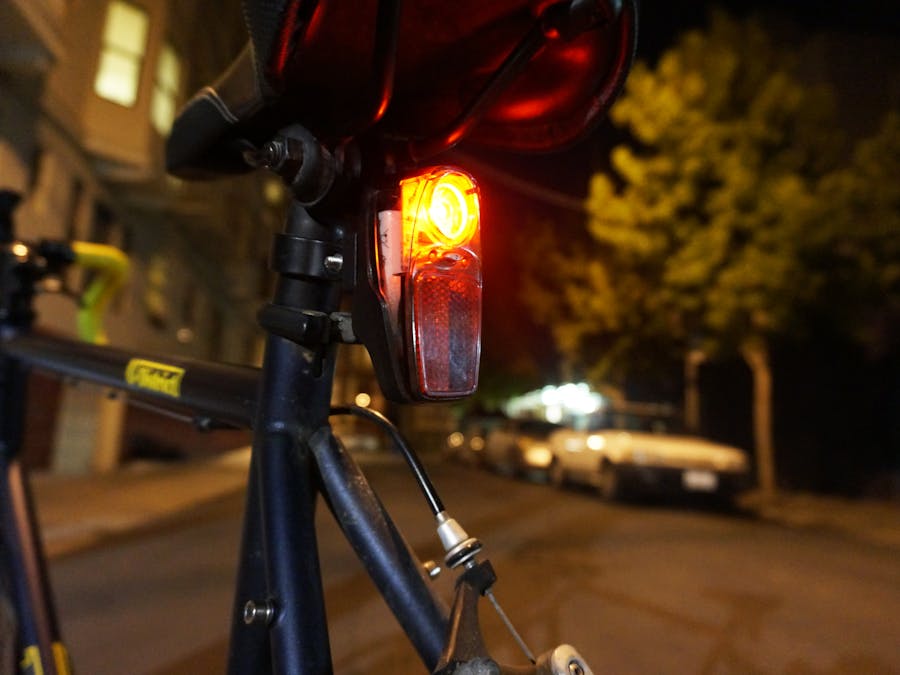
This tutorial goes through how to modify a taillight to turn on automatically when you get on your bike and that turns it off when you stop. Give your brain a rest and let the wonders of technology take responsibility for your taillight!
Step 1: Get the parts
We will use a taillight from Portland Design Works. It’s not the cheapest one on the market but it’s really bright and also has room for putting the LightBlue Bean in it. We will use the Bean’s built-in accelerometer to monitor when the light is moving and to simulate pressing the button on the taillight to turn it on and off.
Materials:
Tools:
- Hacksaw
- Soldering iron
- Screw driver
- Needle-nose pliers
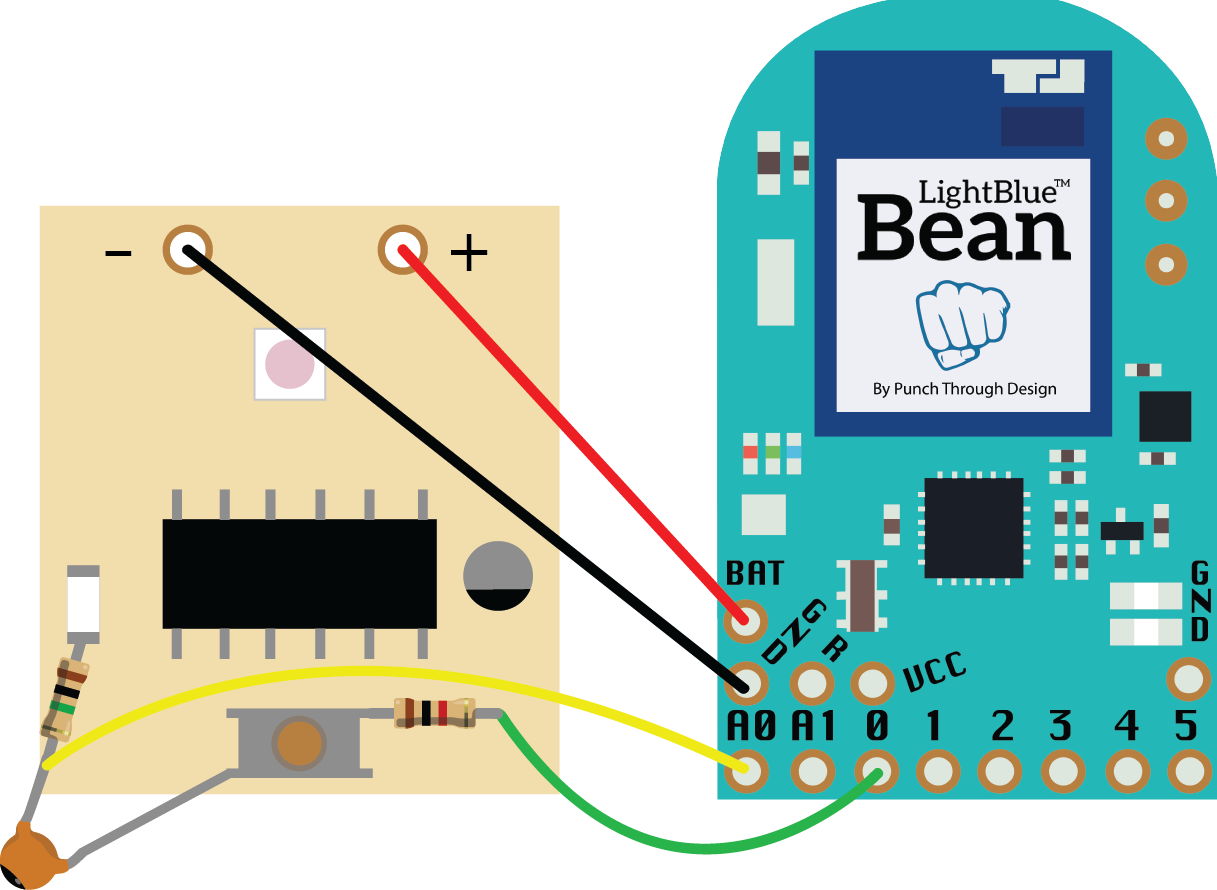
This is what the final wiring will look like:
Step 2: Cut the Bean
To fit the Bean into the taillight we need to give it a bit of a haircut. Use a small hacksaw to cut it just under the the digital pins.
Remember to clean off the metal shavings afterwards!
Step 3: Remove battery pack
Use the soldering iron to remove the battery holder on the back of the Bean.
Step 4: Solder wire to the button
Open up the bike taillight and take out the small board that’s laying inside.
On the board, there’s a button that turns the light on and off. By connecting it to digital pin 0 on the Bean and setting it to output and LOW, we can simulate pressing it down. If we then set pin 0 to an input we not only “release” it but allow the physical button to once again function normally.
Solder the wire on to the top right corner of the button. Be careful so that the solder doesn’t touch the metal chassis around the button. Solder it to digital pin 0 with the 1k ohm resistor in between.
We used magnet wire in our taillight but normal wire should work fine too.
Step 5: Make the low-pass filter
In the code we need to know if the LED is turned on or off. The problem is that the taillight has three different modes: one solid mode and two where it blinks with different frequencies.
By reading the PWM signal sent from the chip on the taillight board we can see which mode it is in. The only problem is that the two blinking modes give inconsistent readings. To smooth the PWM signal we make a low-pass filter using a capacitor which will even out the peaks and dips to a more consistent signal.
Solder the 1M ohm resistor to the bottom end of the resistor on the left of the taillight board. Solder the capacitor to the end of it, with the other leg connected to the the button. Also solder a wire at the same place and then solder it to pin A0 on the Bean.
We connected an oscilloscope to the taillight to see the difference before and after the low-pass filter. The top curve shows the unfiltered signal and the bottom one after it has been through the low-pass filter:
Step 6: Power the Bean
Solder a wire from the plus pin on the taillight board to BAT on the Bean and one from the minus pin to GND. The Bean will now be powered from the same batteries as the LED.
Step 7: Put it all together
Place the Bean behind the reflector, in the same way as the image below. The orientation of the Bean is important since we will monitor which direction the taillight is in to prevent it from turning on if it’s just laying on your desk. Use sand paper to trim the Bean a bit on the top if it doesn’t fit.
Put in some soft styrofoam or similar to make sure that the Bean doesn’t scramble around.
Step 8: Code
Upload this code to your Bean:
/*
  This sketch automizes turning a bike taillight ON and OFF.

  The bike light will turn on when the taillight is in vertical position and it moves.

  This example code is in the public domain.
*/

// When acceleration change goes beyond this threshold, the LED will blink.
#define THRESHOLD 100
#define BUTTON_PIN 0
#define LED_STATUS_PIN A0

AccelerationReading previousAccel;
uint16_t ledReading = 0;
bool ledIsOn;
// Timer counts how long the taillight has been still
int timer = 0;
//  String state;

void setup() {
  // Initial reading
  previousAccel = Bean.getAcceleration();
}

void loop() {
  // Check if the taillight is ON or OFF
  ledReading = getLedReading();
  if(ledReading == 0){
    ledIsOn = false;
  }else{
    ledIsOn = true;
  }

  // Get the current acceleration with a conversion of 3.91×10⁻³ g/unit.
  AccelerationReading currentAccel = Bean.getAcceleration();

  // Find the difference between the current acceleration and that of 200ms ago.
  int accelDifference = getAccelDifference(previousAccel, currentAccel);

  // Update previousAccel for the next loop.
  previousAccel = currentAccel;

  // Check if the conditions are right to turn ON the taillight
  if(accelDifference > THRESHOLD    // Taillight is moving
  && !ledIsOn                       // LED is OFF
  && currentAccel.xAxis < -200){    // Taillight is in a vertical position
    // state = "Active";
    timer = 0;
    // Turn the LED ON
    pressButton(2000);
  }
  // Check if the conditions are right to turn OFF the taillight
  else if(accelDifference < THRESHOLD // Taillight is still   && ledIsOn){                        // LED is ON     // state = "Inactive";     timer ++;         if(timer > 30){
       // Turn the LED OFF
       timer = 0;
       pressButton(2000);
    }
  }else{
    // state = "Other";
    timer = 0;
  }

// String output = String();
// output = output + "State: " + state + "\tTimer: " + timer + "\tLED Reading: " + ledReading + "\tAccel Diff: " + accelDifference + "\tAccel X Axis: " + currentAccel.xAxis;
// Serial.println(output);

 Bean.sleep(500);
}

// This function calculates the difference between two acceleration readings
int getAccelDifference(AccelerationReading readingOne, AccelerationReading readingTwo){
  int deltaX = abs(readingTwo.xAxis - readingOne.xAxis);
  int deltaY = abs(readingTwo.yAxis - readingOne.yAxis);
  int deltaZ = abs(readingTwo.zAxis - readingOne.zAxis);
  // Return the magnitude
  return deltaX + deltaY + deltaZ;
}

// This function simulates a button press to turn the light ON or OFF
void pressButton(int milliseconds){
  // Simulate a button press for a duration
  pinMode(BUTTON_PIN, OUTPUT);
  digitalWrite(BUTTON_PIN, LOW);
  delay(milliseconds);
  // Set BUTTON_PIN as a high impedance input to simulate a "button release" and allow the physical button to function again
  pinMode(BUTTON_PIN, INPUT);
}

// We use a low-pass filter connected to LED_STATUS_PIN to monitor the LED state
// When LED_STATUS_PIN is above a certain value it corresponds to the LED being OFF
uint16_t getLedReading(){
  uint32_t reading = 0;
  // Take the average of 8 readings over a period of time
  for(int i = 0; i<8; i++){
    reading += analogRead(LED_STATUS_PIN);
    Bean.sleep(40);
  }
  reading = reading/8;
  return reading;
}
If everything goes well you should now have a bike light that turns on and off when you move it and it’s in an upright position.
What’s next?
This is still just a prototype but we’ve used it on our office bike for a couple of days and it’s working just fine! A nice feature to add would be to add a light sensor so that it only turns on when it’s dark. What features would you like to add if you were to make your own taillight?
Ray Kampmeier


Comments
Please log in or sign up to comment.