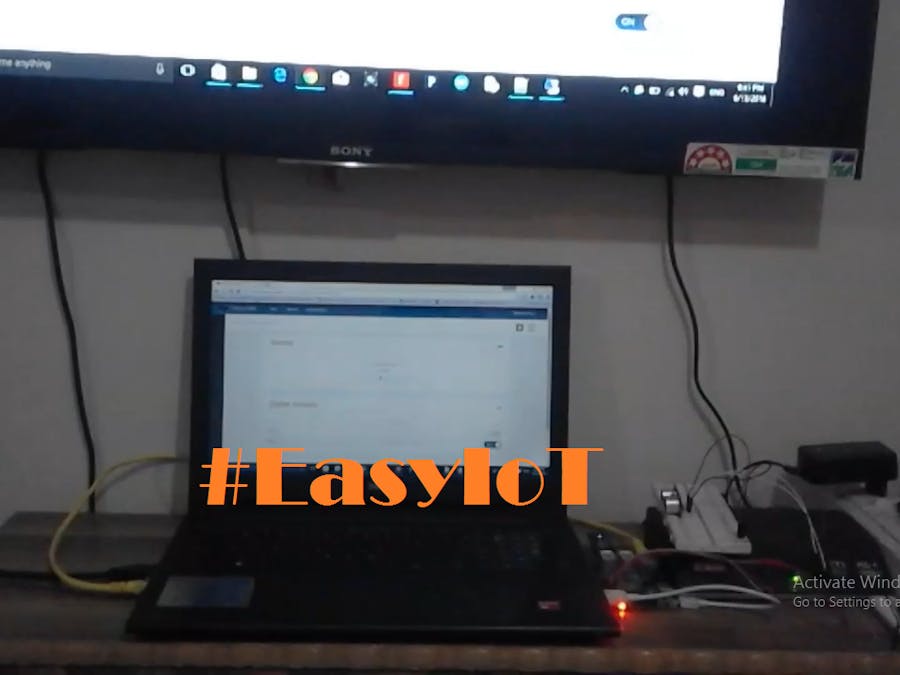
Welcome back folks! This is another Hackster.io project of mine! And today I'm gonna show you guys, my hourly build with Raspberry Pi and www.TaurusSystem.com powered Internet Of Things device.
Before getting started, all you need is an AlfaTech account for managing your device remotely! Visit www.TaurusSystem.com for getting started.
Registering an account on AlfaTech!You can fill up all the sections provided except the SERIAL one. SERIAL is basically a unique key assigned to different projects.
NOTE: One account can have multiple projects, each project requires a unique SERIAL!
SERIAL is provided by the administrators of this platform, so for getting one, you need to shoot a mail at alfatech@inatel.br, requesting a SERIAL for your project and they'll reply ASAP! Or you can send a personal message to @Leoribg on Hackster.io. They are really helpful, believe me.
For more info, visit here! When you have your SERIAL and account running, you could see something like this:
Logging into your dashboard!Now you can enter your dashboard to manage Sensors, Digital Actuators, Analog Actuators, etc.
Now 50% of the project is done. Let's complete another 50! This complete IoT platform works with a series of URLs which makes HTTP requests to the platform!
Let's get these URLs known:
http://www.taurussystem.com/ws/webresources/Add?key=SERIAL&&component=xxyy&&value=0
In the above URL, replace SERIAL with your key. Let's understand component=xxyy.
xx is the component name:
- xx=10 for digital actuator
- xx=20 for sensor
- xx=30 for analog actuator
yy is the component number:
- yy=01 is for the first object created, 02 will be for the second and so on.
- For example, first sensor object will be 01, second digital actuator object will be 02, that's it.
Easy, huh? value=0 is the initial value, and should remain the same while creating a new component. For this tutorial, open up a new tab in your browser and enter the following link:
http://www.taurussystem.com/ws/webresources/Add?key=SERIAL&&component=2001&&value=0
Replace SERIAL with your serial number and press enter, and a new sensor component created with this message!
{'code':200,'message':success}
Now for updating sensor, you need the following URL: www.TaurusSystem.com/ws/webresources/Sensor/set?key=SERIAL&&sensor=2001&&value=x
Replace SERIAL with your serial number. value=x is the sensor value, so if you replace x with 10 and visit your dashboard, you could see sensor value updated to 10! If you see above picture, you can find LAST VALUE & CURRENT VALUE, they are basically the sensor value, and it's also beautifully plotted on a graph. So for a test, open a new tab and enter the following: www.TaurusSystem.com/ws/webresources/Sensor/set?key=SERIAL&&sensor=2001&&value=10
Press enter and you could see the following message on screen:
{'code': 200,'message':sensor successfully updated}
But we need this to work on our Raspberry Pi! Python to the rescue!
Setting up the Raspberry Pi!Download the usoniciotstream.py & usoniciot.py from the attached file, and put them in the same folder!
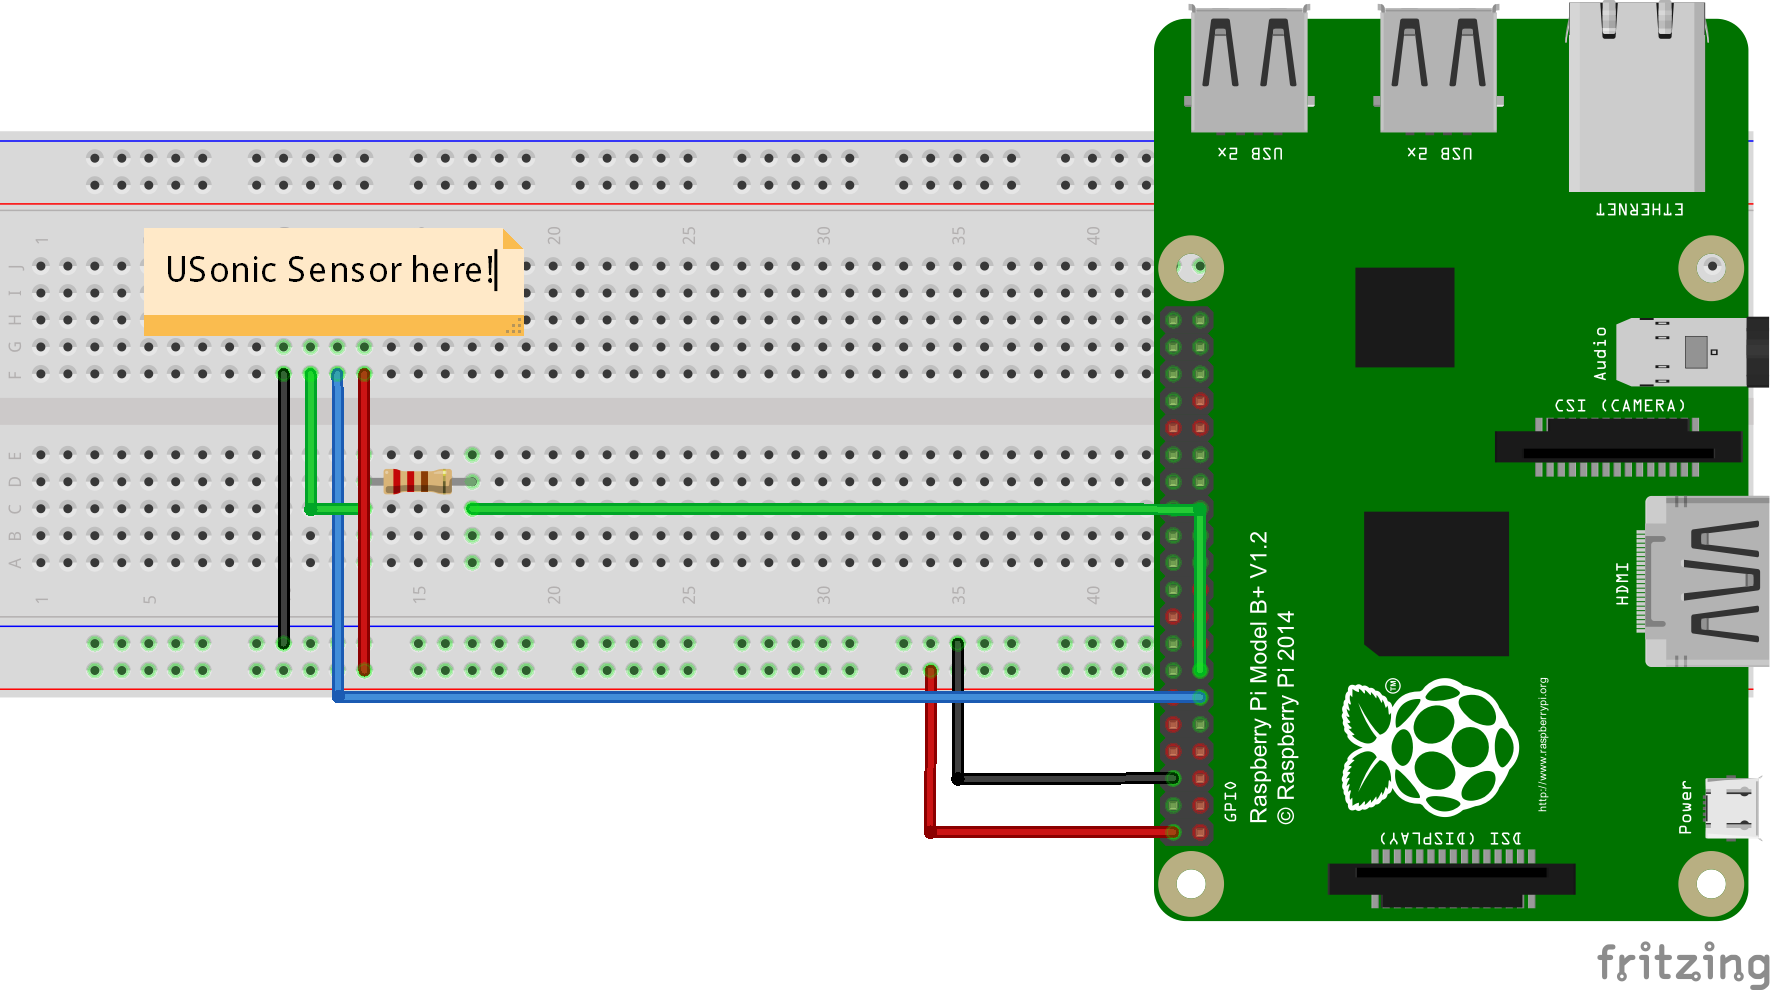
Red wires are +5V. Black wires are GND. Green wire is ECHO. Blue wire is TRIG. Resistor is of 1K. Easy? Yeah! That's it, done with the Hardware!
Time to code, and get some coffee!Open up the usoniciot.py you have downloaded previously, and do the following edit:
import requests
from usoniciotstream import reading
while True:
key = 'SERIAL'
sensvalue = reading(0)
x = int(sensvalue)
url = "http://www.taurussystem.com/ws/webresources/Sensor/set?key=%s&&sensor=2001&&value=%s" % (key, x)
print url
r = requests.head(url)
print r
Replace key = 'SERIAL' with your serial number and done. Run the python file and great to go! Run the file with following command:
$ sudo python usoniciot.py
That's it! Now visit www.TaurusSystem.com and login into your dashboard, you can see the sensor data being updated.
Done! Enjoy!If you really find this helpful, do follow at Twitter @RiSiOfficial for more similar projects.
Thanks for Reading! And thanks to AlfaTech!


Comments
Please log in or sign up to comment.