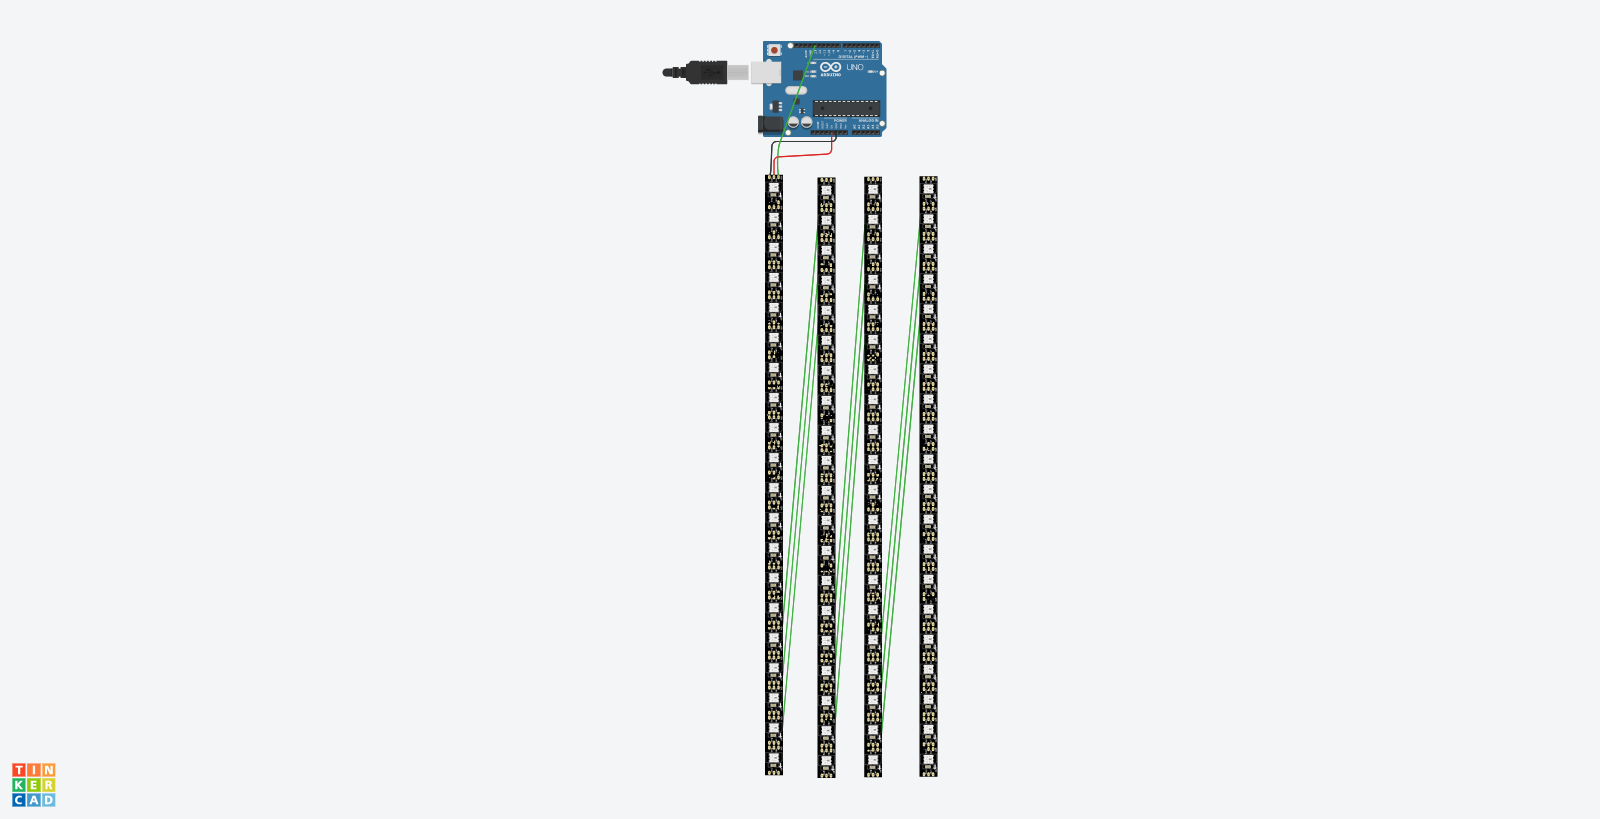
// A basic everyday NeoPixel strip test program.

// NEOPIXEL BEST PRACTICES for most reliable operation:
// - Add 1000 uF CAPACITOR between NeoPixel strip's + and - connections.
// - MINIMIZE WIRING LENGTH between microcontroller board and first pixel.
// - NeoPixel strip's DATA-IN should pass through a 300-500 OHM RESISTOR.
// - AVOID connecting NeoPixels on a LIVE CIRCUIT. If you must, ALWAYS
//   connect GROUND (-) first, then +, then data.
// - When using a 3.3V microcontroller with a 5V-powered NeoPixel strip,
//   a LOGIC-LEVEL CONVERTER on the data line is STRONGLY RECOMMENDED.
// (Skipping these may work OK on your workbench but can fail in the field)

#include <Adafruit_NeoPixel.h>
#ifdef __AVR__
 #include <avr/power.h> // Required for 16 MHz Adafruit Trinket
#endif

// Which pin on the Arduino is connected to the NeoPixels?
// On a Trinket or Gemma we suggest changing this to 1:
#define LED_PIN    13

// How many NeoPixels are attached to the Arduino?
#define LED_COUNT 56

// Declare our NeoPixel strip object:
Adafruit_NeoPixel strip(LED_COUNT, LED_PIN, NEO_GRB + NEO_KHZ800);
// Argument 1 = Number of pixels in NeoPixel strip
// Argument 2 = Arduino pin number (most are valid)
// Argument 3 = Pixel type flags, add together as needed:
//   NEO_KHZ800  800 KHz bitstream (most NeoPixel products w/WS2812 LEDs)
//   NEO_KHZ400  400 KHz (classic 'v1' (not v2) FLORA pixels, WS2811 drivers)
//   NEO_GRB     Pixels are wired for GRB bitstream (most NeoPixel products)
//   NEO_RGB     Pixels are wired for RGB bitstream (v1 FLORA pixels, not v2)
//   NEO_RGBW    Pixels are wired for RGBW bitstream (NeoPixel RGBW products)


// setup() function -- runs once at startup --------------------------------

void setup() {
  strip.begin();           // INITIALIZE NeoPixel strip object (REQUIRED)
  strip.show();            // Turn OFF all pixels ASAP
  strip.setBrightness(50); // Set BRIGHTNESS to about 1/5 (max = 255)
}


// loop() function -- runs repeatedly as long as board is on ---------------

void loop(){

  segment1(strip.Color(255,   0,   0), 100); // Red
  delay(5000);
  segment2(strip.Color(255,   0,   0), 100); // Red
  delay(5000);
  segment3(strip.Color(255,   0,   0), 100); // Red
  delay(5000);
  segment4(strip.Color(255,   0,   0), 100); // Red
  delay(5000);
  segment1(strip.Color(0,   0,   0), 0); // off
  segment2(strip.Color(0,   0,   0), 0); // off
  segment3(strip.Color(0,   0,   0), 0); // off
  segment4(strip.Color(0,   0,   0), 0); // off
  delay(5000);
}

void segment1(uint32_t color, int wait) {
  for(int i=0; i<=15; i++) { // For each pixel between x and y
    strip.setPixelColor(i, color);         //  Set pixel's color (in RAM)
  }
      strip.show();                          //  Update strip to match
    delay(wait);                           //  Pause for a moment
}
void segment2(uint32_t color, int wait) {
  for(int i=16; i<=31; i++) { // For each pixel between x and y
    strip.setPixelColor(i, color);         //  Set pixel's color (in RAM)
  }
  strip.show();                          //  Update strip to match
    delay(wait);                           //  Pause for a moment
}
void segment3(uint32_t color, int wait) {
  for(int i=32; i<=45; i++) { // For each pixel between x and y
    strip.setPixelColor(i, color);         //  Set pixel's color (in RAM)
  }
  strip.show();                          //  Update strip to match
    delay(wait);                           //  Pause for a moment
}
void segment4(uint32_t color, int wait) {
  for(int i=46; i<=56; i++) { // For each pixel between x and y
    strip.setPixelColor(i, color);         //  Set pixel's color (in RAM)
  }
  strip.show();                          //  Update strip to match
    delay(wait);                           //  Pause for a moment
}


// Some functions of our own for creating animated effects -----------------

// Fill strip pixels one after another with a color. Strip is NOT cleared
// first; anything there will be covered pixel by pixel. Pass in color
// (as a single 'packed' 32-bit value, which you can get by calling
// strip.Color(red, green, blue) as shown in the loop() function above),
// and a delay time (in milliseconds) between pixels.
void colorWipe(uint32_t color, int wait) {
  for(int i=0; i<strip.numPixels(); i++) { // For each pixel in strip...
    strip.setPixelColor(i, color);         //  Set pixel's color (in RAM)
    strip.show();                          //  Update strip to match
    delay(wait);                           //  Pause for a moment
  }
}


_bCgvXCbRTg.jpg)


Comments