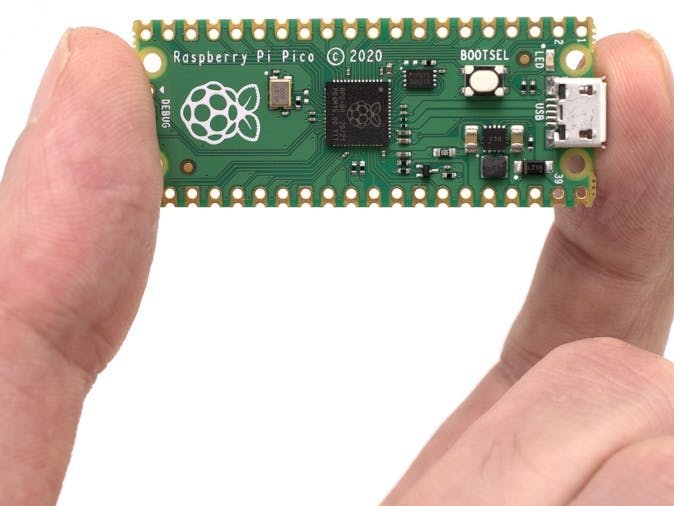
The Raspberry Pi foundation changed single-board computing when they released the Raspberry Pi computer, now they're ready to do the same for microcontrollers with the release of the brand-new Raspberry Pi Pico.
But wait
Microcontroller and single-board computers what are they? Is there any difference?
Let’s find out that first.
The computer runs on an operating system and is designed to complete multiple tasks at the same time. While on the other hand, Microcontrollers are a different type of device than Single Board Computers (like the Raspberry Pi 4 and previous generations of Pi), they don't run on an operating system and they are typically programmed to do just one task - though that task can be pretty intricate and exciting! They're perfect for experimenting with hardware and are also used as the brains of custom devices, machines, and inventions.
Examples of Single Board computers are Nvidia Jetson, Raspberry pi, etc
And Microcontrollers include our lovely Arduino, ESP8266, ESP32, STM32, and a new name in this list The Raspberry Pi Pico.
Now the question arises… when we already have many microcontroller boards, why do we need a new one? And how is it different from Arduino? And should we consider buying it?
Technology changes every day, every year we get new and faster iPhones, and the Arduino UNO R3 which most enthusiasts use released in 2010. We are using 11-year-old technology.
The Pico is faster than Arduino. As it has a faster clock, more memory, more data lanes, and capable of handling two tasks at a time using its Dual Cores. It can be programmed with C++ as well as MicroPython.
Also, Pico comes at a cheap rate of 400 rupees only. So, you should definitely buy it.
In this video series, we are going to learn how to use a Pico step by step.
This is the first video of this series and let's see what we will learn
1. Installing Firmware in Pico
2. Setting up VS Code
3. Writing Code for Blinking LED
Firstly, we have to download MicroPython firmware for Pico.
1. Open the link in the description and go to getting started with MicroPython and download the uf2 file
2. Take a data cable and connect Pico to your computer but before connecting press and hold the BOOTSEL button on Pico
3. A window will open. Copy the uf2 file to this folder
4. and firmware installation is done.
Now we will setup vs code. You may have watched my previous video on how to setup vs code for Arduino. You can check it out from the link in the description.
1. Open vs code and go to extensions
2. Search for Pico and install the Pico go extension
3. Now we have to install NodeJS and python… using links in the description download and install python and NodeJS
4. Automatically vs code will give you the advice to install python extension … install it also.
Now our setup is done… we are ready to rock
But before that let’s hear a word from sponsors of this video.
Let’s program the Pico
1. Close vs code and make a new folder… let’s name it as Pico … now create a new folder with the name first project.
2. Right-click and click on open with code
3. Vs code will open.
4. Now press control shift + p and search for Pico and select configure the project
5. Now a.vscode folder will appear in the explorer
6. Let’s connect the Pico with a cable to our computer
7. You will see connected to COM port in terminal means Pico is connected
8. Create a new file flash.py
9. And write code here …
First-line imports pins
Then we will import time for creating a delay
Then we will set our pin as output… built-in led is connected to pin 25 on Pico
Then we will create an infinite loop where we use the pin.toggle to change the LED state and give delay in between
10. Then we will click on run to run the code
11. Now you will see led starts to blink
12. Now we can try changing delay to change blink timing.
MicroPython is really an easy language to learn and there are lots of libraries that we can use to program our microcontrollers.
In the next tutorials, we will check out PWM pins of Pico.
So that was it for this video. If you like this video give this video a thumbs up share it with your friends and don’t forget to subscribe.
Thank you for watching and have a nice day.


Comments
Please log in or sign up to comment.