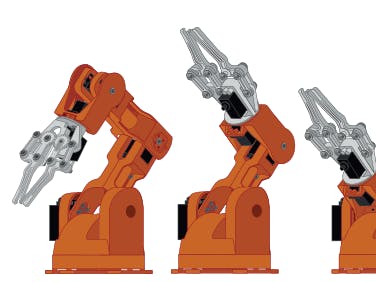
After shopping around I chose a Braccio robot arm based on the Arduino branding. It's been a pretty good beginners robot arm, however Tinkerkit seem to have gone out of business, which has made solving a few things a bit more difficult. There's been plenty of educational value while I've learned more about the arm and robotics in general.
The Braccio Shield for Arduino UNOThe shield provided with the robot arm is designed for Arduino UNO. It comes with a 5V 4A DC switching power supply (wall-wart), and a pretty good circuit design for powering the servos independently from the arduino.
The documentation was a bit scarce. Most of the connections were straight forward. I did have some trouble with the green Two-Wire Interface (TWI / I2C) port, but got around this by connecting directly to the SCL and SDA pins rather than using the green connector.
A couple of limitations with the board came up after a while. The shield uses all the PWM digital pins on the Arduino UNO. Also, the underlying Arduino UNO is not very powerful compared to more modern MCU's.
After an initial period of familiarisation, I found the Braccio V2 library by Lukas Severinghaus more useful that the standard library.
Physical DesignThe robot arm links are manufactured from reasonably robust plastic. The design uses fairly fool-proof plastic connector from each arm link directly to the servo spline (see figure below).
The design places the centre of mass of servos internally along the line of the robot arm rather than to the side (see figure below). Which is nice in terms of weight distribution. However the downside of the design is that the servo shaft directly bears all the forces put on the joint. The shaft of the servo is the joint of the robot arm, there are no seperate bearings or shafts to take the strain. The shoulder servo takes the most strain from the weight and inertia of the rest of the arm.
For example I swung the shoulder joint back and forth from 0 to 180 degrees one day doing some calibration. I got distracted with the code and oscilloscope and left it going for a couple of minutes. Thus destroying the shoulder servo.
Another aspect of the design is that it's quite time consuming to take the arm apart and reassemble. This makes changes and repairs a bit annoying. Finally, the plastic structures leave very few non-intrusive options for mounting extras like sensors.
KinematicsOne of the things I wanted to learn about was describing the kinematics of the robot. I found this pretty hard, and had to dust off mathematics I hadn't thought about since the 1980's. I found the Queensland University of Technology Robot Academy videos really useful, and eventually bought a copy of "Robots, Vision and Control ed 2. Peter Corke" which I've also found useful.
Establishing an initial expression (see figure below) for the pose of the end effector was straight foward.
However, I found calculating Denavit-Hartenberg (DH) parameters very difficult. I didn't make much progress with this by hand, but found that using the "Robotics Toolbox for Matlab R10" code from the Peter Corke book, I was able to derive the DH parameters using the DHFactor() function. The DH results (see figure below) are I confess still counter intuitive to me, but they modelled and animated fine in Matlab.
The resulting DH matrix was:
braccio:: 5 axis, RRRRR, stdDH, slowRNE
+---+-----------+-----------+-----------+-----------+-----------+
| j | theta     |         d |         a |     alpha |    offset |
+---+-----------+-----------+-----------+-----------+-----------+
|  1|         q1|       71.5|          0|    -1.5708|          0|
|  2|         q2|          0|       -125|          0|     1.5708|
|  3|         q3|          0|       -125|          0|          0|
|  4|         q4|          0|          0|     1.5708|    -1.5708|
|  5|         q5|        192|          0|          0|          0|
+---+-----------+-----------+-----------+-----------+-----------+
... which animated nicely in Matlab using the robot.teach method (see figure below).
Directions I'm heading next in my explorations are:
- A hardware and software port to an Arduino Due MCU base to support more advanced libraries such as inverse kinematics and ROS (in progress).
- Designing a more robust, more maintainable, more easily modified robot arm of a similar kinematic layout. Probably using GoBilda build system.
I'll write these up as seperate projects (see https://www.hackster.io/rpatterson/gobilda-robot-arm-mechanical-design-3051ac).
Web resources- BraccioGetting Started Guidehttps://www.arduino.cc/en/Guide/Braccio
- Braccio Shield information https://www.arduino.cc/en/Guide/Braccio#braccio-shield
- Braccio Shield Schematichttps://content.arduino.cc/assets/Braccio-Shield-V1.pdf
- Braccio Datasheethttp://www.farnell.com/datasheets/2575116.pdf?_ga=2.151369337.1936105882.1517985527-654667508.1508905608
- SpringRC SR431 SR331 Servo Datasheethttps://delta-n.ru/Info/SR430.pdf


_ztBMuBhMHo.jpg?auto=compress%2Cformat&w=48&h=48&fit=fill&bg=ffffff)


Comments
Please log in or sign up to comment.