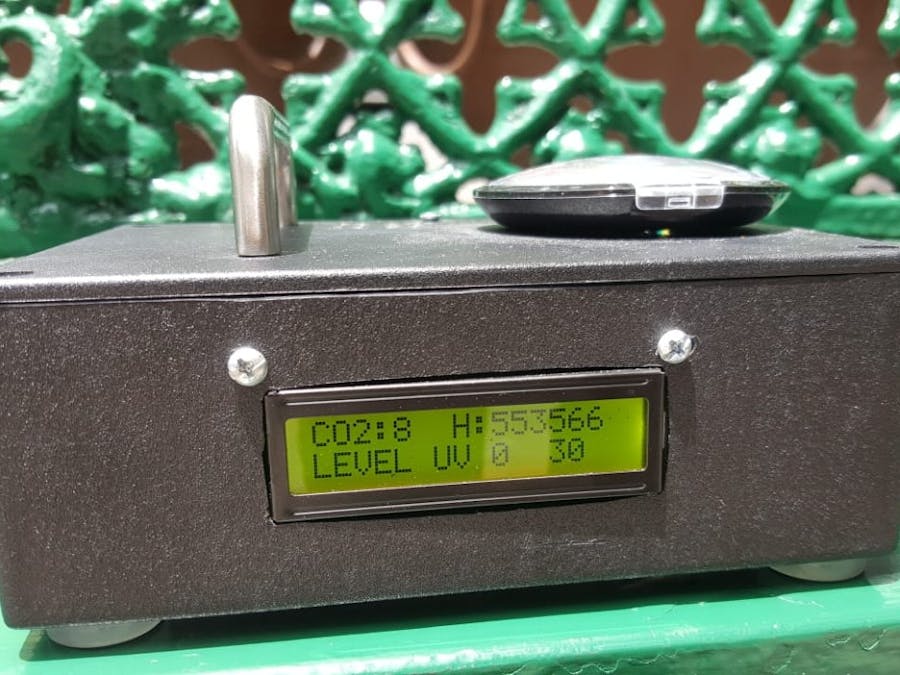
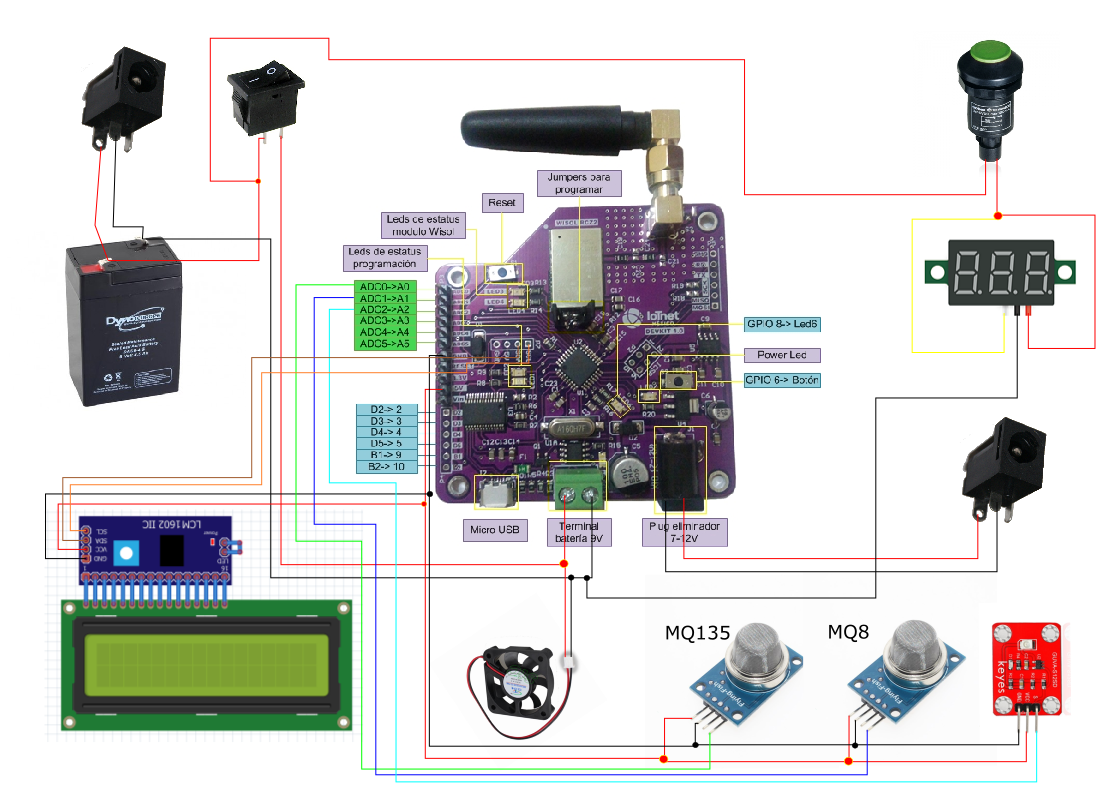
Nowadays, during the reccess at school, the children just worry about playing but they don't know the risks that the playground has, like pollution or skin cancer by the excesive uv radiation so our proyect look for keep the children save, but how? Well, by using the IoT! Our project has 3 sensors, CO2, Hidrogen and UV, but it can use any MQ sensor that you wanted.
The objective of this project is to create a new solution to monitor the enviroment at low cost using Sigfox communication, and also it is easy to take with you and it just need 2 hrs to be fully charged.
The teachers can easy take the school warden with them to take the measures of the enviroment before the children go to outside, all these measures will be updating in Ubidots by Sigfox.
Here is a video where we go to the plinth of Puebla at different times and parts to take measures from the enviroment
DevKits 1.0 and 2.0For this project, we decide to use the 1.0 version because our university decide to implement these ones, but both of them are the same.
Here is the links to both Dev Kit in GITHUD to start practicing and setting all
2.0 version: https://github.com/NXTIoT/NXTIoT_DEVKIT#devkit-2.0
2.1 version: https://github.com/Iotnet/IoTnet_DEVKIT
How to Calibrate the MQ SensorHere are 2 videos that help me to calibrate my sensors and also a link where I use as a guide to complement these videos
The link https://naylampmechatronics.com/blog/42_Tutorial-sensores-de-gas-MQ2-MQ3-MQ7-y-MQ13.html
We just define Ro at 1000 ppm by a rule of three like in the second video at minute 3:10. So our Ro is calculated like this:
Ro at 332ppm =26954ohm
So if we wanted to 846 ppm, because we simulate this in the laboratory, so it will be
332 - 26954
846 - x
x= 81, 186.7469 ohm = Ro
If you wanted to approximate to 1000ppm Ro will be 81186 ohm
You can change it in the code if you want also. Once we know the Value of Ro we need to calculate the value of Rs with this formula
Rs=1000((5-V)/V)
V= the conversion of the analog value readed from the sensor into voltage
Now we will show you the regresion and the power regression that we calculate to obtain the excat formula depend on what we wanted to focus our sensor, in this case the MQ8 is focus on hydrogen and MQ135 is focus on CO2, we made all this calculus based on those videos above and with excel
So we suppose 10 points for MQ8 and 6 points for MQ135
For MQ8 we stablish these values and aproximations and then we set the tendence line for power and the formula for this sensor is
Y=Hydrogen(ppm)
X=Rs/Ro
So...
Hydrogen=20163(Rs/Ro)^-1.438
For MQ135 we focus it to CO2 so we stablish these values and aproximations and following the same process we had this:
Y=CO2(ppm)
X=Rs/Ro
So...
CO2=5.0908(Rs/Ro)^-0.343
for the UV sensor we found this page that show us the levels of UV that can be dangerous
https://polaridad.es/sensor-radiacion-ultravioleta-arduino-indice-uv-uvm30a-guva-s12sd/
LibrariesWe just neede to add the library for de I2C communication with the display so here it is the link to download
https://www.dropbox.com/s/jkgmu8hgvvtdukp/LiquidCrystal_I2C-master.rar?dl=0
How to Configure SigfoxTo configure Sigfox we follow the tutorial for the DevKits but here is our main window in sigfox where we define all our devices
First we set the callback in sigfox for that we go to the apart of "callbacks" and put all the data as is shown in the image, you can change the name of var1 var2 and var3 to any name that you want.
You also can follow the tutorial for this part that is in the DEVKIT tutorial
NOTE: You need to introduce the token that Ubidots give you.
Example:
Once you have been finished the settings for callbacks we moved to Ubidots when you already send the first message you will see that automatically it create a new device with the ID of the module and with the 3 variables that we define in ubidots:
The three variable var1, var2 and var3:
As you can see we create another's variables, well this is because we create different events to have arrow gauges for any level form any sensor. Here is all our event like is define in the main code:
And finally here is our default dashboard for school warden:


Comments
Please log in or sign up to comment.