In this post I am going to show how to integrate Sensecap S2103 and display collected data on reTerminal display.
Since picture is worth a thousand words, block schematics below shows architecture of my project.
I will show data from SenseCap S2103 sensor on Home Assistant which is installed on reTerminal. I will not go step-by-step on configuration/installation of Home Assistant on reTerminal, but you can see great guide on seeedstudio wiki here https://wiki.seeedstudio.com/reTerminal_Home_Assistant/.
I used the guides from link above and Home Assistant Supervised installation/configuration method in order to have data displayed on reTerminal LCD.
Home Assistant acts as a central smart home controller hub by combining different devices and services in a single place and integrating them as entities. That means you can integrate various sensors and variouts services in one single place.
Process of installing Home Assistant Supervised on reTerminal is like following:
1. I am assuming that you already have installed Raspberry PI OS.
2. Install docker
3. Visit Home Assistant OS Agent page, and install Home Assistant Agent V1.3.0. and also Home Assistant-Supervised
4. Install Portainer Docker management platform
5. On portainer dashboard make sure that Home Assistant primary containers are up and running
6. On a web browser, type the following URL homeassistant.local:8123
7. If everything is installed without problems, you can view Home Assistant Dashboard UI on your web browser and proceed with making your account
First big part of the project is finished. Now we are going to configure SenseCAP sensor by using Sensecap MATE Android application. Again, amazing guideline can be followed on Seed's wiki: https://wiki.seeedstudio.com/Cloud_Chain/SenseCAP_Mate_APP/SenseCAP_APP/
The next step is to configure mqtt integration with Home Assistant and subscribe to SenseCAP data.
First, what you need to know is SenseCAP account API ID, Organization ID, and Access API keys. Nice quickstart can be found on sensecap page.
https://sensecap-docs.seeed.cc/data_openstream_quickstart.html
Go to https://sensecap.seeed.cc/portal/#/security, in order to create Access Key and view information about Organization ID.
By clicking on API ID, you can also see API keys information.
So, your important connectivity informations for Home Assistant, which will be important in order to connect to MQTT, are as below:
Host: sensecap-openstream.seeed.cc
User: org-<OrgID> (here you replace OrgID with your Organization id-example for this parameter will be org-428131654987987)
Password: here you insert your Acces Key which is in form XBA6E65464 (a combination of letters and numbers).
Client ID: org-<OrgID>-quickstart (example: org-428131654987987-quickstart)
After this, go to https://www.home-assistant.io/integrations/, which allows integration with a lot of services. You will need, of course MQTT. Enter MQTT in search box, and choose MQTT, as shown below:
In Home Assistant now go to Settings->Devices & Services, Click add integration button and search MQTT. Now you enter the informations from above for MQTT connectivity:
Username= OrgID, password= client ID
Now, in order to test that MQTT connectivity works, click the CONFIGURE button and listen to the topic : device_sensor_data/OrgID/+/+/+/+
(example: device_sensor_data/428131654987987/+/+/+/+).
After few seconds, you will have response: vaule and timestamp in JSON format.
Since we want to show values of temperature, CO2 and humidity, we need to add multiple entities to store aquired sensor data, by editing the Home Assistant configuration file.
Go to the settings, click to Add-ons, search for File Editor, modify the YAML file /config/configuration.yaml by entering:
mqtt:
  sensor:
    - name: "Air Temperature"
      state_topic: "/device_sensor_data/<orgID>/<DeviceEUI>/1/+/4097"
      unit_of_measurement: "℃"
      value_template: "{{ value_json.value }}"
    - name: "Air Humidity"
      state_topic: "/device_sensor_data/<orgID>/<DeviceEUI>/1/+/4098"
      unit_of_measurement: "%RH"
      value_template: "{{ value_json.value }}"
    - name: "Air CO2"
      state_topic: "/device_sensor_data/<orgID>/<DeviceEUI>/1/+/4100"
      unit_of_measurement: "ppm"
      value_template: "{{ value_json.value }}"
DeviceEUI is Unique identification of device eg. 2CF7F12000000001, and it can be found on the sensor itself.
Now the last step is create dashboard.
go to overview and find the "Edit Dashboard"
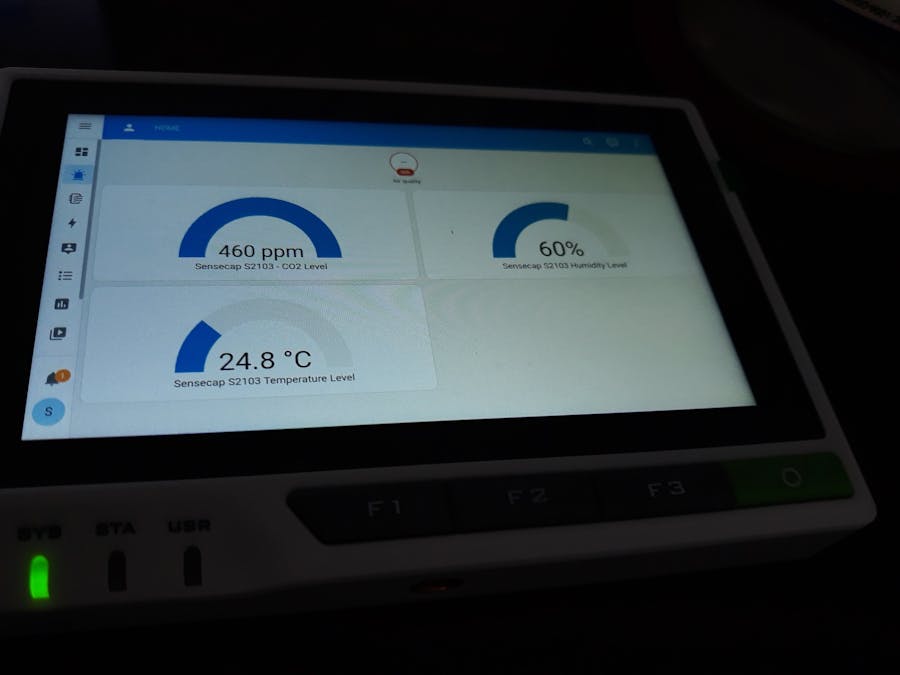
You can add cards as much as you want. I have added Gauge card, and subscribed to entities (temperature, CO2 and humidity).
Finally, the IoT dashboard is shown on your reTerminal Home assistant main screen.
Here below are few pictures for you to see how it looks like:


Comments
Please log in or sign up to comment.