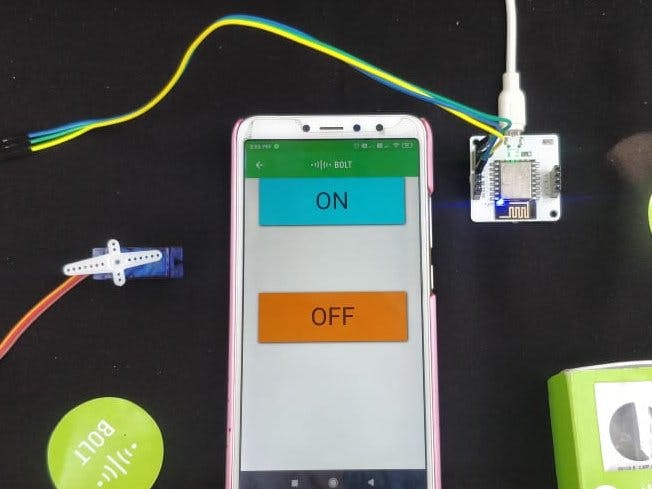
The project is all about to control the servo motor by using Internet.
Have u notice about the car wipers? which is used to remove rain drops, ice, dust/or debris from a vehicle window so that vehicle’s operation can work better and to see what’s ahead of them.
Similarly the Solar Power Plants will be kilometer long and every solar panel uses brushes needs to be cleaned once in a while. If the dust gets on it, the efficiency of the solar panel decreases. Manually we can’t clean it every day. So that motor cleaner came just like car wipers but here we should do wiring about kilometer long, again there will be high damage because of distance
To overcome this issue we are using a Bolt IOT Wi-Fi module ON/OFF by operating a servo motor.
Hardware setup:
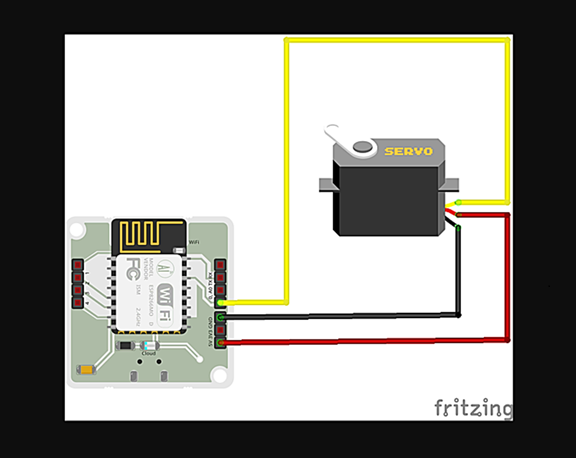
Step 1) Connect the jumper cables from the Servo motor to the Bolt device in the fashion given below:
The servo motor should have three wires coming out of it. Check out the image given below, Brown (0 GPIO pin), Red (5V Digital GPIO pin) and Orange (GND input) in color.
Software apps and online service:
To power-up the Bolt Wi-Fi module, we need a power supply of 3.3v USB cable when I connect it to the Wi-Fi module, Blue light will start blinking it means that our Wi-Fi is turned on and it is searching for an Hotspot, So when it connects to the Hotspot blue light becomes stable and green light will turn on and thus the set-up of Bolt Wi-Fi module is ready.
You can find detailed steps here.
Setting up a Product on Bolt Cloud
Step 1: Now I used software apps is the Bold Cloud we need to open the Google chrome go to
Login to your bolt cloud account [you can also open this cloud account by adding into the desktop site]
Step 2: Now the homepage of your bolt cloud account will appear. Create product https://docs.boltiot.com/docs/adding-a-product
Here I gave the name – servomotor1, I connected to the input device, and I collected the data from – GPIO. Save it.
Step 3: Writing code for controlling devices
https://docs.boltiot.com/docs/using-custom-files-in-your-product
Here I have written the code in HTML.extension
Save the file.
Step 4: Linking the Device to the Product
https://docs.boltiot.com/docs/link-device-to-a-product
1. Automated controlling of Servo Motor
After adding the device to the product click on to the deploy configuration and then view this device, it will redirect to the new tab where you can see ON/OFF button.
4. Turning the Servo Motor ON/OFF
If you click on to the ON button, servo motor will start rotating in between 0 and 180 degree and if you click on to the OFF button, the servo motor will stop to rotate.


Comments
Please log in or sign up to comment.