The challenge:
As you may have discovered, SAP is really perusing IoT with the SAP Cloud Platform (SAP CP). In combination with that, there are apps available that will make your phone into a connected sensor. The combination is golden, and lets you develop IoT scenarios end-to-end. Best of it all, no investment is required to get started with your prototype, as both the trial account of SAP CP and the app is free.
In this blot, I will go through a scenario where we set up SAP CP for IoT and then collect data from a quadcopter, showing its whereabouts in Google Maps. All in real-time, in the cloud. Literally.
Getting startedIf this is your first attempt at playing around with SAP CP, my recommendation is to get free SAP Cloud Platform trial account, so let us start there. You can sign up for a free trial account at https://hcp.sap.com/try.html. It’s quick and easy, and after you have signed up you can use SAP Single Sign on so that you don’t have to type in your password every time you log on at https://hanatrial.ondemand.com. The free version comes with the ability to connect to backend systems and to Eclipse studio for developers, and you get one gigabyte of SAP HANA to play around with. There are some limitations to the free edition, but for trying out stuff, it is absolutely sufficient.
The first thing you want to do is to once you log on is to activate the IoT-services. That requires you to click the “Services” tab on the left hand side of your overview screen. Scroll down until you find the Internet of Things Services and click on it.
Then you should be able to click “Enable” to activate the service. That step will make the IoT cockpit available to you. Before we go any further, I think it would be fair to explain to you the two major services that the IoT services on SAP CP consists of. Namely the “Remote Device Management Service” or RDMS that you just activated. This is where you manage your devices and the message types they use for communication. So this would be the place you would need to start in order to set up a prototype or proof of concept. The other major service you should be aware of is the “Message Management Service” or MMS. That one controls the messages going in and out of SAP CP to and from your device interface. So in short, once the RDMS is set up, the real action (sensor data) flows through MMS.
AccessAs the services in SAP CP are protected, you need to make sure that you have the required roles. That you do inside the service we just activated. Choose “Configure Internet of Things Services” in the detail view of the service, from there choose the “Roles” button on the left hand side. Assign yourself to the role “IoT-User”. Later on, you would need to the same for the Message Management Service cockpit role “IoT-MMS-User”. For now, go to the Applications tab in your SAP Cloud Platform cockpit of your account. There, please choose Subscriptions and select the “iotcockpit” application.
Once it has opened, choose the Roles tab and make sure that the role “IoT-User” is assigned to your user.
Device managementNow we are ready to access the Remote Device Management Service. So go back to your IoT service, and click on “Go to service”.
This is your RDMS cockpit. Under “Device Management”, from the left, you see your message types, which is the structure of your information being passed to and from your devices. Secondly, you see your device types, which categorize your devices and link them to a message type. On the right, the different physical devices registered to your account. Your tiles will have a zero in them, as you do not have anything set up just yet. That is about to change.
On the lower part of the screen, you see the Message Management Service. This is where you deploy the service, and later (as in my case) update to later versions. Please go ahead and click it to deploy, and after that you are ready to bind the IoT-MMS-User role to your user, as we did in previous steps.
As the SAP Cloud Platform gets updated every two weeks, there may be some changes to the processes described here. This would therefore be a good time to tell you about the documentation delivered from SAP. You will find it at https://help.hana.ondemand.com/iot/. You will find a more detailed “Getting started” guideline there, which is handy if you are stuck somewhere in my explanation.
The sensorSo we are ready to start interfacing with some “things”. In our case, we will let the thing be an iOS device running the itelligence IoTSensor app. Please go to the Apple App Store and search for IoTSensor.
After you download and install, open the app and make sure it gets access to all the sensors. When you click the “Sensor” button (select your device name), you should be able to see real-time sensor information from your device. Play around with it, so you know what to expect. You can also add external sensors connected by Bluetooth.
For this POC we will use an iPhone, as it contains the sensors we need for geolocation and the required communication hardware for fieldwork.
Connecting the endsSo we have the SAP Cloud Platform running with the IoT services, and we have the itelligence IoTSensor app running on our device. Now we need to connect the two. Before we do that, we will have to establish a message type and device type in RDMS. So go into your RDMS cockpit once again and hit “Message Types”. Create a new one by clicking the little plus sign and give it the following fields and types:
I called my message type iOSData (following the great setup guide by Michael Ameling, see text box for link). After creating it, save the Message ID that is automatically created for your entry, as we will need it for the IoTSensor app. Go back to the RDMS cockpit and enter “Device Types”. Again, create a new entry.
Give it a suiting name, and add the message type you just created. Save the Device Type ID and Device Registration Token that is generated for you.
Open your iOS device and the IoTSensor app. Go to “Connection” and add new. There you enter the required fields.
Setting up the itelligence IoTSensor app on your iOS device- Connection name: Up to you.
- Account: Your SAP CP account name, probably your s- or p-user with the word “trial” at the end. It’s in your SAP CP URL just after “../acc/”.
- Device Type ID: the ID you got when you registered the device type in RDMS.
- Device name: Up to you.
- Message Type ID: the ID you got when you registered the message type in RDMS.
- Data Center: “hanatrial” if you are using the trial account.
- Device Registration: The Oauth token you got when you registered the message type in RDMS.
- Message Type Name: The name you gave the message type, in my case iOSData.
Hit “Registration” and you should receive a confirmation message saying that everything went according to plan. If you go back to the main screen, you see that the connection is now red in color. Select your device again, and that should become red. You are now ready to start passing data to SAP CP.
[If you have problems connecting, I will recommend the following blogpost that gives you a far more detail in the setup: https://blogs.sap.com/2016/03/22/try-out-hcp-iot-services-with-ios-devices-and-sensor-tags/ thanks to Michael Ameling . ]
Hit the red button down center, and you are in action! Move your device around for a while to “feed the beast”.
Where did my data go?You should be able to see it through the MMS services. So in your IoT cockpit, hit “Send and view messages, or perform other actions”. Once in there, go to “Display stored messages”.
What you see next can be kind of cryptic. What you are looking for is the table starting with “T_IOT_” and then the message ID that you got when you created the message type. Click the table name, and you will see the data that your device passed on to SAP CP.
A cool thing to notice is that there is an OData API-button on the top right. Click it and you get both the service URL and the metadata you need for creating a service on top of your data. We will do that later.
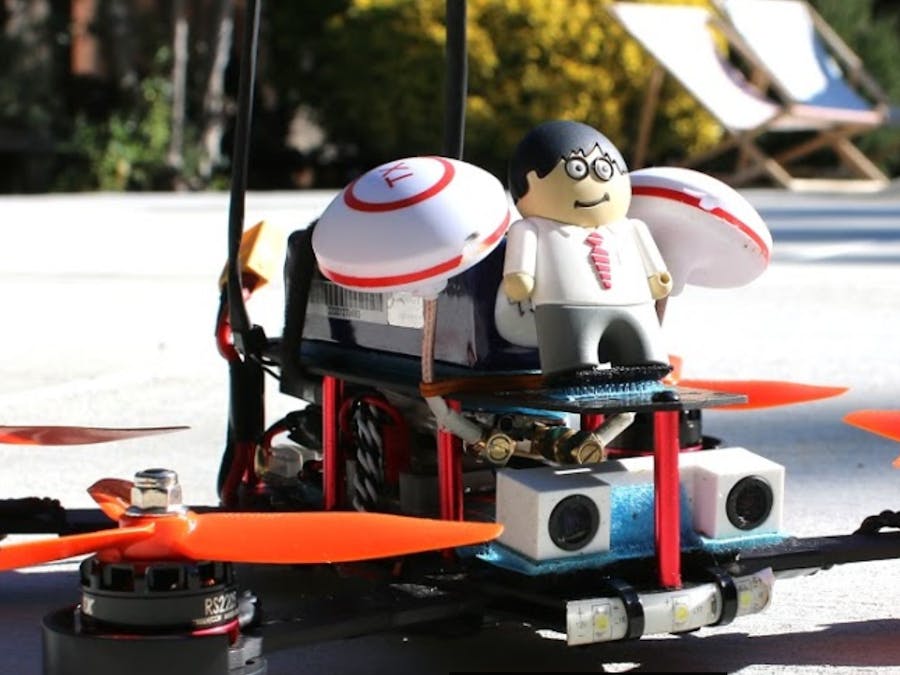
FieldworkNow, it’s time to get some field data from the quadcopter. Putting a working iPhone on a drone may not seem as such a good idea from the perspective that the phone may get damaged and that it will make the drone to heavy. I will calm you by letting you know that I have an old and slightly damaged iPhone lying around that now finally returns to glory. A Bluetooth device would have insufficient range for this particular example – alternatively the scenario could be done offline by first collecting data, then pushing it to the cloud when connection was established. In terms of weight, it just depends on the lift capacity of your drone. I have a QAV250 quad that will easily do 100 km/h without the phone, so it has no trouble carrying the device with just some lowered performance.
Flying with the IoTSensor app connected transfers data in real-time to the cloud, and it can be directly consumed by any connector or app running on SAP CP.
So assume that we have collected the data, and want to present it. There are several ways to do this. You can see the raw data in the message type table, as I wrote about earlier. But you may want to step it up a notch. A great feature with the SAP Cloud Platform is that it comes with its own web based development environment or Web IDE.
I have created a simple HTML5 application there. There I read the message type table and present the coordinates in a google map.
The interval of update can be set in the app, ranging from 1 to 60 seconds. Here, I pushed data every 5th second. I get a nice graphical trace of my flying activities, and for each if the measuring points I can read of the altitude and speed. The data collected from the quad is available for the application in a fraction of a second, so the speed of the whole setup is quite good.
The prospects of what we can do with connected devices and real-time data is almost infinite, so go out there and get creative! I wish you good luck in building your own scenario using SAP CP and the itelligence IoTSensor app.


Comments