Hardware components | ||||||
 |
| × | 1 | |||
| × | 4 | ||||
| × | 1 | ||||
Hand tools and fabrication machines | ||||||
 |
| |||||
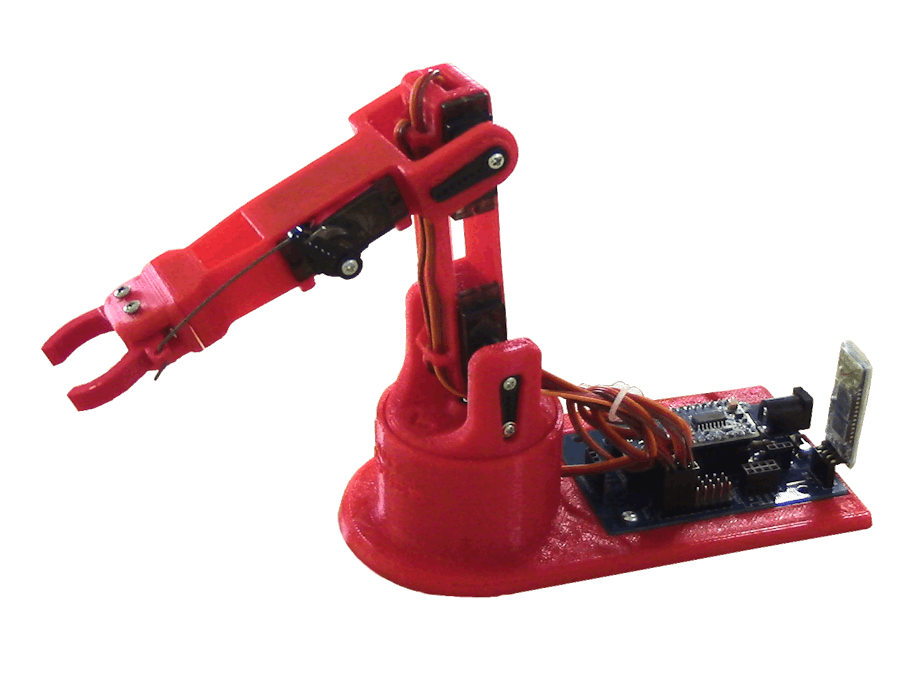
The LittleArm 2C is designed to be the kit that kids can easily use so that STEM classes can implement more robotics curriculum. It has been made more rugged and much easier to put together, so that it is easy for kids to use.
All the parts can be easily 3D printed, and are designed to keep the arm sleek and simple. The entire design has less than 15 screws.
To control the arm you can either use our Windows application (which was originally written in Python code here) or through Bluetooth with the Android App that we made for it.
Full instructions for assembling the LittleArm 2C can be found here.
3D Printing files can be downloaded from here.
// LittleArm 2C arduino code
// Allows serial control of the LittleArm 2C 3D printed robot arm
// Created by Slant Concepts

#include <Servo.h>  //arduino library
#include <math.h>   //standard c library

#define PI 3.141

Servo baseServo;
Servo shoulderServo;
Servo elbowServo;
Servo gripperServo;

//+++++++++++++++Global Variables+++++++++++++++++++++++++++++++
struct jointAngle{    //a struct is a way for organizing variables into a group
  int base;
  int shoulder;
  int elbow;
};

struct jointAngle desiredAngle; //desired angles of the servos

int desiredGrip;    // disired position of the gripper
int gripperPos;     //current position of the gripper

int command;        // the set of joint angles
int desiredDelay;   // the delay that the servos make btween steps

//int ready = 0;      // a marker to used to signal a process is done

//+++++++++++++++FUNCTION DECLARATIONS+++++++++++++++++++++++++++
int servoParallelControl (int thePos, Servo theServo );   //This is a function for controlling the servos
//+++++++++++++++++++++++++++++++++++++++++++++++++++++++++++

void setup()  // Setup prepared the Arduino board for operation
{
  Serial.begin(9600);         // Turn on USB communication (Serial Port) and have it communicate at 9600 bits per second
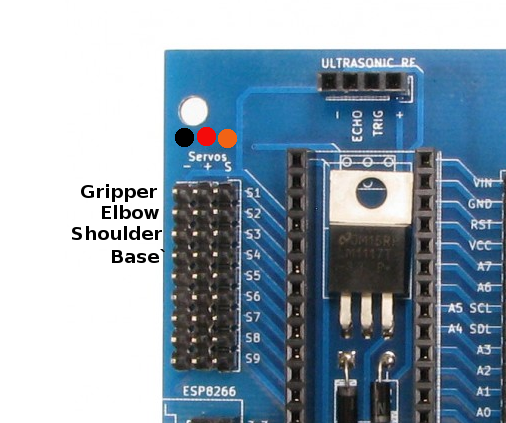
  baseServo.attach(5);        // attaches the servo on pin 5 to the servo object
  shoulderServo.attach(4);    // attaches the servo on pin 4 to the servo object
  elbowServo.attach(3);       // attaches the servo on pin 3 to the servo object
  gripperServo.attach(2);     // attaches the servo on pin 2 to the servo object

  Serial.setTimeout(50);      //Stops attempting to talk to computer is no response after 50 milisenconds. Ensures the the arduino does not read serial for too long
  Serial.println("started");  // Print to the computer "Started"
  baseServo.write(90);        //intial positions of servos
  shoulderServo.write(100);
  elbowServo.write(110);
//  ready = 0;
}

//primary arduino loop. This is where all of you primary program must be placed.
void loop()
{
  if (Serial.available()){                  // If data is coming through the USB port to the arduino then...
//    ready = 1;                            // Ready is set to 1 to indicate that a command is being executed
    // Commands are sent from the computer in the form "#,#,#,#,#,\n"
    // The code below "parses" that command into integers that correspond with the
    // base angle, shoulder angle, elbow angle, grip angle, and delay in the servos, respectively.
    desiredAngle.base = Serial.parseInt();
    desiredAngle.shoulder = Serial.parseInt();
    desiredAngle.elbow = Serial.parseInt();
    desiredGrip = Serial.parseInt();
    desiredDelay = Serial.parseInt();

    if(Serial.read() == '\n'){              // if the last byte is '\n' then stop reading and execute command '\n' stands for 'done'
        Serial.flush();                     //clear all other commands piled in the buffer
        Serial.print('d');                  //send completion of the command "d" stands for "done executing"
    }
  }

  // These values are the status of whether or not the joint has reached its position yet
  // variables declared inside of some part of the program, like these, are called "local Variables"
  int status1 = 0;  //base status
  int status2 = 0;  //shoulder status
  int status3 = 0;  //elbow status
  int status4 = 0;  //gripper status

  int done = 0 ;    // this value tells when all the joints have reached thier positions

  while(done == 0){     // Loop until all joints have reached thier positions                      && ready == 1
    //move the servo to the desired position
    //This block of code uses "Functions" to make is more condensed.
    status1 = servoParallelControl(desiredAngle.base, baseServo, desiredDelay);
    status2 = servoParallelControl(desiredAngle.shoulder,  shoulderServo, desiredDelay);
    status3 = servoParallelControl(desiredAngle.elbow, elbowServo, desiredDelay);
    status4 = servoParallelControl(desiredGrip, gripperServo, desiredDelay);

    // Check whether all the joints have reached their positions
    if (status1 == 1 & status2 == 1 & status3 == 1 & status4 == 1){
      done = 1; //When done =1 then the loop will stop
    }

  }// end of while
}

//++++++++++++++++++++++++++++++FUNCTION DEFINITIONS++++++++++++++++++++++++++++++++++++++++++

int servoParallelControl (int thePos, Servo theServo, int theSpeed ){     //Function Form: outputType FunctionName (inputType localInputName)
    //This function moves a servo a certain number of steps toward a desired position and returns whether or not it is near or hase recahed that position
    // thePos - the desired position
    // thServo - the address pin of the servo that we want to move
    // theSpeed - the delay between steps of the servo

    int startPos = theServo.read();       //read the current position of the servo we are working with.
    int newPos = startPos;                // newPos holds the position of the servo as it moves

    //define where the pos is with respect to the command
    // if the current position is less that the desired move the position up
    if (startPos < (thePos-5)){
       newPos = newPos + 1;
       theServo.write(newPos);
       delay(theSpeed);
       return 0;                          // Tell primary program that servo has not reached its position
    }

    // Else if the current position is greater than the desired move the servo down
    else if (newPos > (thePos + 5)){
      newPos = newPos - 1;
      theServo.write(newPos);
      delay(theSpeed);
      return 0;
    }

    // If the servo is +-5 within the desired range then tell the main program that the servo has reached the desired position.
    else {
        return 1;
    }

} //end servo parallel control
8 projects • 176 followers
Slant is a group of makers and engineers creating robots and other gadgets


Comments
Please log in or sign up to comment.