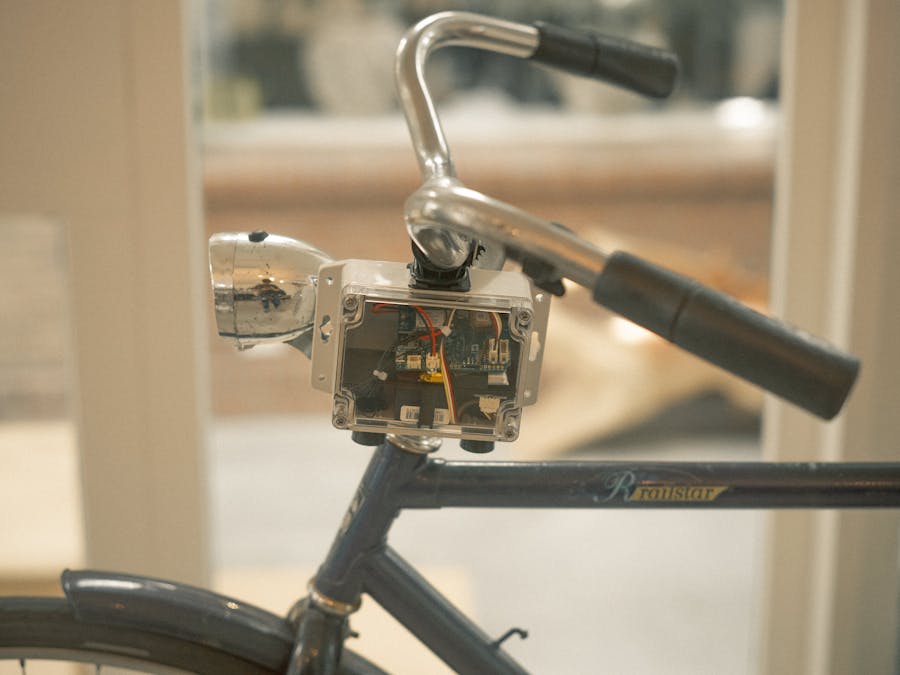
The SODAQ Sniffer Bike is an open-source collaboration project with Civity and Provincie Utrecht in the Netherlands. The idea is to raise awareness of the public on the air quality in the environment they live in. We design this sensor to be attachable to any bikes so that it is effortless for anyone to use. The rising concern to air pollution also plays a major part on why we are in the interest of developing this project (World Economic Forum). We envision this project to perpetuate to a much greater scale such that the public can be more aware of what is happening in the environment.
Here is a video demonstrating what we picture the future of Sniffer Bike would be:
Now comes the assembly!
Step 1: Set up SODAQ Board files in Arduino IDE (Link attached)- Connect the usb port (left) to your computer.
- Open Arduino IDE:
- Select SODAQ SARA as your board (Tools > Board > SODAQ SARA)
More details on the setup here
- Open sodaq_sniffer_bike.ino from the downloadable zip (files attached)
- Upload the source code into the board
By default, the setting requires a T-mobile sim card (you can request from us when ordering SARA Board) and the upload destination is T-mobile's server.
In order to forward your data to Civity's Dashboard for visualization, send us a message at snifferbike@sodaq.com containing:
Subject: For Dashboard
Name: (your name)
IMEI: (you can see it in the serial monitor)
OPTIONALLY, You can re-configure the settings such as Sampling frequency, Upload frequency, Upload destination, etc..
- First reset your board
- Then, configure your board in the serial monitor (Tools > Serial Monitor)
Be sure to know that if you are going to change the upload destination to your own server, these are the format of the message you sent every 10 seconds (1 sample)
- Disconnect the board from your computer after your setup is done
- Together with the Pololu booster, comes 4 male header pins. Cut one off - this is the one you need.
- Solder the pin onto GND on the PCB. Then add the Pololu on it's GND pin and solder again. (GND Polulu → GND PCB)
- Solder the 5 cm cable on the VIN on the Pololu onto the 3V3 on the PCB. (VIN Pololu → 3V3 PCB)
- Solder the 10 cm cable on the SHDN on the Pololu onto the D.3 on the PCB. (SHDN Polulu → D.3 PCB)
Connect the PM Sensor as such (each cable should be about 15 - 20 cm):
- Cable 1 → GND Polulu
- Cable 2 → TX PCB
- Cable 3 → RX PCB
- Cable 4 → VOUT Polulu
- Place the PM Sensor into Divider as shown below - this is important for it to function properly. The arrow points towards the position of the lid of the box. Also, this is the side where the Divider has two "notches" in the corners.
- Attach the PCB/Battery Mount to the Divider with double sided tape in the center of the Divider. Make sure the back side of the PCB/Battery Mount aligns with the surface.
- Attach the PCB to the PCB/Battery Mount with double sided tape. Make again sure that the PCB aligns with the surface. Only this way, it will fit properly in the case.
- Mount Temp/Humid Sensor to the bottom of the divider
- Mount the sensor to PCB (left port)
- Mount the Antenna to the PCB with a gentle push.
- Place the battery in the mount and connect it to the battery port of the PCB
- Insert the NB-IoT sim card into the board
Drill the enclosure as such:
- 2 Bottom (20.5 mm) → Vents
- 1 Top (6mm) → Clamp
- 1 Forward Side (22 mm) → USB
- Sand the inside around the USB and Bike clamp holes to remove the flanges inside the box. This will let the bike clamp and USB fit tightly.
- Mount the clamp on top side of the enclosure
- Attach and glue the vents to the enclosure
- Solder the cable onto the USB:
- Red Cable → #1
- Black Cable → #4
- Then mount the usb in the side hole. Remember to add the rubber seal of the cap under the nut, before screwing the USB on.
- Connect USB to the solar port on the PCB (the one next to the battery) and then gently place the board in the box. It will take a little wiggling, but it will fit.
- Close the lid (FINAL PRODUCT)


Comments
Please log in or sign up to comment.