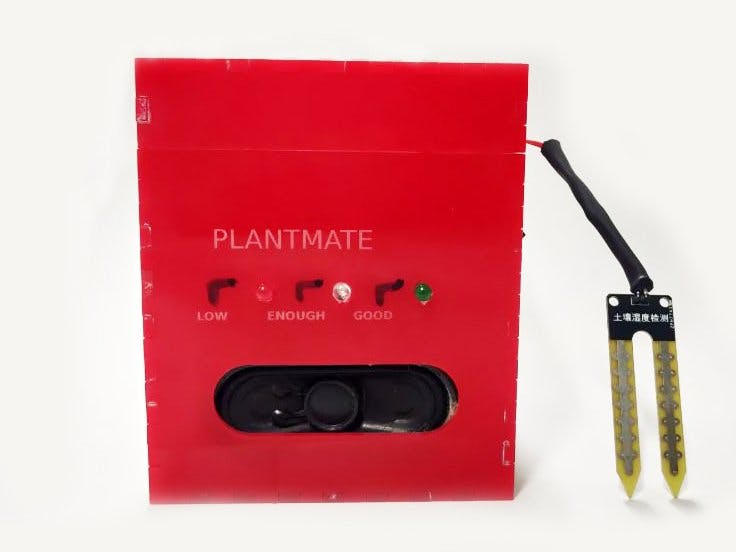
What if your plants talk to you when they needed. Using Sony spresense development board you can build a simple and effective plant monitoring device by yourself. The motivation is simple, People can interact with your plant while they make a scream for water if the water is too low. and also tell you a three level soil moisture level indication through voice and LED indication.
The device is portable. If you have a garden you can use it as a soil moisture level checker. It comes with a inbuilt 1500mah 18650 battery that can be recharge using a micro USB cable.
So, without further do let get in to the build!
Sony Spresense Development BoardSpresense is a compact development board based on Sony’s power-efficient multicore microcontroller CXD5602. It allows developers to create IoT applications in a very short time and is supported by the Arduino IDE as well as the more advanced NuttX based SDK.
Here iam using Arduino IDE to program the sony spresense board. To do so first you need to download and install the Board manager for spresense development board.
First open Files - Preferences - Additional Board Manager URL
paste the below URL in the fields and click OK button
https://github.com/sonydevworld/spresense-arduino-compatible/releases/download/generic/package_spresense_index.json
Then Head to the Tools and Board Manager Then search for "spresense"
Install the Board manager
Now you can play around with the spresense board by blinking the builtin 4 LEDS.
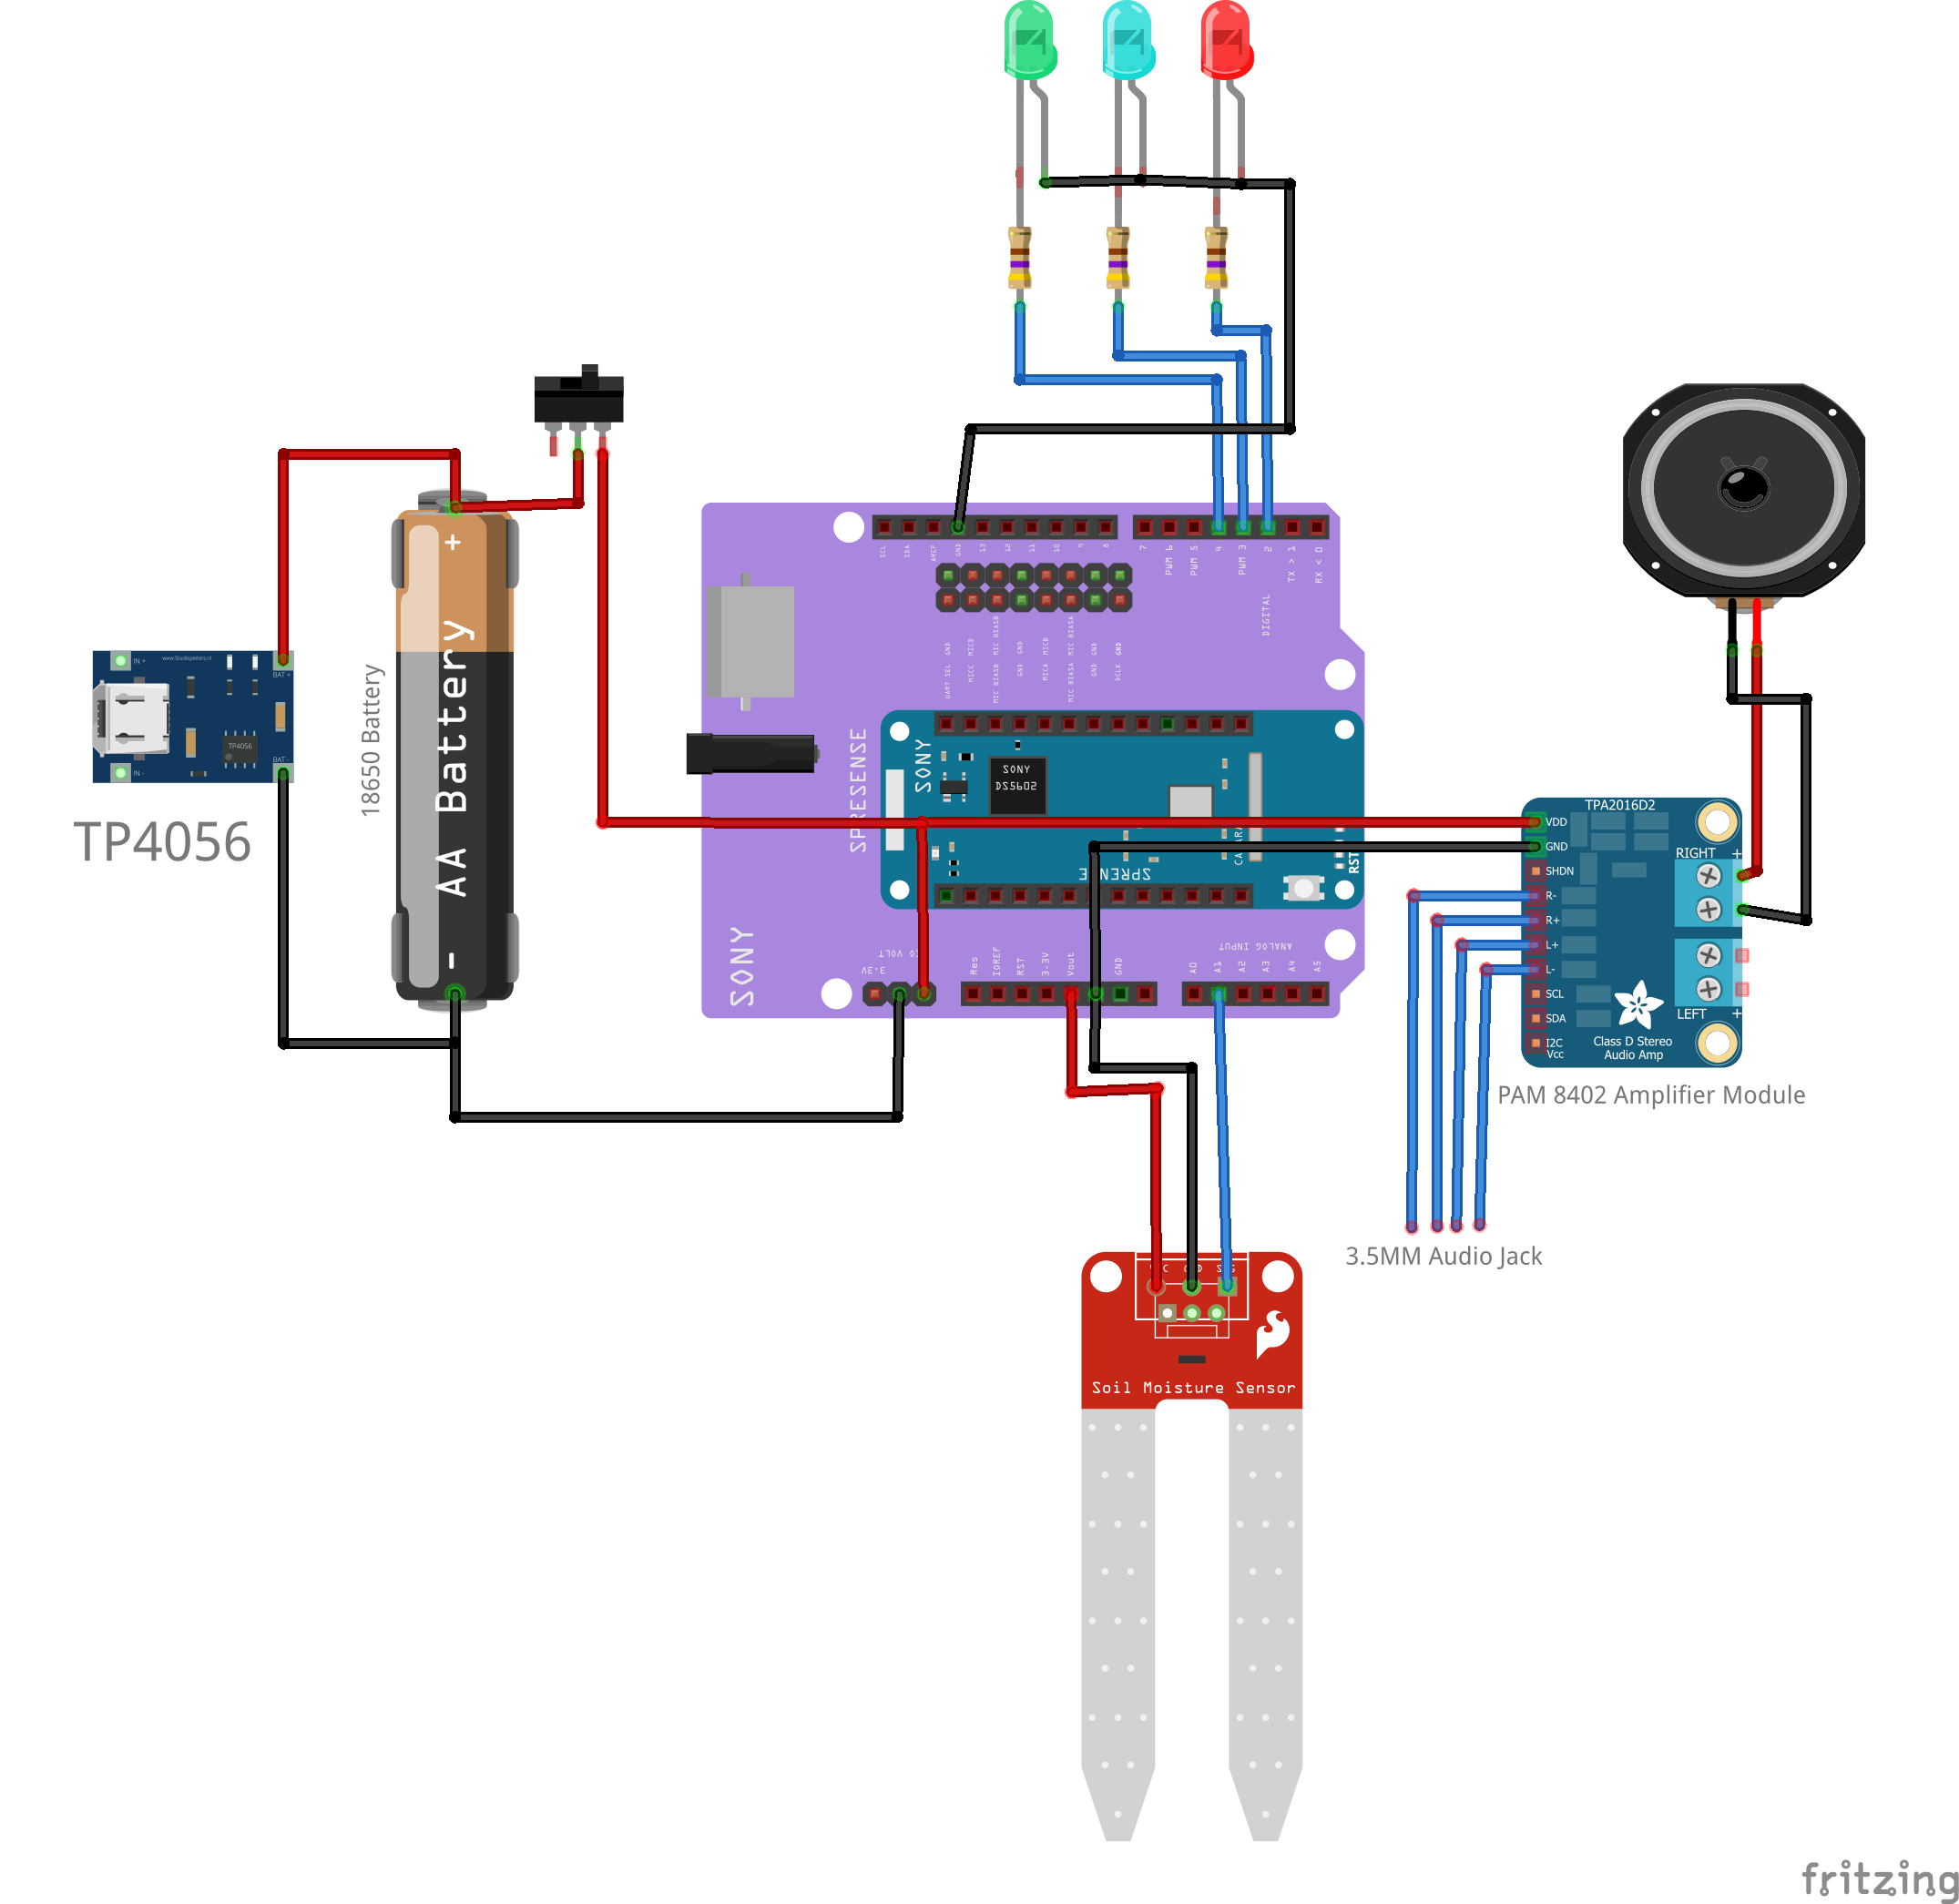
Building The Loudspeaker and Battery Power SupplyI used a 5W speaker and PAM8402 Class D amplifier for the sound feedback and used a TP4056 Lipo battery charging module and 18650 lipo battery for the power supply.
You can find the connection diagram in the image below.
I designed a press fit enclosure for this project. I used a 3MM red acrylic sheet. and cut the design by utilizing a trotec speedy100 laser cutter machine from a nearest fablab. You can also find laser cutting service in your nearest makerspace or fablab or even there are also have some online services for laser cutting. I attached the design files with this tutorial below.
I used a gel type superglue to glue the parts for a sturdiness!
The I placed the parts accordingly in the case that you can see in the image below
Conect your spresense board to your PC via a micro USB cable. The open the sketch in Arduino IDE and upload it.
After programming the device. I closed the enclosure and put it for the test!


_3u05Tpwasz.png?auto=compress%2Cformat&w=40&h=40&fit=fillmax&bg=fff&dpr=2)


Comments
Please log in or sign up to comment.