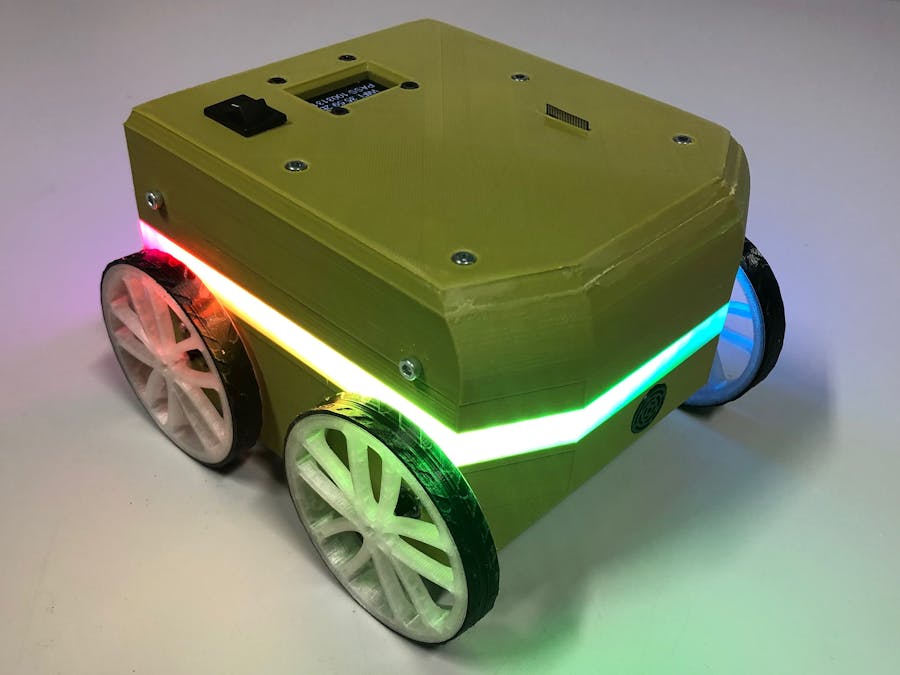
I made a DIY robot that includes all safety features that a robot should need.
Main features:- Battery security
- Startup with hotspot
- SSID and Passwd printed on OLED
- Camera stream
- Basic tutorial to set up the APIs that control the robot
All the code and documentation are on GitHub and Gitbook.
More information is available on www.pytobot.com.
Updates will be release on the Website and Github and the documentation on Gitbook.
The project in ongoing progress. Subscribe to be up-to-date!
For questions, please leave a comment.
All Information of Pytobot:
A small introduction into Pytobot:
PYTOBOT
Pytobot is a 3D-printed, low-cost DIY rover that will bring you step by step into the world of IoT. It brings electronics, 3D modelling and IoT together into a tailor-made project for kids.
Programming can be quite overwhelming for starters. The Pytobot makes steps easier and makes programming more accessible for children. With a full REST interface that controls the robot, you will be able to have multiple ways of control for different levels of programming.
The Pytobot is build on a REST interface and JSON communication controlled fromcontrolled any framework and program that is connected to the network of the Raspberry Pi.
JSON is an open-standardfile formatthat uses human-readabletext to transmit data objectsRESTful API
The REST interface is used to communicate from the frontend (controller) to the backend (Pytobot). A RESTful API is an application program interface (API) that uses HTTP requests to communicate through the network.
NetworkTo control the robot through the network, the Raspberry Pi will proceed as a router and access point. By accessing in the same network as the robot, the REST communication is active and the connection from the controller to the backend is established.
To connect to the network, the SSID SSID and password will be printed out on the OLED screen on the robot. When connected to the hotspot, a browser will pop up and show the features of the project.
More on www.docs.pytobot.com
GET STARTED:The following tutorial will give you all the default functionalities of the Pytobot:
What do you need:https://docs.pytobot.com/hardware/electronic
Minimum implementation of hardware is:
- OLED
- Motor
- H-Bridge
- Switch
Total Minimum Price (ordered from Mouser) is 95 euro.
*without battery and 3D-Print
Flash the Image on your SD card with Etcher.
AssemblingSolder the components to the PCB.
You can get your PCB really cheap from https://jlcpcb.com
Connect the Raspberry Pi on the PCB and connect all the hardware wires.
CONNECTION
Fire up the robot trough switching the robot on.
The Pytobot Takes 55 Seconds to boot.
After that time, the SSID and PASSWD will print out on the screen.
More on www.docs.pytobot.com


_3u05Tpwasz.png?auto=compress%2Cformat&w=40&h=40&fit=fillmax&bg=fff&dpr=2)
Comments
Please log in or sign up to comment.