Purpose
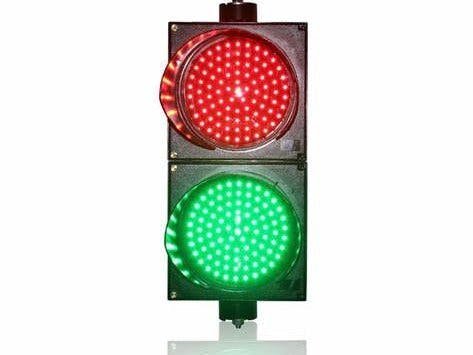
Many households already provide a garage door opener. However, we were inspired to create additional features to make parking more efficient. We used an ultrasonic sensor to set a certain distance that would allow the driver to stop the vehicle when the RGB light strip turns red and along with a buzzer going off.
The main reason for this project is to minimize accidents in the garage. Sometimes, you can't tell if you're too close to the wall, or too far away. With our parking sensor, your car will be parked the same distance, within one or two inches, every time. This will especially help those with nice cars that need to park in the garage. It will allow you to visually see when you are far enough in the garage, but not too far up to where you will hit the wall.
How does the HC-S04 sensor work?
The sensor works by using one microphone to transmit a signal and the other to receive the signal. A pulse is sent out and when it hits an object it is then reflected back and reveals the time between the pulses, which allows for the distance to be calculated. When the car is within a specified distance, the RGB light strip will turn red. The picture is a good reference in understanding how it works.
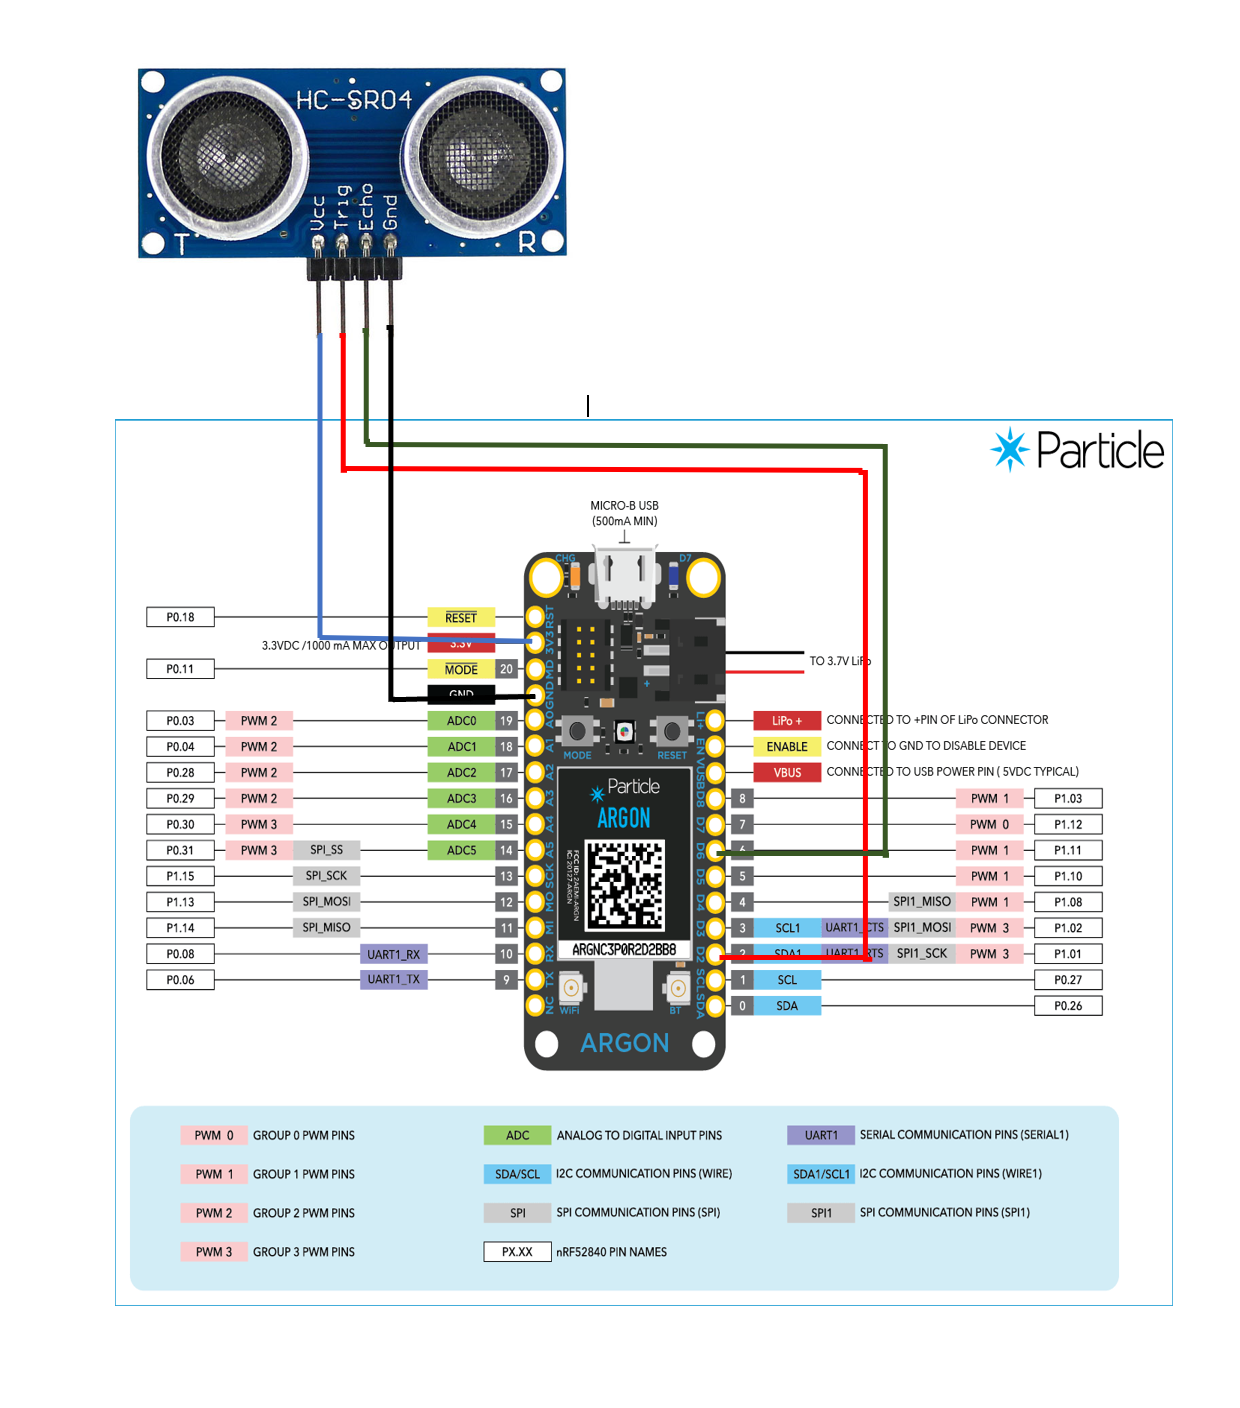
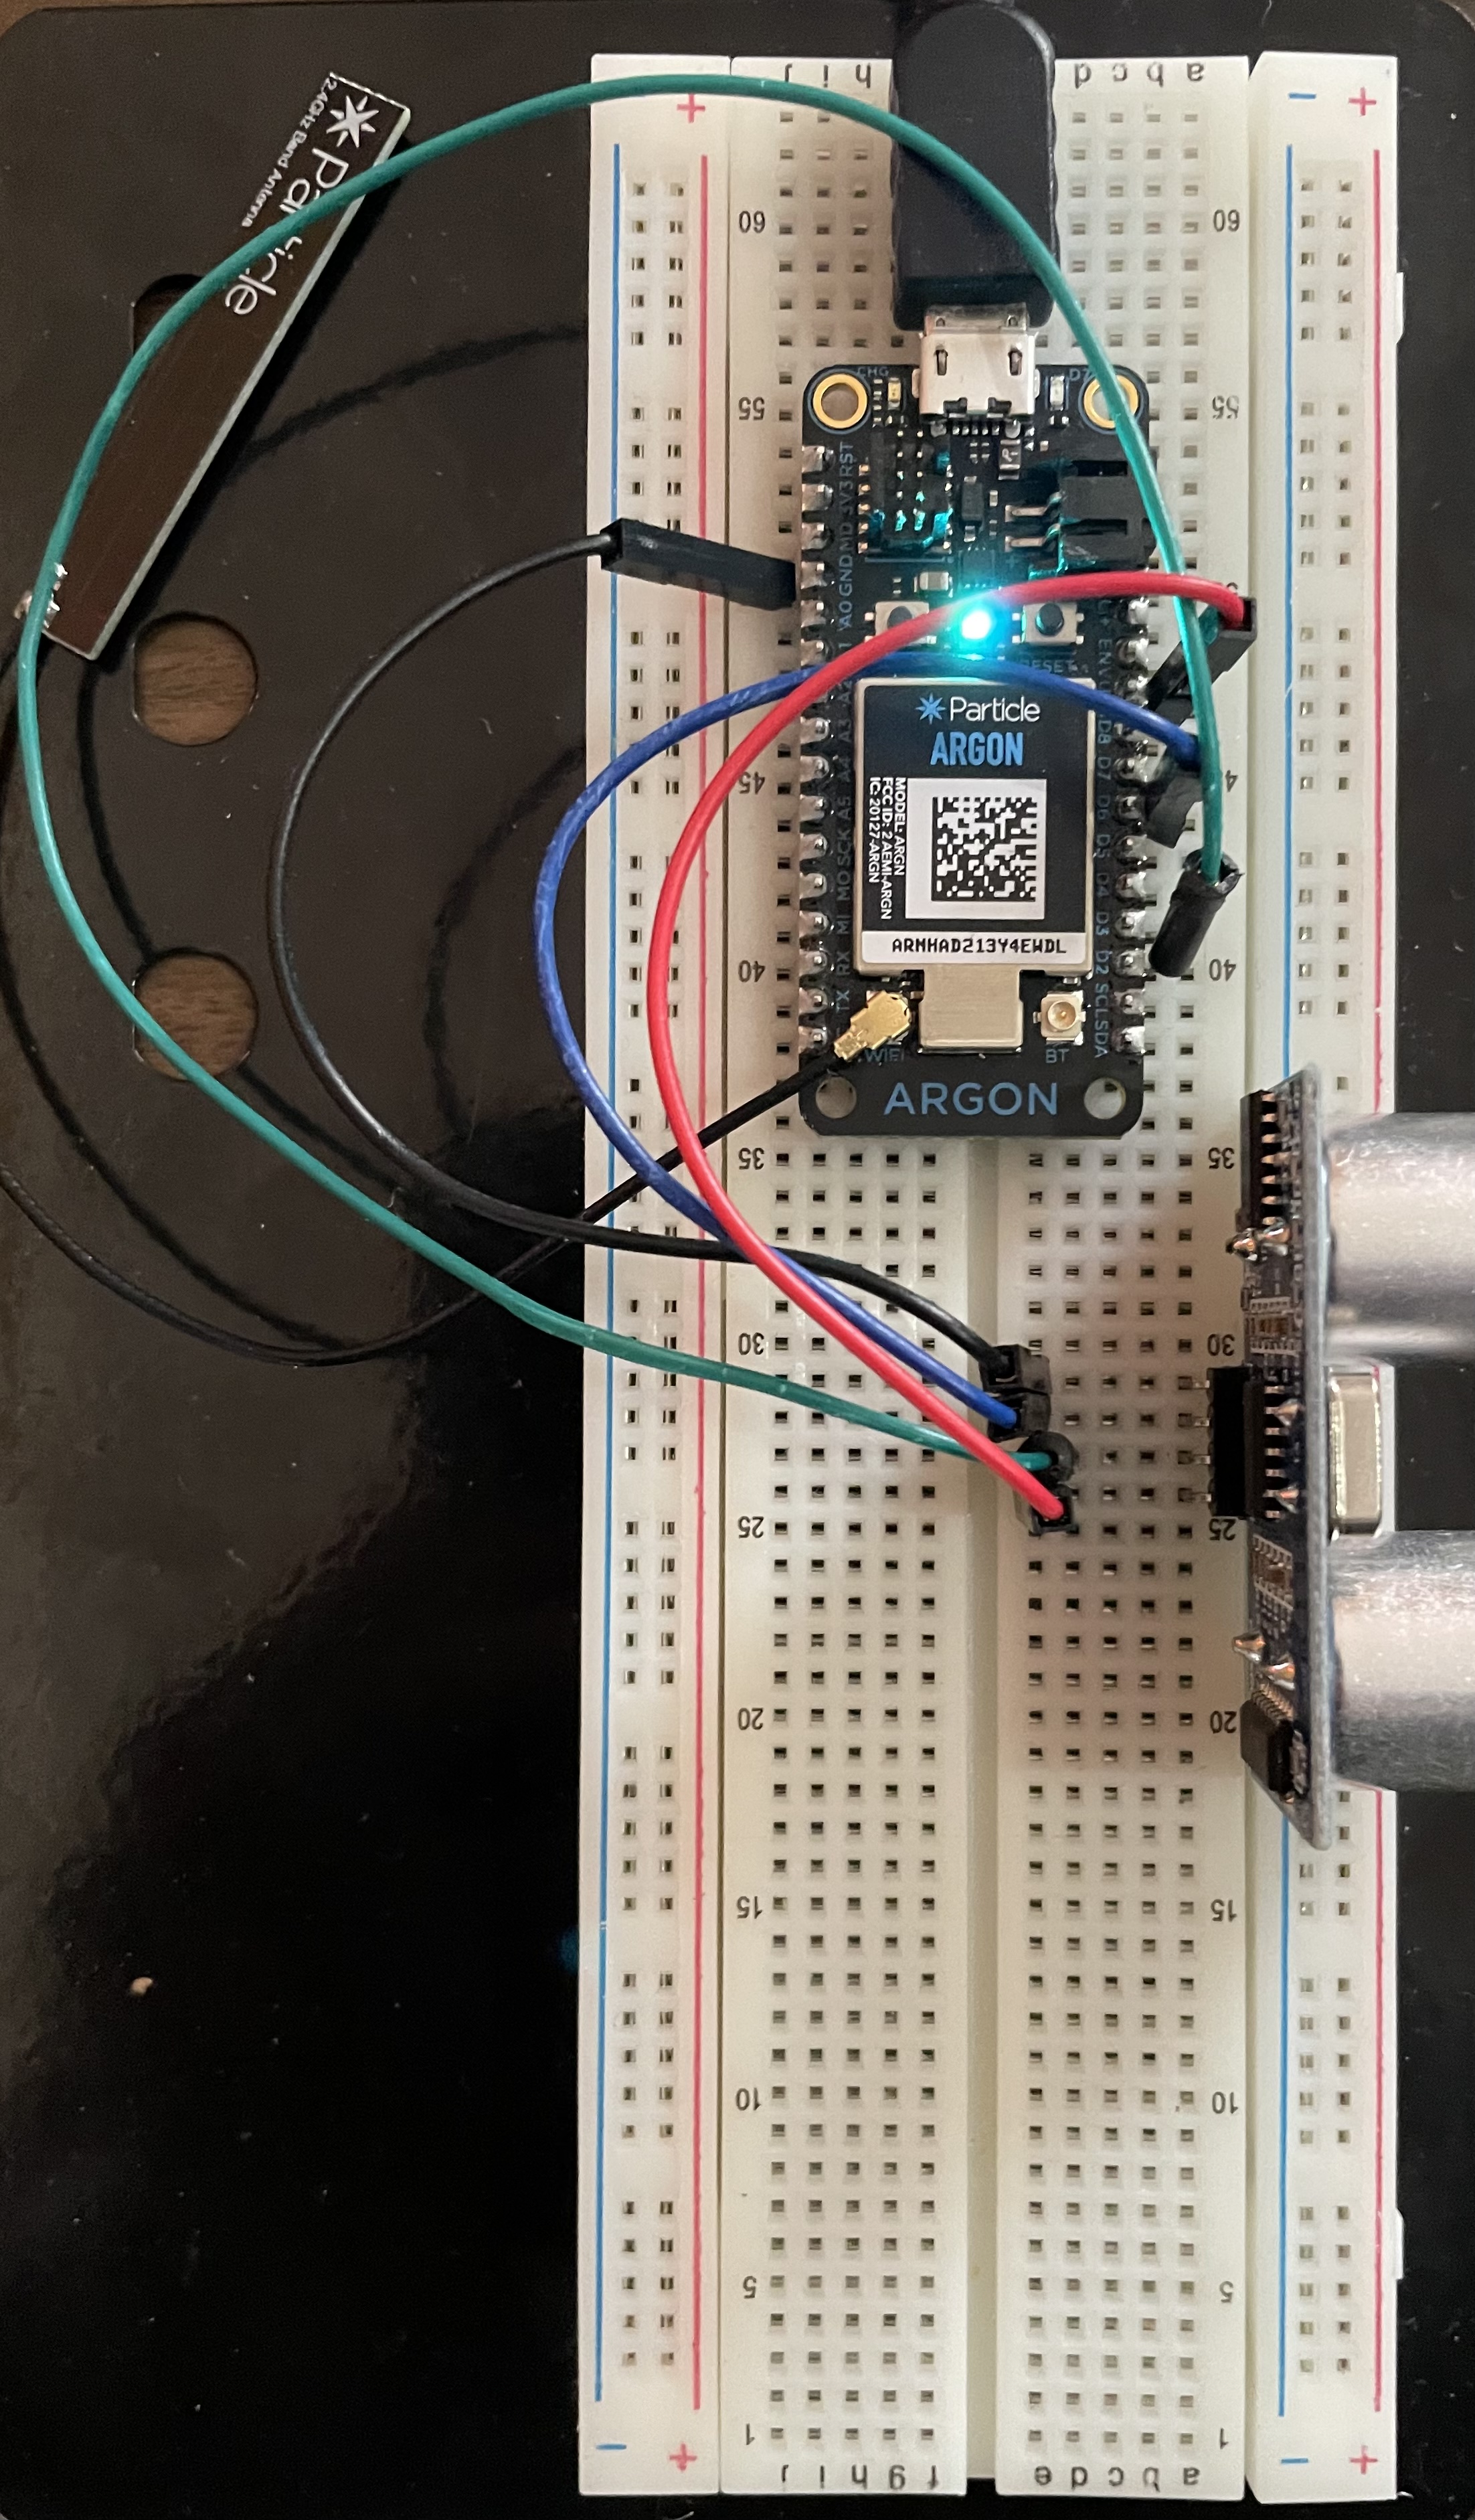
HC-SR04 Ultrasonic Sensor Connections
- Connect the VCC from the ultrasonic sensor to the digital pin USB on the Particle Argon.
- Connect Trigger from the ultrasonic sensor to the digital pin 2 on the Particle Argon.
- Connect Echo from the ultrasonic sensor to the digital pin 6 on the Particle Argon.
- Connect GND from the ultrasonic sensor with the GND on the Particle Argon.
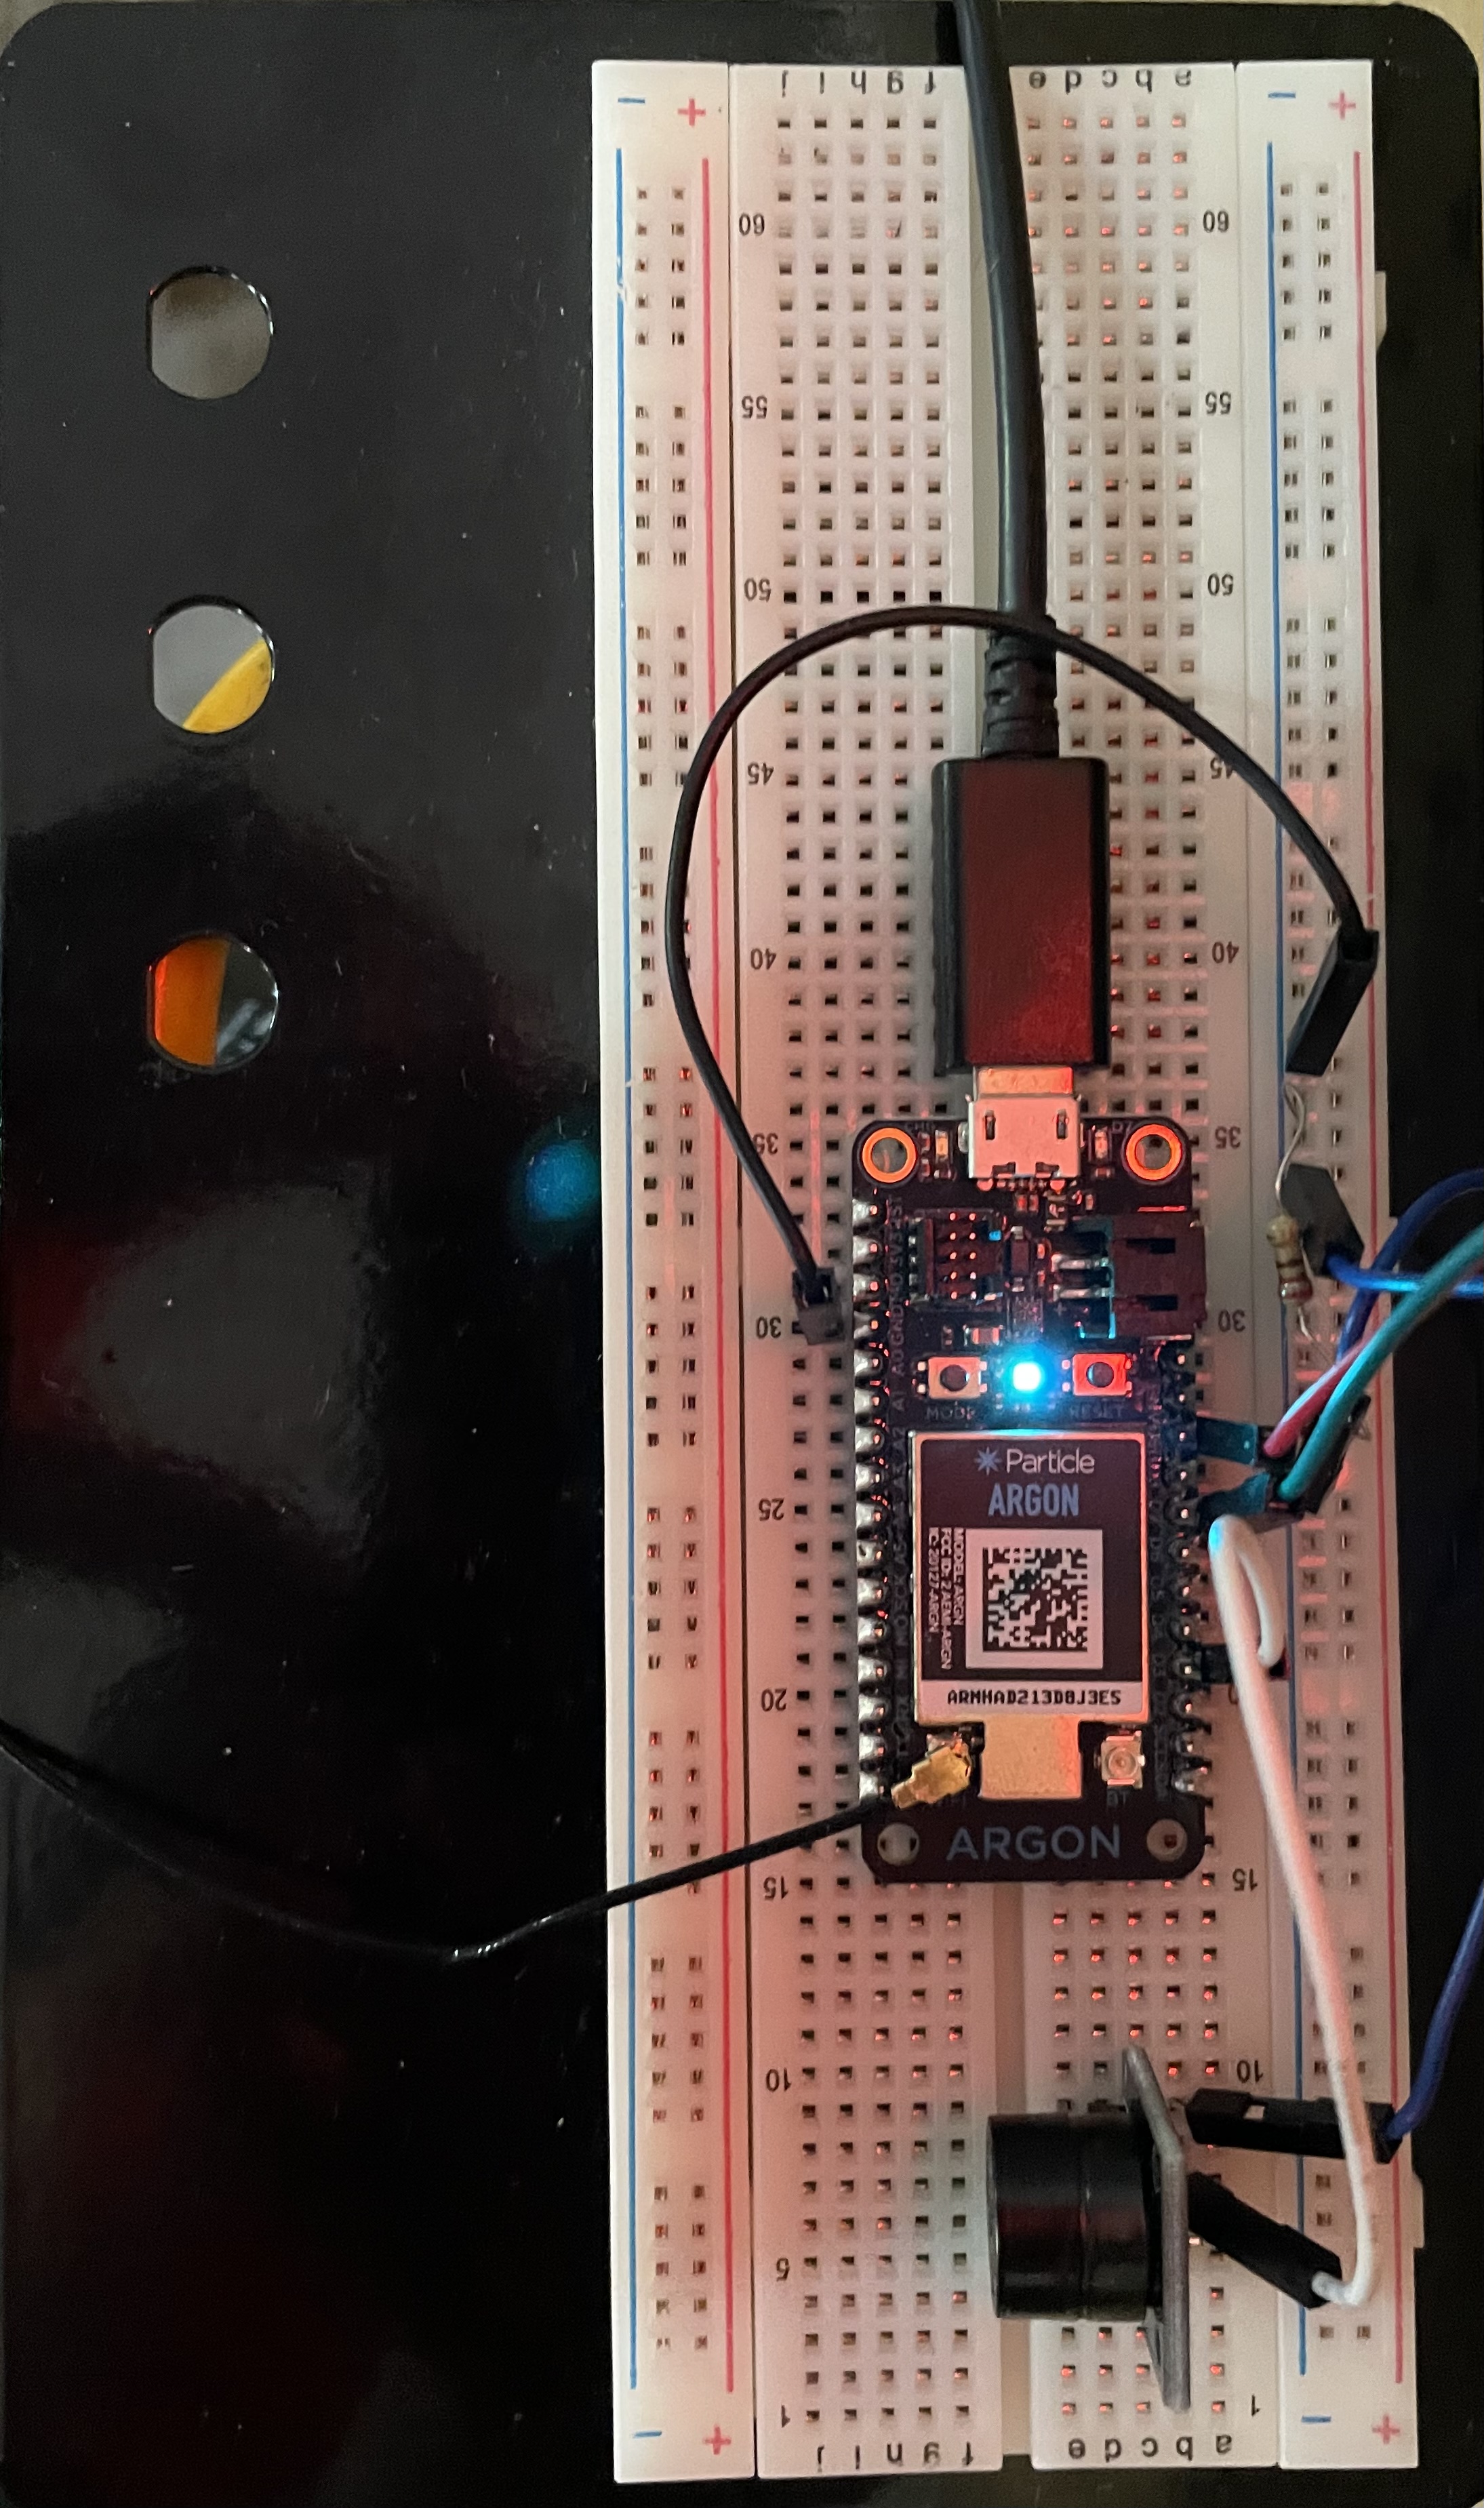
Top View of Particle Argon/ HC-S04 circuit setup
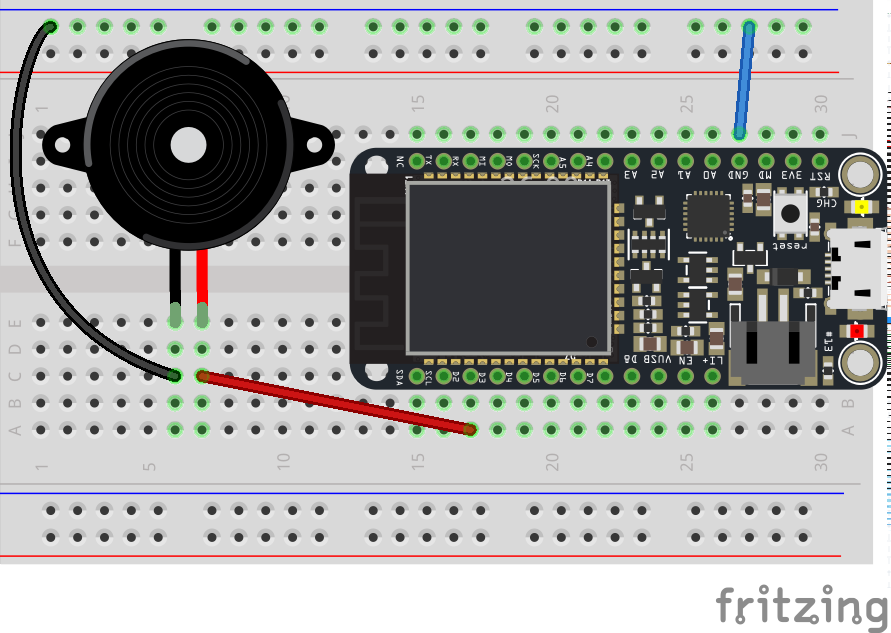
RGB light strip and Buzzer Connections
Particle Argon
- Connect GND of the particle argon with the negative terminal on the power rail.
- Connect one end of a 220-ohm resistor to the negative terminal on the power rail (in-front of the argon ground wire) and the other end to the positive terminal on the power rail (behind digital pin USB).
Buzzer
- Connect GND of the buzzer with the negative terminal on the power rail.
- Connect Signal of the buzzer to digital pin 3 on the Particle Argon.
RGB light strip
- Connect GND (white strip) of the RGB light strip with the negative terminal on the power rail.
- Connect Data (green strip) of the RGB light strip to digital pin 7 on the Particle Argon.
- Connect Power (red strip) of the RGB light strip to digital pin USB on the Particle Argon.
Side view of Particle Argon/Buzzer/RGB Light Strip
IFTTT and Google Sheets
To show that both particle argons are correctly communicating, we implemented an IFTTT that would send specific data to two different Google Sheets. The steps to make this happen are listed below.
One IFTTT/Google Sheet for “No Car”
- Go to Ifttt.com/create and make sure you have already made an account.
- Click create under the applets.
- Select Add under “If This” and choose “Webhooks” and then “Receive a web Request”, enter your Event Name and create trigger.
- Now create the trigger and then Add to “Then That”.
- Select Google Sheets and choose “Update a Cell”, enter your google sheet account, spreadsheet name, and what cell the information should be located in.
- Select Finish.
One IFTTT/Google Sheet for “Car Arrived”
- Go to Ifttt.com/create and make sure you have already made an account.
- Click create under the applets.
- Select Add under “If This” and choose “Webhooks” and then “Receive a web Request”, enter your Event Name and create trigger.
- Now create the trigger and then Add to “Then That”.
- Select Google Sheets and choose “Update a Cell”, enter your google sheet account, spreadsheet name, and what cell the information should be located in.
- Select Finish.
Particle Integrations
Integrations are used in the web IDE code for the particle argons to send and receive information to each other. We will Connect our IFTTT for “No Car” and “Car Arrived” to separate integrations. See steps below to make this happen.
Integration for “No Car”
- Go to console.particle.io and make sure to sign into the account that has both Particle Argons.
- Click on the integrations tab and click on Create.
- Choose Webhook and for the event name you will make it “No Car”.
- The information needed for the full URL can be found on https://ifttt.com/maker_webhooks/settings which will show your personal API key after /use.
- Once you have your API key you can then insert it into https://maker.ifttt.com/trigger/{Event_Name}/json/with/key/{insert API Key Here}.
- Request type should be “Post”, the Request Format should be “Web Form” and the device should be the particle argon that is connected to the HC-S04 sensor circuit.
- Click Create Webhook, now you have code for Particle. publish and Particle. Setup.
Integration for “Car Arrived”
- Go to console.particle.io and make sure to sign into the account that has both Particle Argons.
- Click on the integrations tab and click on Create.
- Choose Webhook and for the event name you will make it “Car Arrived”
- The information needed for the full URL can be found on https://ifttt.com/maker_webhooks/settings which will show your personal API key after /use.
- Once you have your API key you can then insert it into https://maker.ifttt.com/trigger/{Event_Name}/json/with/key/{insert API Key Here}.
- Request type should be “Post”, the Request Format should be “Web Form” and the device should be the particle argon that is connected to the HC-S04 sensor circuit.
- Click Create Webhook, now you have code for Particle. publish and Particle. Setup.
Live Data
The live data for the parking notifier project is shown below in 2 separate links. Pictures are also shown below if you plan to stay on this webpage!
- No Car – Google Sheets
- Car Arrived – Google Sheets
“No Car”: Google Sheets
“Car Arrived”: Google Sheets
Group #16 – Parking Notifier in Action
Click the link below to watch the project come to life!


_zhWsCcSEcl.jpg?auto=compress%2Cformat&w=48&h=48&fit=fill&bg=ffffff)




_3u05Tpwasz.png?auto=compress%2Cformat&w=40&h=40&fit=fillmax&bg=fff&dpr=2)
Comments
Please log in or sign up to comment.