


Hardware components | ||||||
_wzec989qrF.jpg?auto=compress%2Cformat&w=48&h=48&fit=fill&bg=ffffff) |
| × | 1 | |||
 |
| × | 1 | |||
| × | 4 | ||||
 |
| × | 10 | |||
| × | 4 | ||||
Software apps and online services | ||||||
 |
| |||||
 |
| |||||
| ||||||
Hand tools and fabrication machines | ||||||
 |
| |||||
 |
| |||||
 |
| |||||
 |
| |||||
 |
| |||||
| ||||||
 |
| |||||
 |
| |||||
I wanted to create a remote-control quadcopter that is capable of displaying a video feed. For years I have always been at the forefront of engineering teams as a driver for autonomous vehicles. I have built and driven a multitude of remote operated vehicles such as cars, boats, submarines, but to this day, I have not built one that could fly.
Not only that but just like Orville and Wilbur Wright, I will not be tethered to the ground any longer. I want to create an extension of myself in the atmosphere. At the least be able to see. This drone accomplished this goal and help me achieve my dream of being one with the sky (to an extent),
However, it wouldn't be enough for me to actively fly in the sky, I would need to be able to see from the perspective of my drone. I would need to implement the use of a camera that would let me view the skies from the perspective of my drone.
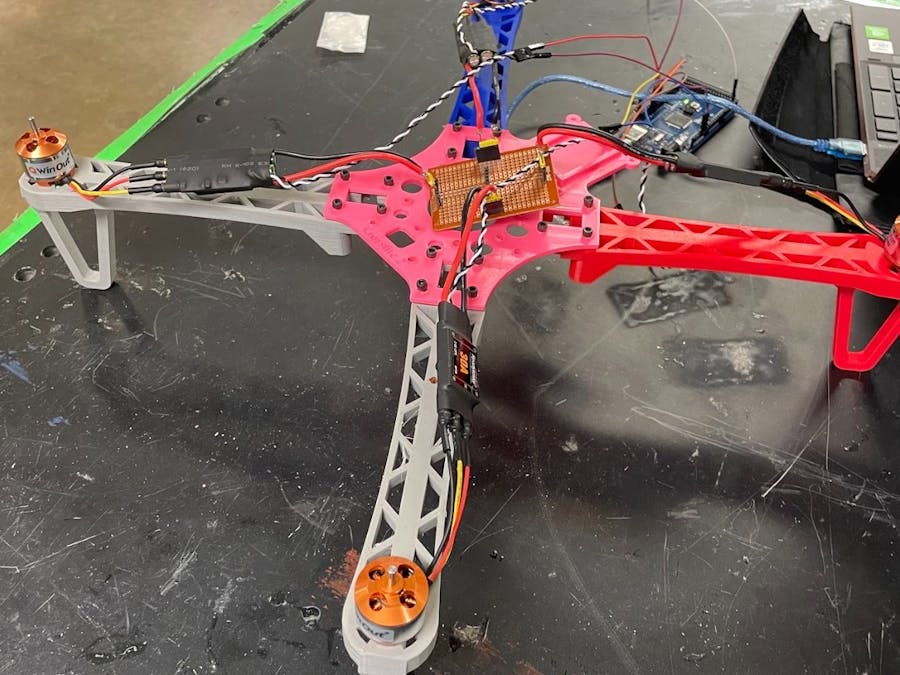
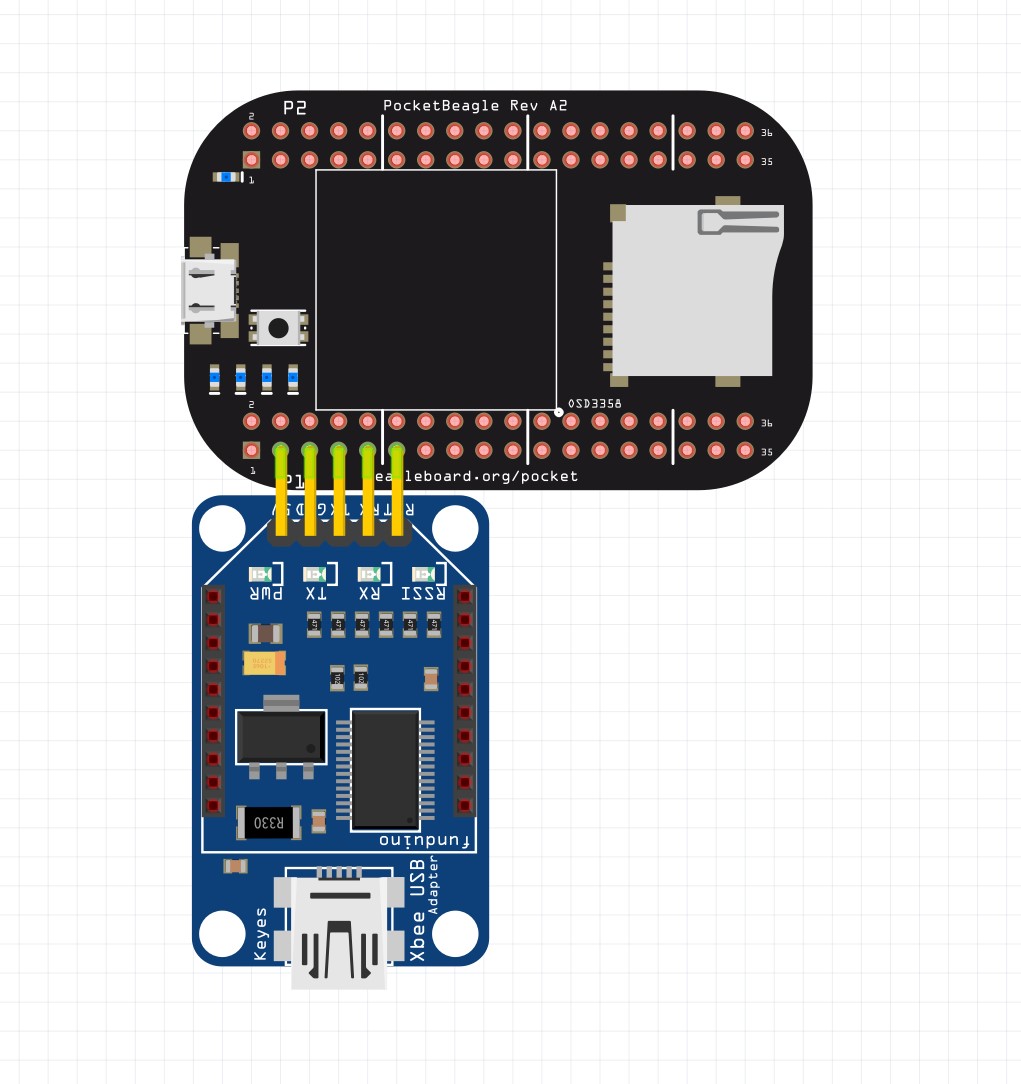
The drone itself works by having an Arduino control and facilitate the four motors as well as each of the Electronic Speed Controllers that come with each of the motors. Not only that. There will a Pocket Beagle on the drone that will also be streaming live feed to me as I continuously fly.
This will all be powered by a LiPo batter strapped to the drone itself.
In order to start this project, I first looked throughout the internet to find what 3d parts I could use and or modify. After searching, I ended up finding a balance between several drones that I could use.
In the picture above, from left to right, top to bottom, we have the four arms, the controller mount, the bottom plate, middle plate, and top cover. Make sure that when you make these, you use the top settings on your printer in regards to infill and density. The reason behind this is that they will not last in the tensile and stress test otherwise, and will more than likely break during the flight.
AssemblyFind yourself a clean place to work, find some basic tools like Allen wrenches, screw drivers, dykes, hammer, super glue. Assembling the quadcopter requires some basic soldering skills. If you have never done it before, it is not rocket surgery. Check out some videos on YouTube and practice a little before starting this project. One bad or broken connection anywhere in the system will cause a crash and or short circuit.
Start out with the arms. The arms are designed to receive M3 hex lock nuts. Each arm takes six, four on top and two on the bottom. The tolerances are such they they need to be seated with a thermal insertion. Get the soldering iron, put it as the tip of the screw, and use it to create a hole inside the plastic if it doesn't fit (due to the geometric deformation associated with plastic). It helps to take an exacto knife and flare out the opening. The four outside holes (the ones towards the motors, there are two on the top and two on the bottom) need the hex nuts seated so that they are flush with the top and bottom edge. The two holes towards the inside of the arm need the hex nuts seated with the flat edge of the nut facing the the top edge of the arm. A small amount of super glue should be applied inside the holes before the hex nuts are seated. Align the hex nut on the hole and swiftly tap it in. It should seat flush. The inside hex nuts don't need glue before you seat them as they are being pulled to the inside by the bolts. Because of the flat edges it can be hard to seat and glue may cause it to get stuck at an improper angle. If the angle is wrong thread a bolt in and use it to align the angle. After all hex nuts are seated add another bead of super glue around the edges to make sure they aren’t going to go anywhere.
After that, follow the same process with inserting the motors, you are going to need to orient the motor in such a way that each of the screws will be seated flush with the associated hole.
Once you connect the motors, you should be able to connect the ESCS to the motors. essentially the center wire needs to go in the middle of the ESC as it is the power wire. Anything else can be put in as you want, as the other two wires once connected, will just affect orientation of the spin.
Once that is there, you will need to connect the arms to the body. You should follow the same process that we had before with the arms and the motors. At the. The arms should be oriented in such a way that the holes will match up with one another.
After you construct the main body, it is time to solder everything up. You will need to either buy your own power distribution board, or solder up your own. I did the latter and came up with mixed results.
The one on the left (version 1) ended up short circuiting and caused a lot of smoke. The reason for this is that you need to use 12 gauge wire to distribute the power or get a certified board. The one on the left (version 2) is essentially a repetitive way of hooking them all up together, but it gets the job done.
You are also going to need to create your own adapters that will transfer the power from the power wires of the ESC to the board. You can create these by getting a string of male connecters, taking out the two inner metal prongs, You can then solder that piece to the two power wires of the ESC. Repeat this step as you continue through your project.
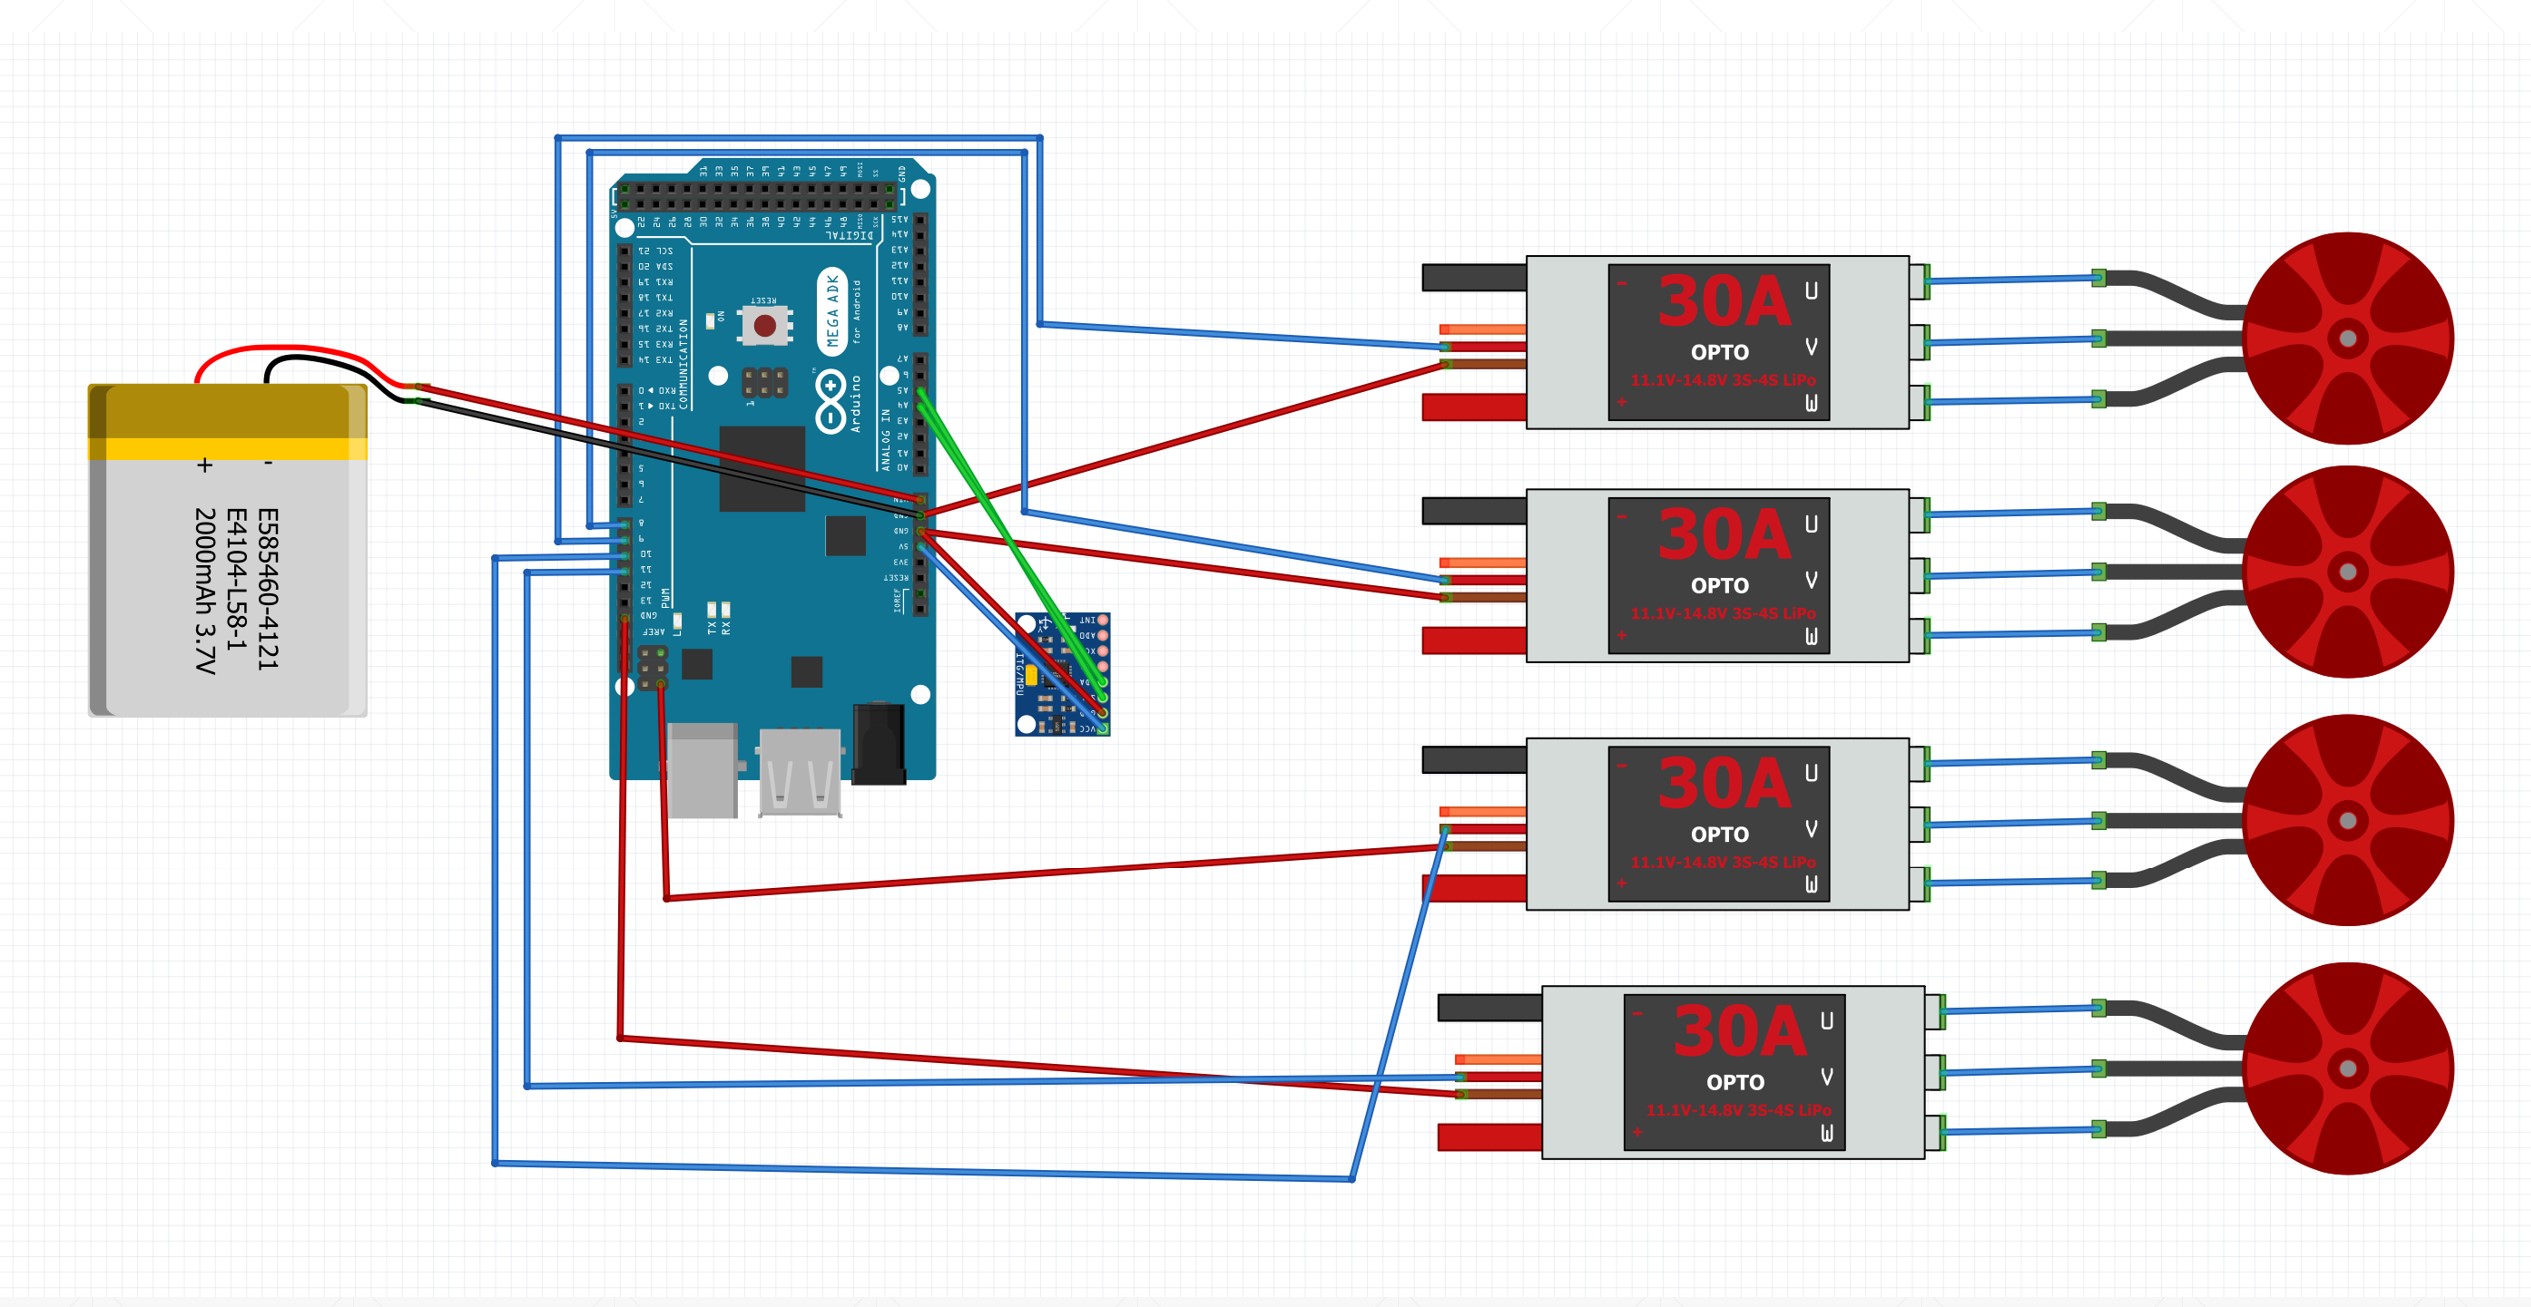
Use the code that we have in the file to calibrate the ESCS and make sure that they work. When you want to fly it, use the function 2, in order to have a decent flight. The video below shows what happens when the ESC undergoes its calibration.
https://drive.google.com/file/d/1odTSc9Oqy1D3TApi4Jy-vL1QSrQnzls8/view?usp=sharing
Once all the ESCS are connected, you can use the fritzing diagram that is included with the manual to see how to connect all of the motors.
KEEP IN MIND!!! Do not calibrate the ESCS with the propellers due to the fact that they could injure you. After they are calibrated, you should want to assemble the propellers at this time and attach them to the motor. In order to attach them correctly, you must follow the procedure that is designated with your propeller and/or motor. It should often involve the use of the Allen wrench that will screw the nozzle down until the propeller moves with the motor itself. DO NOT TURN ON if the motor moves separately of the axle.
Check here for the github link with codes and CAD files https://github.com/Damian-Gsource/ENGI301
Arduino Motor Drone Fritzing Diagram


Comments