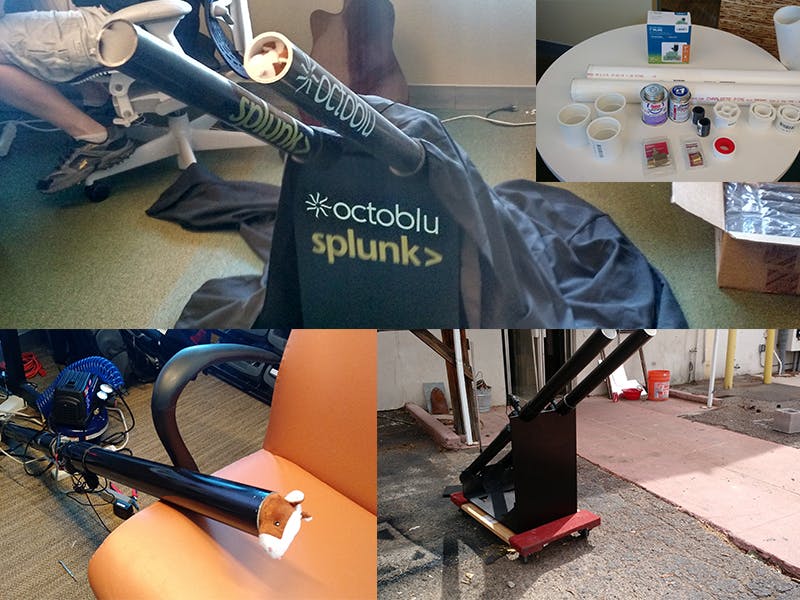
IoT Air Cannons?! Octoblu?!
This tutorial will show you how to build a PVC Air Cannon using parts you can find at Home Depot / Ace Hardware or any decent hardware store and an Octoblu compatible IoT board. Octoblu is an IoT platform built on top of a powerful multi-protocol machine to machine messaging service called Meshblu. If you already have a board that is on the following list or you have some web connected board that can use the protocol supported by Meshblu (REST, COAP, MQTT, Websockets, SOCKET-IO) then you can use that as well.
Supported Boards:
-
Particle Photon
- Raspberry Pi - Using Johnny-Five OR Pre-made code
- Arduino/Firmata Compatible Board - Johnny-Five Gateblu Plugin
- Intel Edison
- Blend-Micro
These cannons were originally built for Splunk Conference 2015!
Data was collected live from the audience as they shook their phones, pushed into a Splunk Instance (big data analytics) and when activity hit a certain threshold ponies were launched into the audience!
Check it out! https://twitter.com/JasonConger/status/646372098802237440
Step 1 - Gather Materials
There is a parts list at the bottom of this page that lists all the items shown as well as the components you'll need for the electronics.
Glue Pieces
For the next steps you'll be gluing the pieces together using PVC Cement and Primer.
Apply primer to one piece and cement to the other before mating them.
NOTE: Anything threaded you will wrap with teflon tape and then simply screw in until you have a nice tight seal.
ALLOW GLUE TO SET OVERNIGHT
Sprinkler Valve Attachments
On one end of each piece of 2ft PVC Pipe attach the following in order.
PVC Tube -> 2in Coupler -> Bushing w/ 1in thread -> 1in Threaded Tube (using Teflon tape)
Airtank Valve
On one end of one piece of 2ft PVC Pipe attach the following in order.
PVC Tube -> 2in Coupler -> Bushing w/ 3/8 in thread -> Needle Valve -> 1/4 in Interchange
Assemble Cannon
Screw the tank and the barrel to the sprinkler valve. Be sure to wrap the 1in threaded tube with teflon tape. Ensure a tight seal.
Electronics
Wire the relay to the sprinkler valve to connect one of its leads to the power supply's positive lead. The following diagram illustrates all the connections.
I used a readily available Relay module/breakout. It simplifies the wiring and makes it easy to swap boards.
After wiring the relay, you can choose to use any of the supported boards (listed at the beginning with links to tutorials) to trigger the relay. Simply connect the digital input (marked "s" for signal) to a digital output on your board.
In an Octoblu flow, trigger your relay to digitalWrite High(1) and then digitalWrite Low(0) after a half second delay. This should open and then immediately close the sprinkler valve.
Filling the Tank
NOTE! Please use CAUTION when filling the tank.
DO NOT GO OVER 100 PSI
The tank can handle 110 PSI if sealed properly, however it is best to exercise caution!
LOAD AIR
- If you look at the base of each tank there is a quick connect for an air compressor and a control valve. Turn the control to open the valve.
- Plug in the quick connect of the air compressor.
- On the compressor there are two guages, one for the compressor tank pressure and one for the outbound (the cannon tank). If filling the compressor tank first DO NOT EXCEED 110PSI
- Turn the knob on the compressor all the way to the right (to send air out)
- Fill the cannon until at 60 <-> 100 PSI It seems to fire well at 60 but can go greater at 100.
- Close the valve on the cannon tank and turn off the compressor.


Comments
Please log in or sign up to comment.