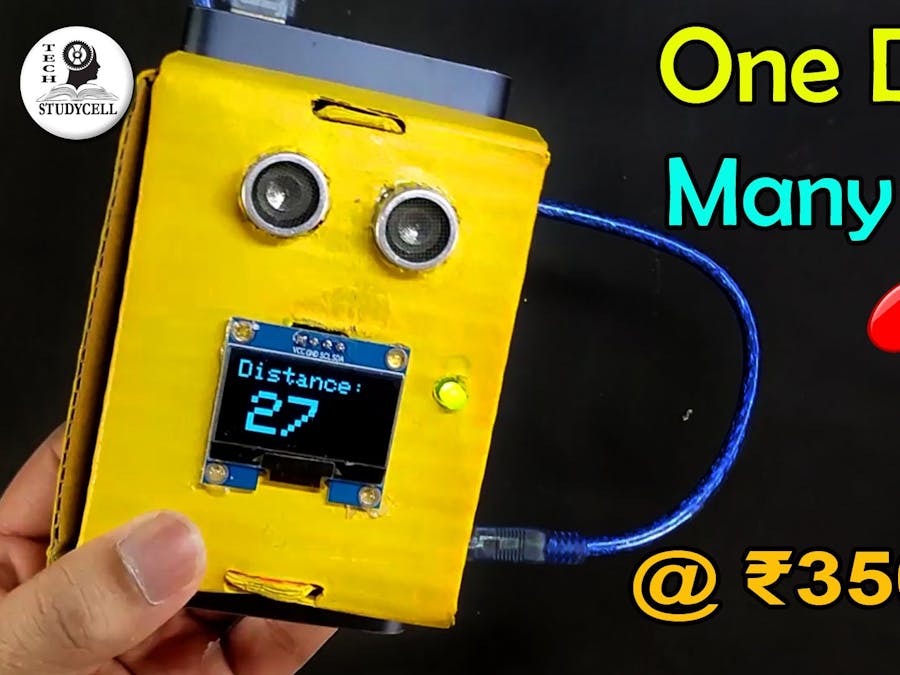
In this project, we will discuss how to measure distance using ultrasonic sensor HCSR04 and Arduino with circuit diagram and Arduino code. This HC-SR04 sensor and Arduino circuit also can be used as a touchless doorbell or distance measuring tool.
- HC SR04 Ultrasonic sensor
- Arduino Nano
- OLED Display (I2C) 1.3′ or 0.96′
- DC Buzzer
- 220-ohm resistor
- LED
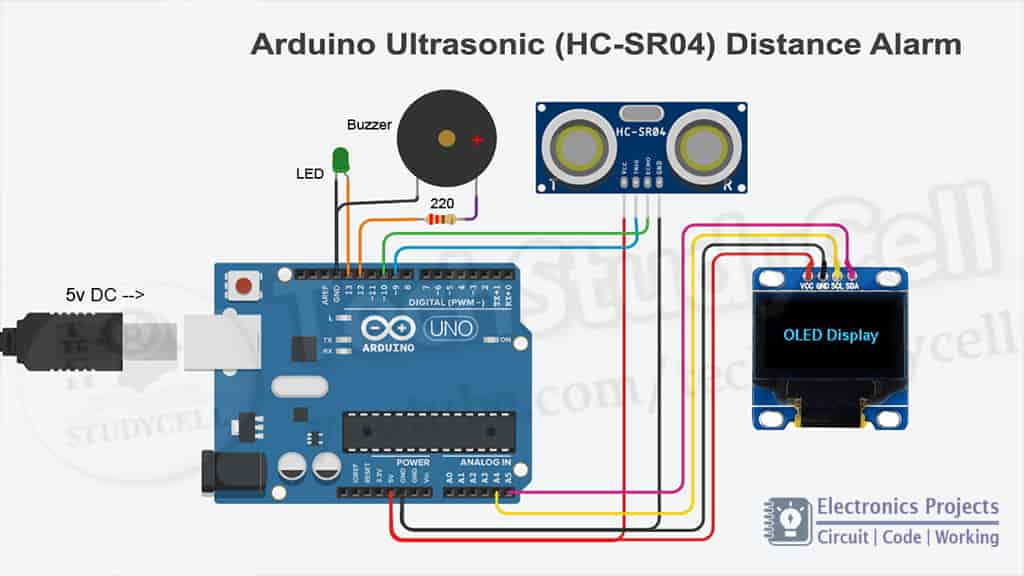
I have connected the ultrasonic sensor with Arduino as per the circuit diagram. Here for the trigger pin and echo pin of the HS-SR04 sensor I have used D9 and D10 respectively. You can also use otherdigital pins of the Arduino. For the OLED the SDA is connected with A4 pin and SCL connected with A5 pin of the Arduino.
I have fed 5v to both OLED and ultrasonic sensors from Arduino. And I have used a power bank to supply the circuit.
Ultrasonic sensor working:The working principle of the HC-SR04 ultrasonic sensor is quite simple. If emit ultrasound at 40000Hz which travels through the air. If there is any object or obstacle on the path it will bounce back to the module.Now considering the travel time and speed of the sound we can calculate the distance.
I have shared the separate Arduino sketches for 0.96″ and 1.3″ OLED (I2C) display.For the 0.96″ OLED install the following libraries
#include <SPI.h>
#include <Wire.h>
#include <Adafruit_GFX.h>
#include <Adafruit_SSD1306.h>
For the 1.3″ OLED installed the following libraries
#include <SPI.h>
#include <Wire.h>
#include <Adafruit_GFX.h>
#include <Adafruit_SH1106.h>
Click Here to download Adafruit_SH1106 library for 1.3″ OLED
// define Trigger Distance in CM
const int trigDistance = 15; //change this value from 2 to 400
You can change the trigger distance between 2 to 400 as per the requirement
Please let me know if you face any problem while programming the Arduino.
Tutorial video:Make the circuit on Breadboard for Testing
First I have made the ultrasonic sensor Arduino circuit on the breadboard for testing.
Place the circuit inside the cardboard boxAfter testing the circuit, I have placed the complete ultrasound sensor circuit in a cardboard box as shown in the picture.
Finally, the device is readyI have supplied the circuit from a power bank and fitted the device on the wall. Now, this device continuously monitors the distance, and the buzzer will start whenever the distance becomes lower than the trigger distance.
Now I have set the trigger distance 1 meter. So if anyone comes within 1 meter the buzzer will start. In this way, this device can help to maintain social distancing.
I hope, you like this ultrasonic sensor Arduino project.
Please do share your feedback on this Arduino project. Thank you for your time.


Comments