Even though it's part of my major, I don't get any hardware classes until next year, so I decided to just start learning on my own. This is the first of (hopefully) many hardware projects to come.
Originally, I just wanted to do this project by Tony DiCola. As I started reading through it though, I realized that it was more expensive than I would've liked. As such, I decided to make it more affordable. Instead of buying a $15 aluminum chassis, I constructed my own out of wood. I replaced the $22 motor hat with the $12.50 Explorer pHAT from Pimoroni. I also used a Pi Zero instead of a Pi2 or Pi3.
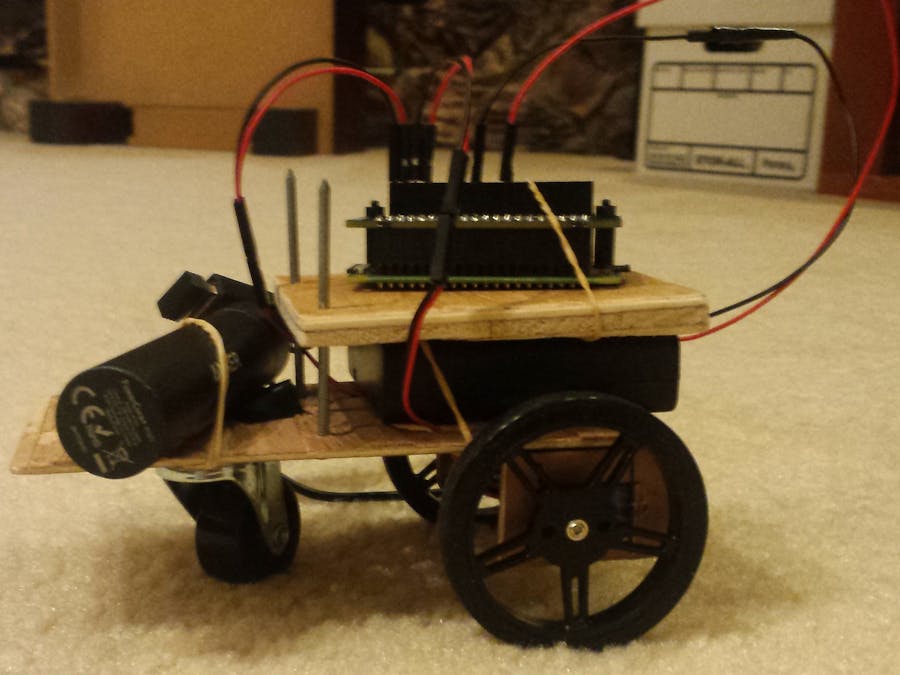
What is it:This is a small, 3-wheeled car powered with a Pi Zero and Explorer pHAT. The wheel in the front is just to provide stability and ease of turning. The two wheels in the back are connected to micro DC motors, which are powered with a portable charger or battery pack (both work).
Now for the build guide.
Part 1: Chassis ConstructionThis is the design for the bottom part of the chassis. I used the top layer of plywood, but any light and thin piece of wood will do. The dimensions are about 6x3x1/8 inches.
To create the motor housing, just take a DC motor and trace the bottom outline onto the wood that's about 1.75x1x3/8 inches. You will need two of these. You should have something that looks like the following:
Make sure your motor fits in the housing! Next step is to cut out the lines and drill the holes. Scroll saw is highly recommended for the cutting as it's precise and easy to use. You could also use some kind of multi-tool.
Your project should now look like this:
Superglue both motor housings to the underside of the bottom chassis. Then screw down the motors to their respective housings and attach the wheels to the motors. Also screw down the swivel wheel.
Now for the top part of the chassis. This time, the dimensions are 3.5x3x1/8 inches. Line it up with the two holes in the bottom chassis and drill there. Put two nails, point up, from the bottom of the bottom chassis up through the top of the top chassis.
The chassis is now complete.
Part 2: Setting up the PiInsert a micro SD card into the Pi and boot up Raspbian. If you're unsure of how to do that, this guide should help.
While it's not necessary in the beginning, I highly recommend you set up a VNC with your Pi and some other device like a laptop. This way you don't have to plug and unplug like 50 different cables into your Pi every time you want to change something.
Install the explorerhat library onto your pi. Also, clone this Github repository on your Pi. To do these, enter the following commands in the terminal:
sudo apt-get install python3-explorerhat
git clone https://github.com/dli40/simple2WD
Don't forget to update and upgrade!
sudo apt-get update
sudo apt-get dist-upgrade
That's it for the software side of things.
The last thing we need to do is connecting the Pi with the pHAT. In other words, we need to solder.
Start by soldering the 2x20 male headers onto the Pi Zero.
The explorer pHAT should've come with two female headers, a 2x20 and a 1x20. Solder the 2x20 onto the underside of the pHAT and solder the 1x20 on top of the pHAT.
Then simply line up the female 2x20 header of the pHat with the 2x20 male header on the Pi and push them together. If you have brass spacers, feel free to put them in between the Pi and the pHAT. Otherwise don't worry about it.
Our Pi hardware is now done.
Part 3: Putting it all togetherLet's start by connecting the motor wires into the explorer pHAT. Notice how the motor wires already come with female headers. Take 4 jumper wires and plug one end of each wire into the female part of each motor wire (2 for each motor). Note how the inputs on the lower right side of the pHAT say Motors. Plug the other end of the jumper wires into these slots. Put black in the negative slots and red into the positive ones.
The last thing we need to do before testing is to attach a power source. You could either use a portable USB charger or batteries in a case. You don't need both. The USB requires no additional setup. If you want to use batteries, then you need to solder two jumper wires onto the leads of the battery like this:
When you're one soldering them, make sure to seal off the wire with electrical tape.
To power the the Pi with the newly soldered batteries, plug the red wire into 5V and black wire into GND on the pHAT.
To power with USB, just plug it in to PWR IN port on Pi.
Use rubber bands to keep everything in place. I put my Pi/pHAT on top of the chassis and my USB on the inside, but you could do it the other way around.
The finished robot should look like this, but with only one of the power sources:
To test everything, log in to your Pi and run the following command:
cd simple2WD
python3 mover.py
If everything is okay, the robot will move forward for a few seconds and move backwards for a few seconds.
Thanks for reading this guide. Feedback is always appreciated :)


Comments
Please log in or sign up to comment.