
Hardware components | ||||||
 |
| × | 1 | |||
 |
| × | 1 | |||
Software apps and online services | ||||||
 |
| |||||
Time to cast all your worries about the safety of your home, your workplace, and any of your other go-to place to chill, away! Presenting to you the DIY Password-Based Door Lock! A simple yet effective means to safeguard your home and office by preventing others from entering your room without the correct password. Lie back and relax for your abode and workplace are now protected from attempted break-ins with this easy-to-make DIY security mechanism.
Want to know how to make one for yourself? Then jump aboard!
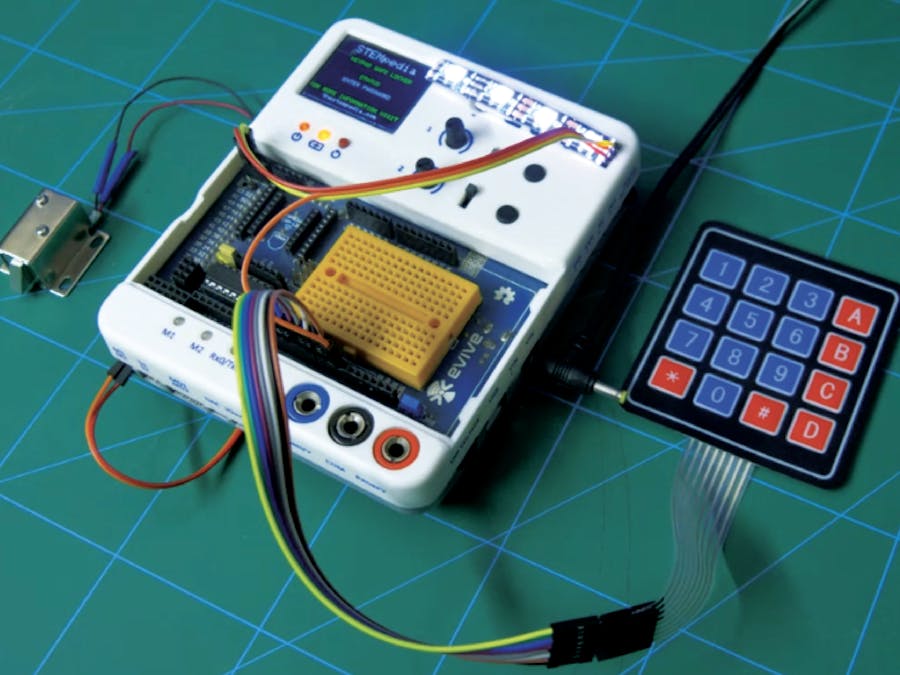
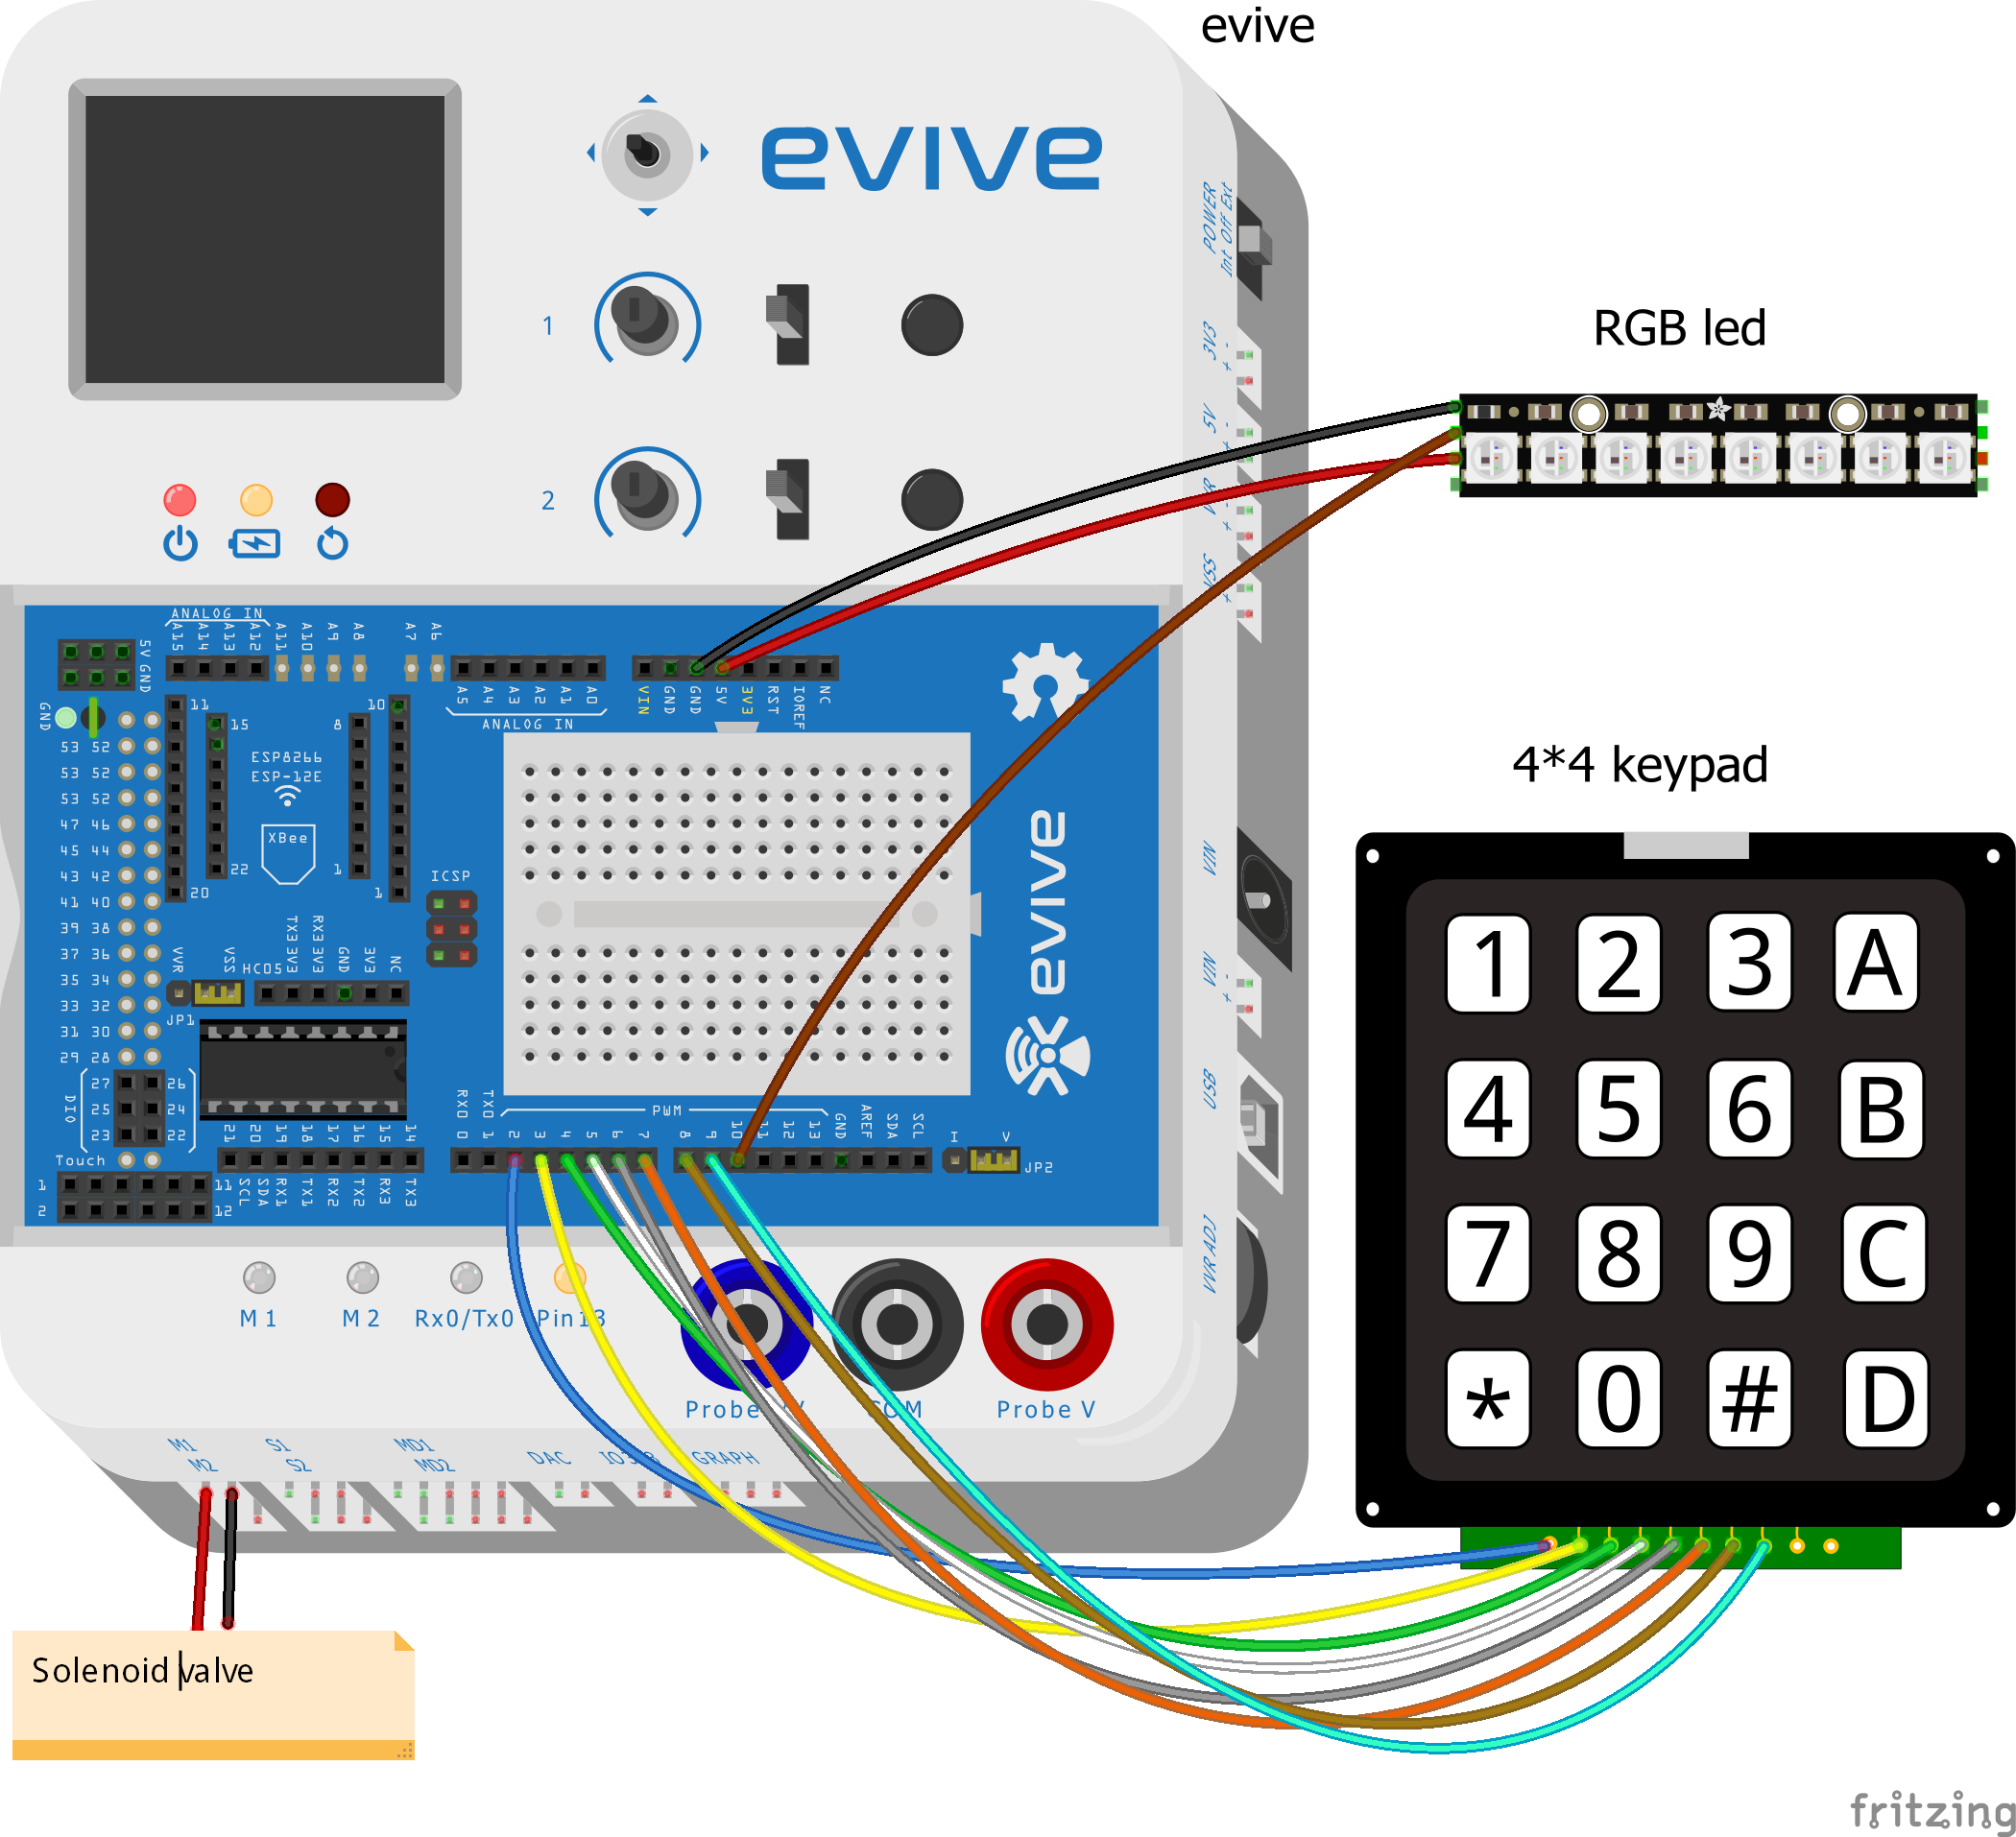
Step 1: Things You'll Need- evive
- 4x4 Keypad
- Solenoid Lock
- 12C 2A DC Adapter
- Multi Colour RGB Lights
- Male to Female Jumper Cable 20cm
Most of the electrical components mentioned above can be found in evive IoT Kit. Many Projects can be made with the help of that Kit. Also, many are even listed on Hackster.
Step 2: The ApplicationYou might have noticed the password protected safe or doors everywhere you go. We are using it with the door. We placed a keypad on the frame of the door.
And have added the solenoid lock at the edge.
The other one you can try is with the electronic safe. We have already made one with the fingerprint sensor. The making of the same can be foundhere.
Step 3: The ConnectionsWe are going to connect the Keypad to evive.
We need to connect the Solenoid to Motor Channel 1 on evive.
Add Neopixel Strip and connect it to evive.
The Neopixel that we have installed shows the working status of the keypad lock system.
We have secured the door with a 4 digit code. This code can be set by you from the code.
We have coded the RGB Strip such that the number of lights on the RGB Strip indicates the number of digits of code entered.
The display shows “ENTER PASSWORD”.
If the entered code is WRONG, then the RGB will turn BLUE and the screen shows “ACCESS DENIED”.
And you won’t be able to open the door. But if the code is CORRECT, the RGB will turn GREEN and the screen shows “ACCESS GRANTED”.
Finally, you can now enter through the door.
Once you get the passcode correct, the signal via Motor Channel M1 is sent to solenoid where the magnet attracts the magnets of the slot of the lock. Thus, opening the door.
Step 5: Final StepHere, the Arduino Code will be uploaded to evive for performing the above actions.
You can download the Arduino Code and the evive library from the code section below:
To know more about Arduino, visit: https://thestempedia.com/tutorials/arduino-ide/
Thus, we can now successfully install our own Password Protected Door Locking System.
For more detailed Instruction visit: https://thestempedia.com/project/diy-pass...
Step 6: ConclusionWith this, the DIY Password-Based Door Lock is ready to make you laugh as the burglars cry! Time to leave your worries behind!
To explore more projects, visit: http://thestempedia.com/projects


Comments