The light sequencer is a very basic and fun lighting system that anyone can make and code. Also the code can be changed so you can design your own unique pattern of lights.
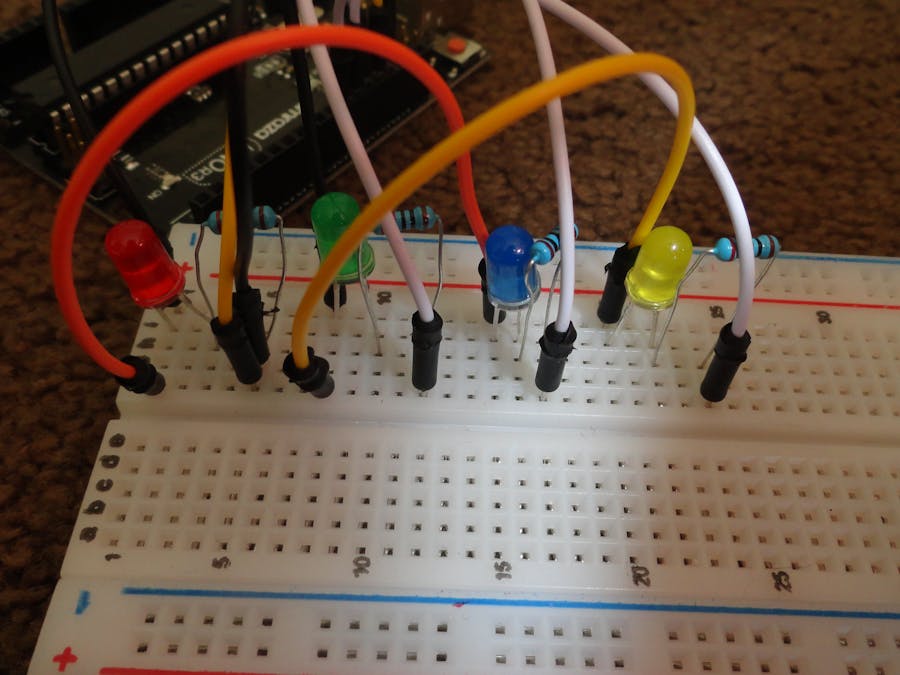
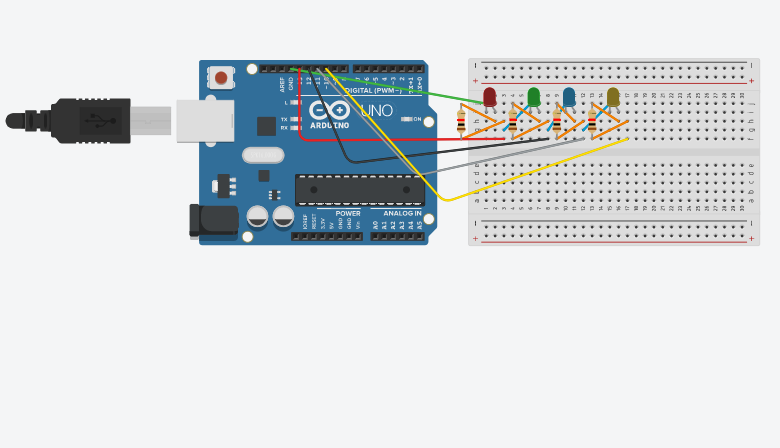
InstructionsStep 1 First take your Arduino and breadboard, take a small jumper wire and plug it on ground on the Arduino and the first hole on the bread board. When finished take an LED and plug its long leg right underneath the wire. Then take a 220 ohm resistor and plug it under the short leg of the LED. Take another short jumper wire and and plug it under the resistor and connect that to pin number 13.
Step 2Take another jumper wire and plug it in between the resistor and the yellow wire. Take that wire and put it in a new row. Do the same things as step one except this time have the short leg of the wire under the one in the new row and in the end put the end wire in pin hole 12.
Step 3 Take another wire and put it on under the very first wire (under the long leg of the LED) and plug it on a new row on the other side of the second LED and repeat step one and connect the end wire to pin 11.
Step 4Take another jumper wire and plug it under the second LED. repeat step one again and plug the last wire to port 10 on the Arduino. Download the program and the finished product should look like below:
Thanks for checking out my project please leave a like!


_ztBMuBhMHo.jpg?auto=compress%2Cformat&w=48&h=48&fit=fill&bg=ffffff)


Comments