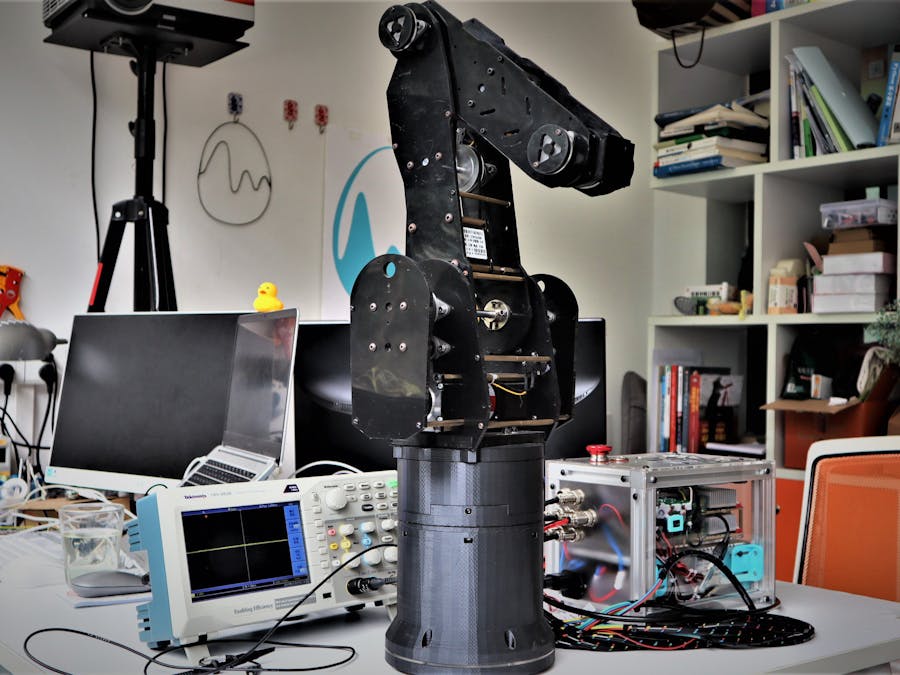
Abot is being created to help robotic enthusiasts, makers, students to build a scalable robotic arm by themselves in a affordable, easy and fun way.
He's a big guy about 1 meter tall, 6~7 kg weight.
> Abot is a great project for you to learn about multiple disciplines within robotic arm.
> By doing this project, you can grow your own skill set such as programming, electronic circuit design, machine design and even the algorithm of robotic control.
> Abot is totally open-source including ROS source code, STM32 source code, Qt source code.
Why did I created this robotic arm?
It was 2014, when I was a junior three student. That's my first time to watch the Iron Man. I was attracted by a scene in the movie.
From then on, I always dream about create my own robotic arm.
I know it sounds silly, and I totally have not ideas about how to make at that time.
The story about this project.
When I was in high school in 2017, I began trying to design my first robotic arm. I have design about 10 versions of mechanical structure. But they were still not good enough for production.
I didn't design the first version of the robotic arm drawing for production until March 2018.
I used 5 mm nylon board to make the body of my robotic arm, and designed a bottom for it. Most of the bottom parts are 3d printing parts.
In order to reduce the weight of robotic arm body, I designed a synchronization wheel reducer system for it. The synchronization wheels I used is 2GT synchronization wheel. 2GT synchronization wheel usually used in 3d printer.
After finished the mechanical structure, I began designing the electronic circuit and cost me about 2 days.
The whole robot system is consist of upper computer or upper computer software and lower computer system. I used PC as the upper computer. The lower computer system consist of 5 STM32 microcontrollers. And I used STM32F103C8T6 to be the main controller of my lower computer control system. Controllers use CAN bus to communicate and work in master-slave mode. There are one master and 4 slaves.
The electronic circuit of master and slaves are totally same. The only different between them are their program.
I used USB port to connect the CAN bus, so I also designed a USB hub to connect all the PCB broads.
You can get all the code from my github repositories.
Program of STM32:
Master using serial port to communicate with the upper computer or upper computer software. All the motion information is come from the upper computer or upper computer software. While Master receive valid motion information it will distribute the information to slaves by CAN bus immediately.
Slaves using CAN bus to communicate with the Master, every Slave have its distinctive ID, Master send information to all the Slave in the form of broadcasting. Slaves use its ID to filter out the useful information for itself. Then Slave use the information to control Abot's joint by driving the stepper motor.
Programing environmentIDE-Version: uVision V5.25.2.0
Hardware requirement:
- STM32 with medium capacity
- At least having one CAN (you can reference the official website of STM32)
- CAN transceiver (like tja1050)
ROS programming:
I used my PC to be the upper computer which runs inverse kinematics solution and trajectory planning.
To finish that job, ROS will be a big help!
Using MoveIt in ROS, you can finish inverse kinematics solution and trajectory planning without a great number...
STM32-for-Abot
ROS-for-Abot
Abot-controller-v0.1
My Chinese Blog


Comments
Please log in or sign up to comment.