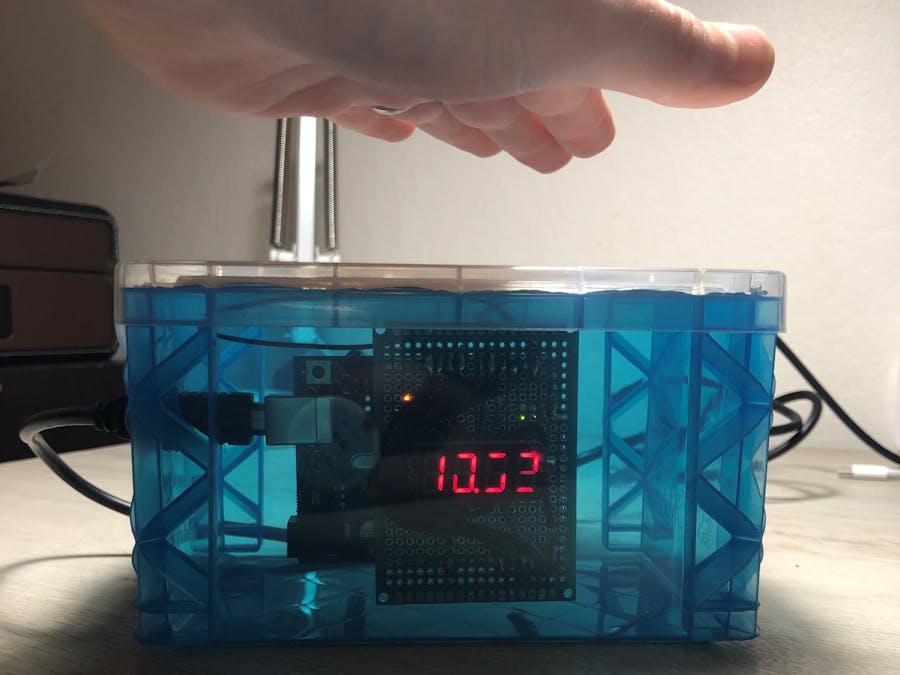
This project is inspired by the covid-19 outbreak of 2020. There are a plethora of countdown timers out there, and I thought I'd throw my hat in the ring as well. This countdown timer utilizes a 4x6 inch rectangle of aluminum foil as a capacitive proximity sensor to sense the wave of a hand to trigger a 20 second countdown timer.
To build the touchlessTimer, collect materials in the BOM.
BOM:
- 1 Arduino Uno
- 1 Solderless Breadboard
- 1 3461AS 4 character 7 segment display
- 4 220Ω Resistors
- 4 1MΩ Resistors
- 16 Jumper Wires
- 1 4" x 6" piece of aluminum foil
- 2 1" strips of scotch, electrical, or tap
Assembly Steps:
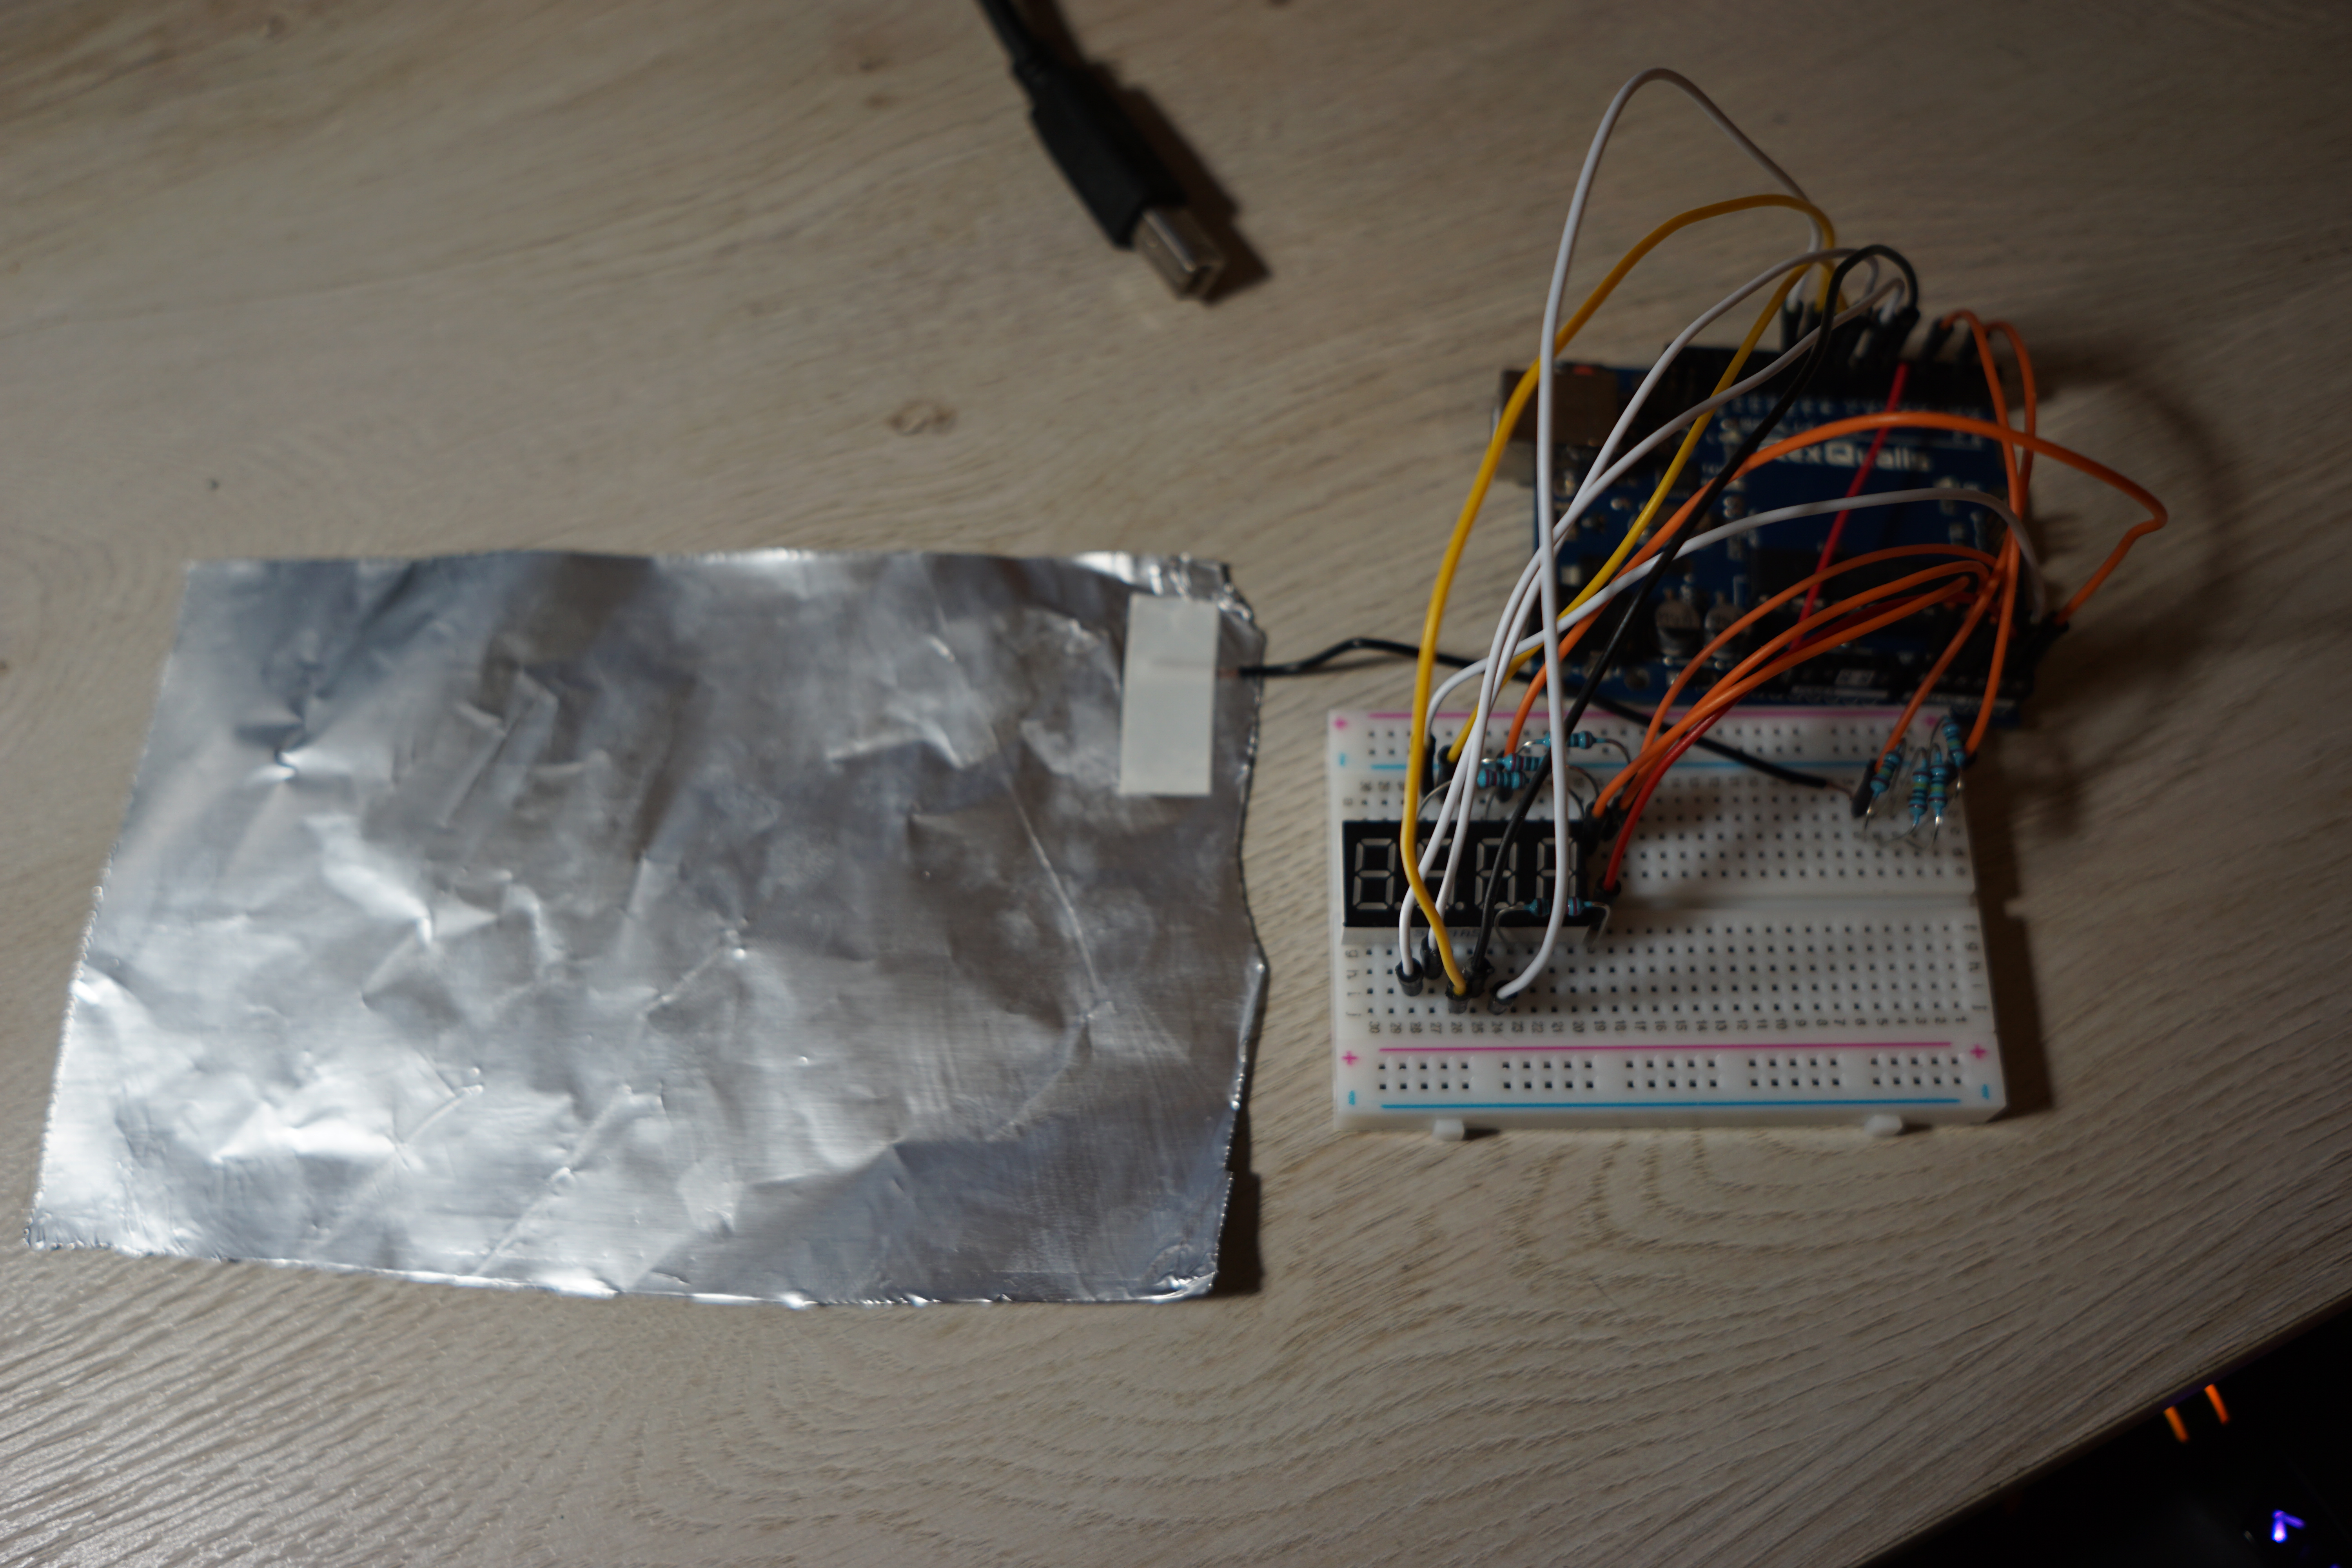
- Cut out a 4"x6" sheet of aluminum foil
- Tape 1 end of a jumper wire to the aluminum foil sheet. (we'll connect the other end to the breadboard later)
- Install the seven segment display onto the breadboard. (I chose the left-hand side of the breadboard to allow room for placing the resistors later. Make sure to orient the seven segment display with the decimal points at the bottom, and make sure the two rows of pins straddle the middle channel of the breadboard so each pin has it's own row on breadboard.)
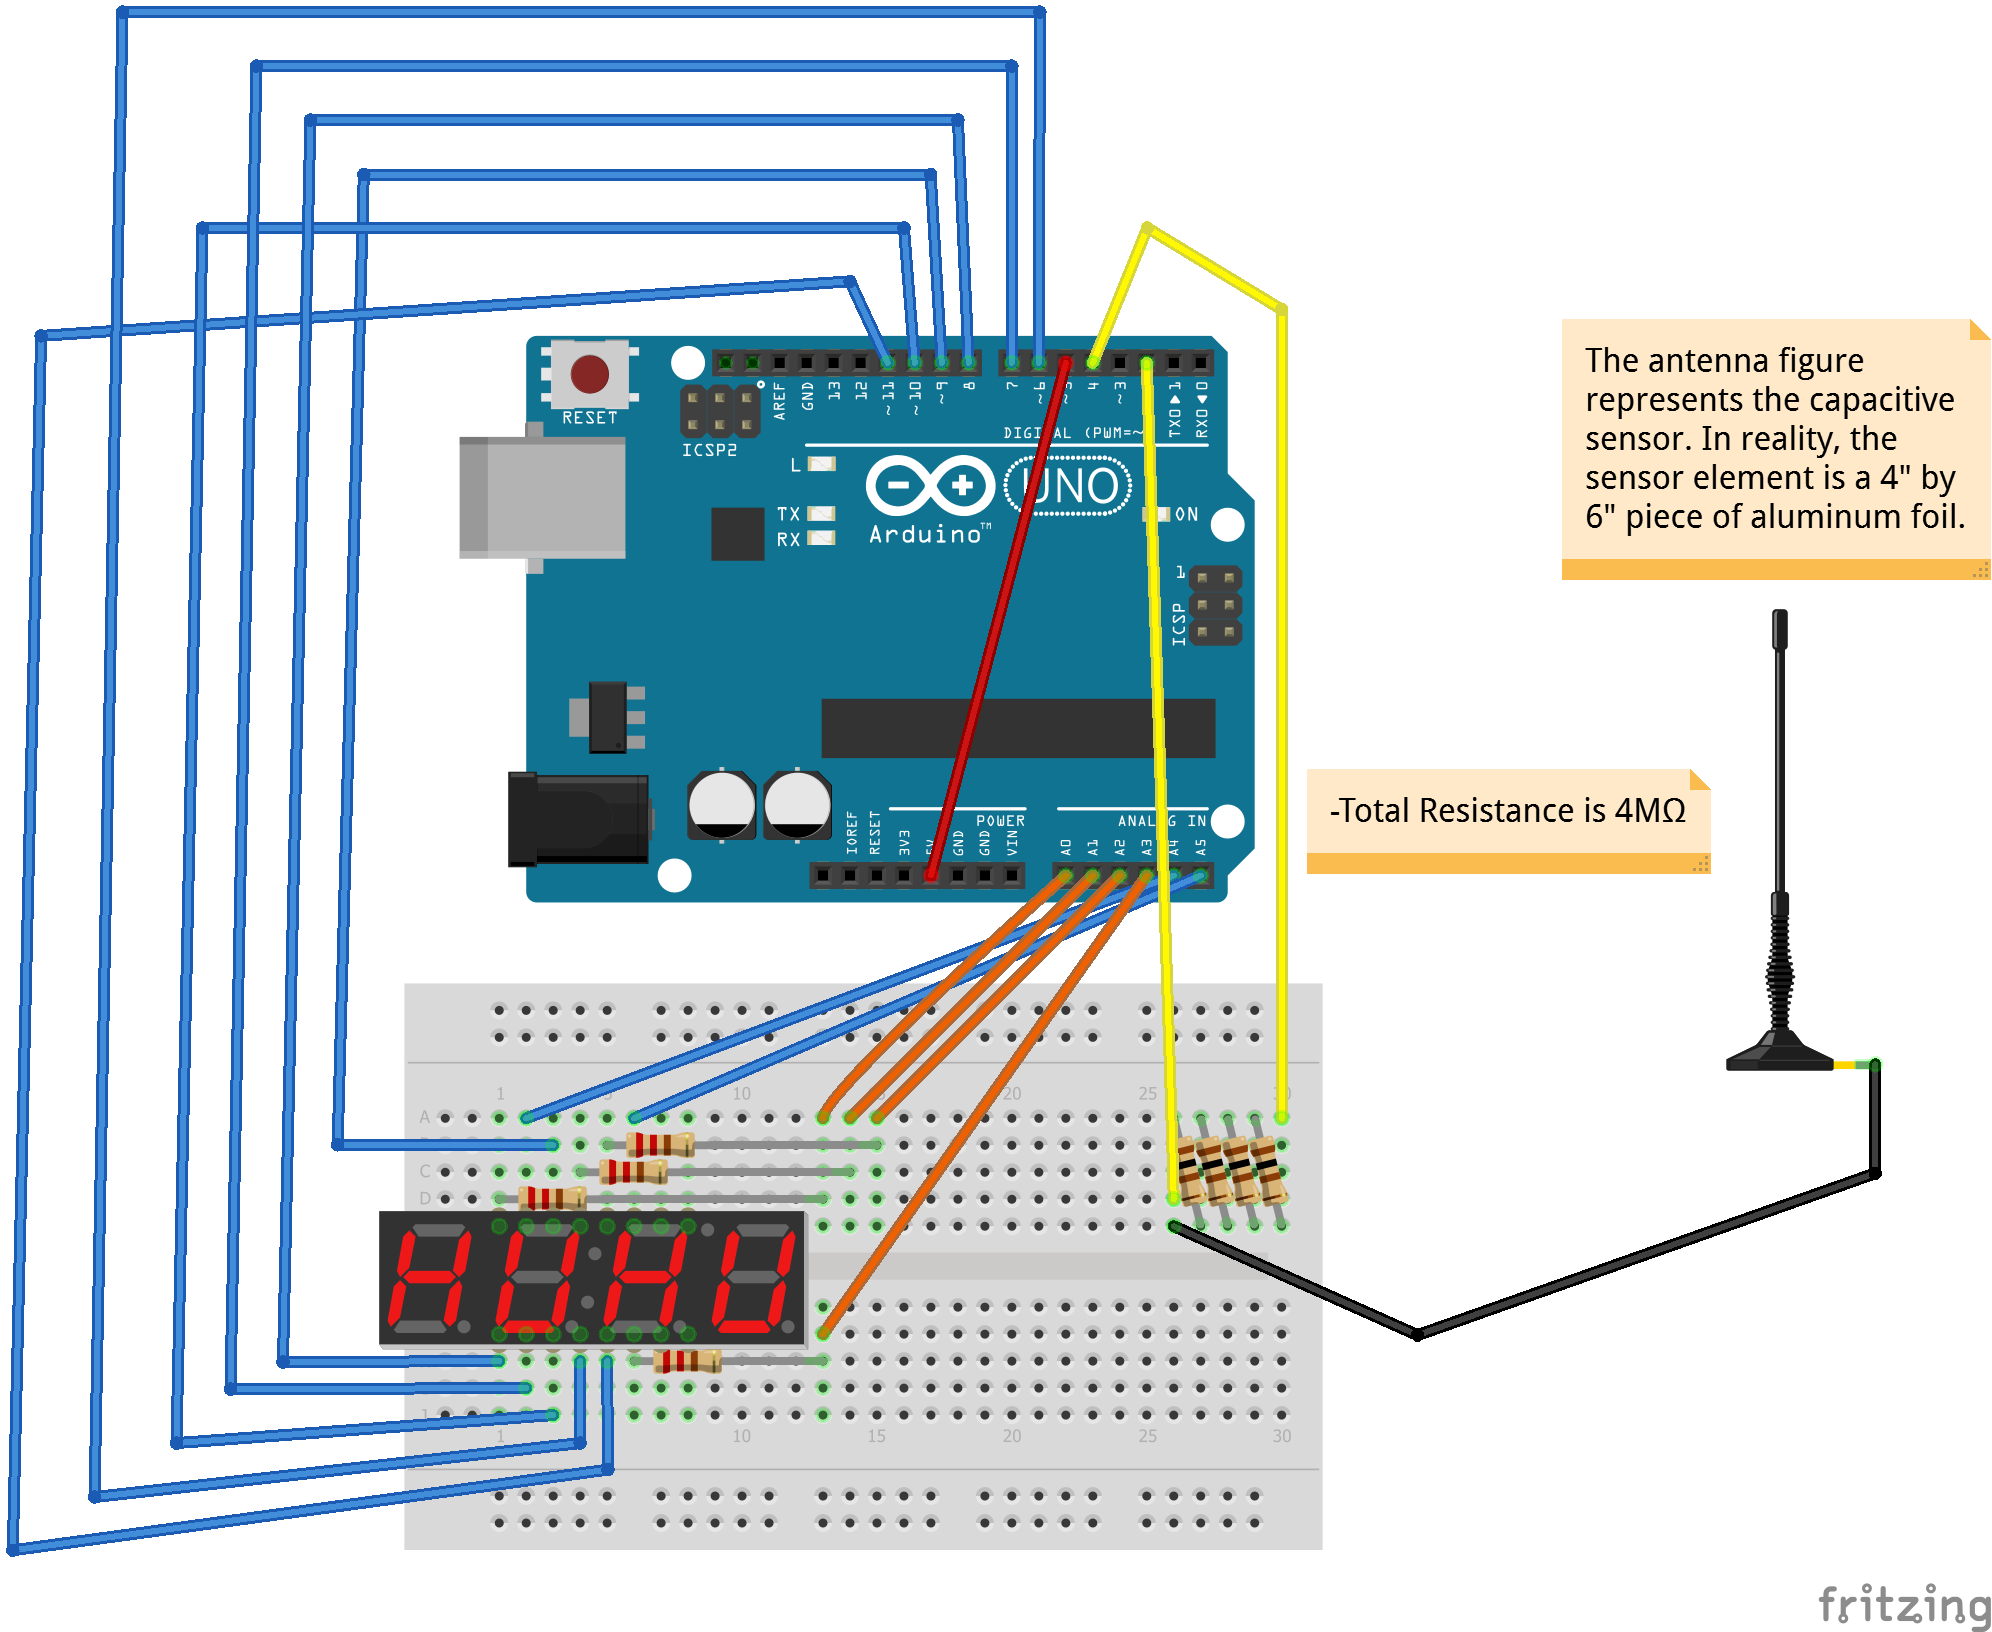
- Wire the seven segment display according to the wiring diagram. Note the 220Ω resistors are for wiring the seven segment display, and the 1 MΩ resistors are for the capacitive sensor.
- Connect the 4 1MΩ resistors in series on the breadboard. If you have larger value resistors availalbe, it is okay to use those instead of the multiple smaller resistors. 1MΩ is the largest value I had on hand. We just want to make a resistance that is at least 4MΩ, and not higher than 10MΩ.
- Connect the series resistors to the uno like is shown in the circuit diagram.
- On the pin 2 side of the series resistors, connect the jumper wire that is coming off the aluminum foil.
- connect the jumper wire between pin 5 and the RESET pin of the arduino.
- upload the code to the Arduino and test your countdown timer!


_ztBMuBhMHo.jpg?auto=compress%2Cformat&w=48&h=48&fit=fill&bg=ffffff)


Comments
Please log in or sign up to comment.