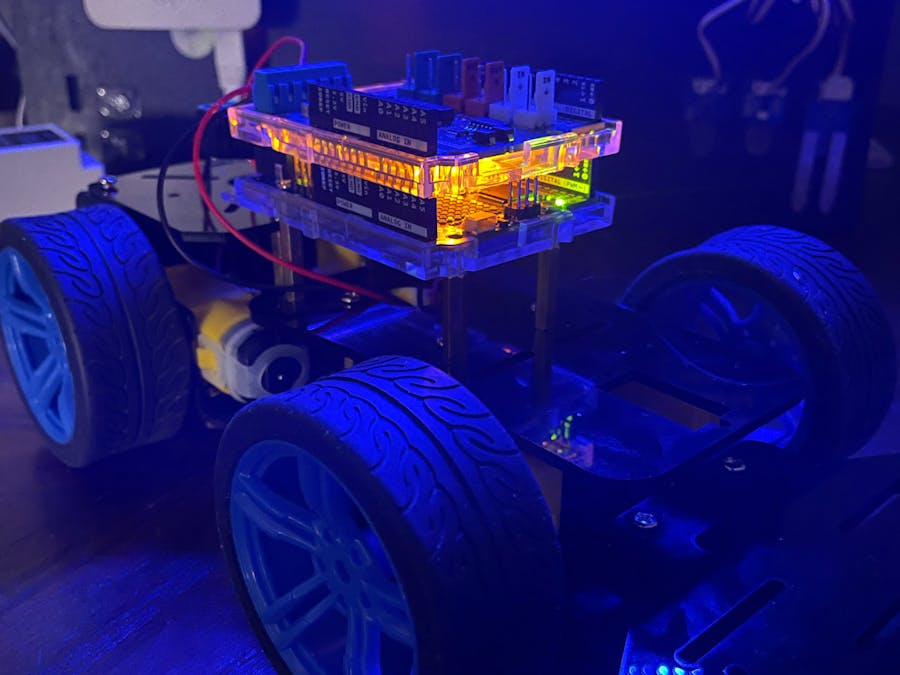
In this guide I'll show you how to quickly put together a remote controlled robot using off-the-shelf parts and open-source software! While this guide covers the basics of driving a robot, the MQTT messaging framework used can be modified to include other components and sensors for two way communication!
If you’re unfamiliar, MQTT stands for Message Queuing Telemetry Transport. It’s a robust messaging protocol with a publish and subscriber model - using topics to define where messages are coming from or going to.
EMQX is the most feature rich, secure, and reliable MQTT broker available as both an open-source project and as a managed cloud service. This guide will be using EMQX.
Install EMQXYou have a number of options for deploying EMQX. You can install it locally or use our cloud platform to deploy a dedicated deployment.
At this time we don't have a working example for the Arduino Uno R4 WiFi that can connect using a certificate file. So you'll need to either use the dedicated cloud trial or the free EMQX Community edition.
For a local deployment using the EMQX Community edition, follow this Hackster guide.
https://www.hackster.io/virgilvox/mqtt-basics-with-the-emqx-community-edition-58f18f
For this guide I used this robot car kit. Really you can use any robot kit or chassis that is driven by 3-12v motors.
- Follow the instructions for putting together your robot.
- Mount a battery pack and insert charged batteries. (The kit I used came with the battery holder but the 18650 batteries were purchased separately).
- Mount the Arduino Uno R4 WiFi.
- Plug the Arduino Motor Shield into the Arduino Uno R4.
You only need to wire a couple of things together. You can use a barrel jack connected to the positive and negative leads of the battery holder and plug that directly into the Arduino Uno R4 or you can wire it to the terminals on the motor shield.
You then need to wire the motors to the A+/A- and B+/B- terminals on the motor shield. One motor or set of motors per side assigned to each letter. Ensure that the placement of positive and negative leads of the motors drive in the same direction based on polarity. Test this by connecting their leads directly to the power source. That way in the code forward means forward for both motors. Otherwise you'll have to adjust polarity for the motors in the code.
- Install the latest Arduino IDE.
- Install the ArduinoMqttClient and the ArduinoJson library. You can do so easily from the Library Manger.
The Arduino sketch creates a basic program that connects to your WiFi network, connects to the broker as the user created on your EMQX broker, subscribes to messages on a topic car/action and when a JSON message is received with a direction command it will set the motors to correspond and drive the robot.
- Create a blank sketch in the Arduino IDE and copythe sketch included at the bottom of this guide.
- At the top of the sketch configure your WiFi credentials, the user credentials from your EMQX broker, and the IP addressor Hostname.
- Plug the Arduino to your computer.
- In Tools > Board select the type of Arduino development board that you are using.
- In Tools > Port select the corresponding port for your Arduino.
- Click the Upload arrow.
- Once uploaded open the Serial Monitor from the Tools menu in order to monitor the device logs and view messages received.
You can test this using MQTTX, a free test client provided by EMQX.
- Plug the battery into the Arduino Uno R4
- Wait a few moments for the Arduino to connect to the broker. (You can see active connection in the EMQX dashboard)
- Connect to the broker using MQTTX or some other MQTT client.
- Publish to the topic
car/actionwith the following JSON structure using one of the commands forward, backward, left, right, or stop.
{
    "action": "forward"
}There are MQTT client libraries for every language and platform. You can easily build your own driving application or have the robot controlled by Twitch or some other service. You can follow our guide for using Node-Red with EMQX to quickly program an interface for controlling the robot without code! The applications you can create are endless. Be sure to share what you build with us!
Join Our Community!We have an amazing community of open-source contributors and users of the EMQX project and cloud service. Join in on the discussions, share your projects, or feel free to ask any questions! We'd love to hear from you!


Comments
Please log in or sign up to comment.