


Hardware components | ||||||
 |
| × | 1 | |||
Software apps and online services | ||||||
.png?auto=compress%2Cformat&w=48&h=48&fit=fill&bg=ffffff) |
| |||||
_4YUDWziWQ8.png?auto=compress%2Cformat&w=48&h=48&fit=fill&bg=ffffff) |
| |||||
I've been wanting to create my own peripheral boards to use with my Kria development kits for a while, and I though it'd be fun to see if I could use one of my Krias to design and layout the PCBs. I got the idea when I initially launched KiCad on my main PC and I remembered that a full desktop version of Ubuntu is available for the Kria SoMs, and I wondered if I could get KiCad to work in the Ubuntu desktop on the Kria.
While the K24 and K26 SoMs have the same processor and GPU specs that would impact the performance of an app like KiCad running in the user space of the OS, I decided that either my KR260 or KV260 would be the better option over my KD240 since the KR260 and KV260 both have 4GBs of RAM versus the KD240 with 2GBs. And since my KR260 is still tied up with my ever-evolving Lego Defender robot project, the Kria KV260 was the winner for this little experiment.
Update K26 Boot FirmwareSince the boot firmware on the K26 of my KV260 predated the release of the official Ubuntu 22.04 image for AMD devices, I figured it would be best to update the first before attempting to even boot the Ubuntu 22.04 desktop image on it.
I downloaded the latest boot firmware for the K26 from the Kria SOM wiki and followed the instructions for using the Boot Image Recovery Tool to upload the firmware to the QSPI flash of the KV260.
I personally think this is the easiest method for updating the boot firmware on a Kria even though "Boot Image Recovery" sounds like an intensive process. It's actually only a few steps to get to a handy web-browser GUI for programming the QSPI flash of the Kria.
With the boot firmware updated, the image file for the Ubuntu 22.04 desktop image for the Krias can be downloaded directly from Canonical's website:
Then image an SD card with your tool of choice. I'm still a balenaEtcher fan.
I went with a 32GB SD card since I wanted plenty of space for KiCad projects and extra footprint/part libraries I might want to install.
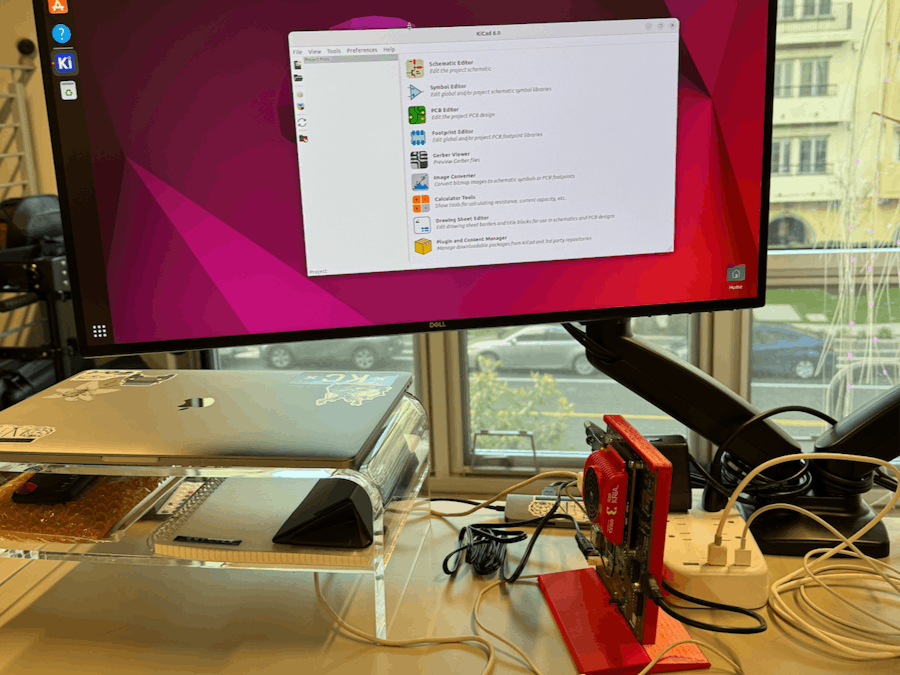
Hardware SetupI connected my KV260 to my HDMI monitor with a keyboard, mouse, and ethernet connection to my router for network access:
I do have to note that I feel like the new Ubuntu 22.04 desktop booted faster than I remembered the Ubuntu 20.04 desktop booting on my KR260, but that's probably more to do with the new boot firmware.
Either way, this full Ubuntu desktop image for the Krias is one of the most handy things that I've ended up using the most on all of my Kria development boards. It makes it possible to more easily install various third-party packages/libraries/apps like KiCad versus having to build them into a PetaLinux project by hand like I did when I created Pi OS on my Zynqberry to install Adafruit's CircuitPython.
Kria Ubuntu Environment PrepFirst things first, as I discovered during my Lego robot project, the PWM logic in the FPGA bitstream of the Kria SoM clashes with the fancontrol service in Ubuntu. So to make sure the CPU fan is running at full speed constantly to keep the K26 from overheating, the fancontrol service in Ubuntu needs to be stopped:
ubuntu@kria:~$ sudo service fancontrol stopThe Xlnx-config is command line tool needs to be installed then used to configure the system with the ZynqMP specific requirements such as the custom Xilinx gstreamer:
ubuntu@kria:~$ sudo snap install xlnx-config --classic --channel=2.x
ubuntu@kria:~$ sudo xlnx-config.sysinit
Finally, update and upgrade the system:
ubuntu@kria:~$ sudo apt update
ubuntu@kria:~$ sudo apt upgrade
And reboot the Kria to make sure all changes have taken effect.
Install KiCadWhile I could have just installed KiCad, I decided to install the entire science-electronics package so I could also try other applications I commonly use like GnuRadio, Fritzing, etc.
ubuntu@kria:~$ sudo apt-get install science-electronicsWhich installed without issue, so I was hopeful!
While a touch slow, especially on that first launch, KiCad worked flawlessly on my Kria KV260!
I just used what was available in the default library of KiCad to layout a simple common-emitter BJT circuit driving an LED.
Which of course while it isn't really useful outside of being a circuits textbook example problem, my main goal was to see how each element of KiCad performed on the Kria. I didn't expect any issues in the schematic, I was more curious about how the layout and 3D rendering tools would perform.
The layout gave me no issues and while it was not as snappy as my main PC, it was definitely useable.
The 3D rendering tool took a moment to load initially after I completed my layout; but once loaded, it worked well:
I definitely think I could bog KiCad down on the Kria quickly with complex board layouts, it's perfectly adequate for 2 - 4 layer boards for things like PMOD peripherals and whatnot.
Upload Design to Osh ParkFor bonus points, I also tested out uploading my board files from KiCad to Osh Park straight from the Kria.
Which was no surprise that it worked through Firefox:
But still a fun exercise nonetheless...
This honestly felt like an inception of sorts: using an FPGA to layout peripheral boards for said FPGA. And considering I was able to do all of this without even launching Vivado, Vitis, or PetaLinux, I'm curious how close I can get the Kria to its own standalone development machine now


_Ujn5WoVOOu.png?auto=compress%2Cformat&w=40&h=40&fit=fillmax&bg=fff&dpr=2)
Comments
Please log in or sign up to comment.