In this tutorial, we will be making a proximity detector using a Dot One and displaying our results in a clean manner using a Wia platform widget line graph.
It is often useful to monitor the distance between two items remotely. For example, this hookup tutorial could be used to:
- Detect whether a door is in an open or closed position
- Detect if a cupboard was left open
- Detect if a printer is running out of paperetc.
- Account at Wia - You will need to be logged in and / or registered into an account at Wia
- Wia Button Module - Buy Yours Here
- Wia Dot One - Buy Yours Here
- Micro Usb Cable - Buy Yours Here
- Jumper Wires
- Proximity Sensor
- Create an account at Wia if you haven’t already - refer to this tutorial to get started with Wia here.
- Set up your Dot OneYou will need to have set up a Dot One and you can find the tutorial on how to do that Here.
Once you have finished the tutorials above and learned all about the Dot One, you are all set to do this tutorial below.
Create a Code Project- Note: This portion requires a decent background in coding, specifically in C++ in order to understand how the Dot One and TFT Screen work to print the prices
- Below is the code for this project which you can follow by reading the comments attached to the side of the code.
- Feel free to try and rewrite this code yourself so you can better understand the device! Some advice if you are having trouble is to make a temporary Block Project and take note of what code is pasted into the preview window when you drag certain blocks over!
 #include <WiFi.h>
 #include <Wia.h>
 #include <Arduino.h>

const int trigPin = 25;
const int echoPin = 27;
long duration;
int distance;
Wia wiaClient = Wia();

void setup() {
  WiFi.begin();
  pinMode(trigPin, OUTPUT);
  pinMode(echoPin, INPUT)
  delay(2500);
}

void loop() {
    digitalWrite(trigPin, LOW);
    delayMicroseconds(2);
    digitalWrite(trigPin, HIGH);
    delayMicroseconds(10);
    digitalWrite(trigPin, LOW);
    duration = pulseIn(echoPin, HIGH);
    distance= duration*0.034/2;
    wiaClient.createEvent("Proximity (cm)",distance);
    delay(3000);
}
You can then upload the above code to your Dot One by clicking the rocket icon and the process of detecting proximity of an object will then begin. If you would like to understand more of what is happening:
- The HC-SR04 device sends an ultrasound “Trigger”
- The sound bounces of an object in front of the device
- When the wave returns to the device, we calculate the distance it has travelled based on the time it took to return to the sensor.
Now that we have successfully wrote the software for this tutorial, it’s time to wire up the hardware to make the proximity detector behave as required.
Wiring ConnectionsUsing 4 jumper wires connect the Dot One to the proximity sensor as shown below:
Once the connections are made, you are ready to connect the Micro USB cable and connect the Dot One to your computer.
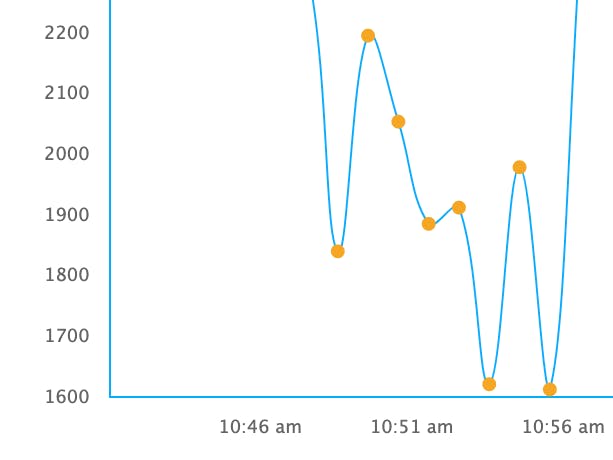
Now, that we have a load of data funnelling back into the platform the most efficient manner of reading the above data would be to set up a line graph widget so we can view all data points as they occur in a human readable way.
Viewing Proximity DataAfter the first data comes back, you will be able to view each reading from the Wia Platform - just head over to Overview(Home Icon on Left Sidebar) -> Click Add a Widget. Choose the widget Line Graph. When set up, the readings should be presented as below:
Congratulations and well done on completing the tutorial. Hope you enjoyed it!
Here’s another to keep you entertained: Get the beer of the day to display on your TFT screen
If you are more into building and making your own electronic devices and hooking them up to the cloud, why not try out some of these tutorials:
Coffee Counter with TFT Screen and Button
Slack Toggle Presence with Wia Button Module and Dot One
or build something from our Hackster projects:


Comments
Please log in or sign up to comment.