


Hardware components | ||||||
| × | 1 | ||||
Software apps and online services | ||||||
 |
| |||||
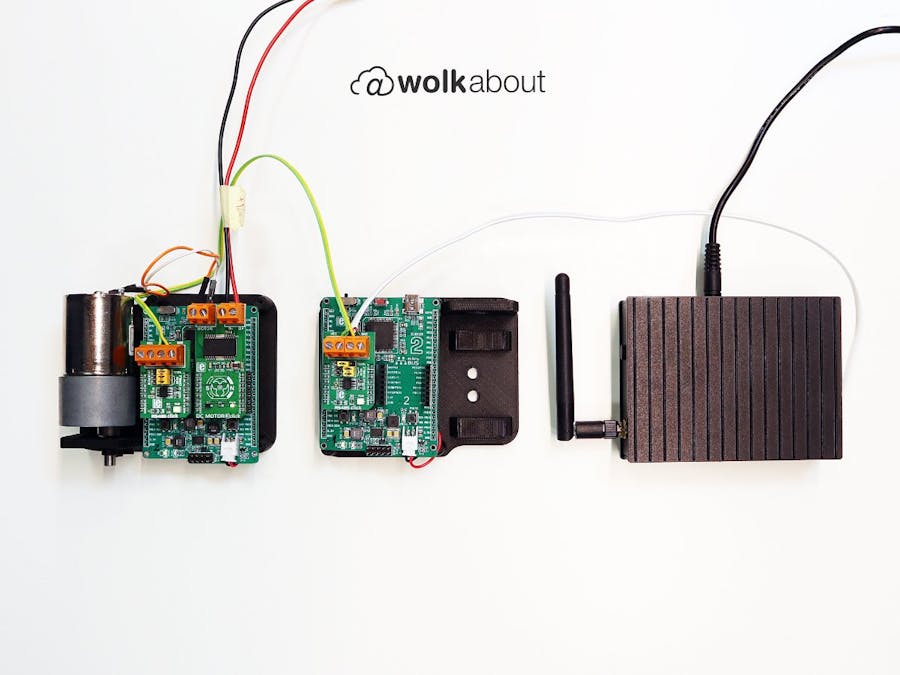
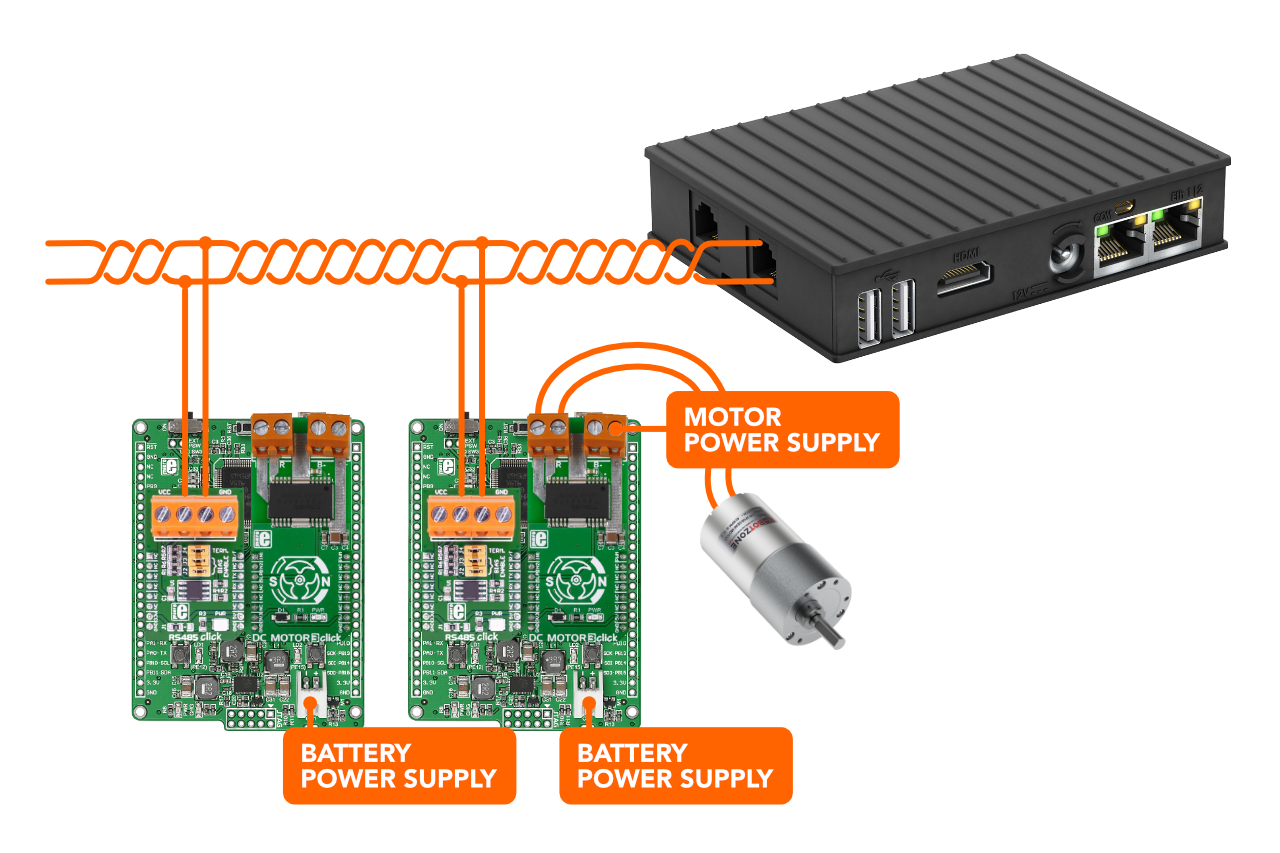
This project uses IOT-GATE_RPi’s RS485 serial port to communicate with two Modbus slave clients that each control a DC motor and modify their state from WolkAbout IoT Platform. You can use devices other than IOT-GATE RPi as the Modbus master, as well as different Modbus slave clients, provided that the communication medium remains RS485 and the master device can run WolkGateway and WolkGatewayModule-Modbus.
Connect your board according to the provided schematics.
After that, you need to access the IOT-GATE RPi either via SSH or by connecting a monitor and a keyboard to it.
Software setupThis project uses two repositories: WolkGateway and WolkGatewayModule-Modbus.
WolkGateway bridges communication between WolkAbout IoT Platform and multiple non-IP-enabled devices connected to it through modules. The modules enable communication with subordinate devices by implementing the device’s network communication protocol on one end (Modbus in this project) and parse data between the Mosquitto MQTT broker on the other end.
Start with connecting to the IOT-GATE RPi and cloning the WolkGateway repository:
git clone --recurse-submodules https://github.com/Wolkabout/WolkGateway.gitAfter that, install WolkGateway’s dependencies.
Now that the dependencies are installed, change directory into WolkGateway and run the configure.sh script. This script will prepare the build system and compile OpenSSL. Because of the limited hardware capabilities, this step will take some time (up to 10 minutes), so while waiting for this step to finish, create a gateway on WolkAbout IoT Platform.
Head over to demo.wolkabout.com and register/log in with your account. Next, switch to the Device Management tool from the application menu.
Press + and from the dropdown menu select Create device without device type.
Enter the name for the gateway and the optionally a device key.
Set the Protocol to WolkAbout MQTT Gateway, Connectivity Type to MQTT and Sub device Management to GATEWAY.
Tick the checkbox for Create Default Semantic and click Save.
A pop-up will appear with the gateway name and the key, as well as its password.After the configure.sh script finishes, change directory to WolkGatewayModule-Modbus/out/ and run make to build the application. To run the application correctly, you need to enter the device credentials into gatewayConfiguration.json:
{
   "name": "",
   "key": "",
   "password": "",
Before running the gateway application, make sure that Mosquitto is running by invoking
sudo systemctl start mosquitto
Then start the application with
./WolkGatewayApp gatewayConfiguration.json
After a couple of seconds, the gateway will connect to the Platform and perform its initial configuration. Now, it is possible to register devices through the gateway.
For easier use, create a service that will run the gateway by creating a new file wolk_gateway.service and copy the content from the project’s attachments. Make changes to the username and the path if necessary. Then move it and enable it with the following commands:
sudo mv wolk_gateway.service /lib/systemd/system/wolk_gateway.service
sudo chmod 644 /lib/systemd/system/wolk_gateway.service
sudo systemctl daemon-reload
sudo systemctl enable wolk_gateway.service
sudo systemctl start wolk_gateway.service
To check the state of the service use
sudo systemctl status wolk_gateway.service, and also use restart, stop, disable if needed.
All of this completes the setup for WolkGateway repository resulting in a service that will route the data from the Modbus module to WolkAbout IoT Platform.
Change directory to home and clone the WolkGatewayModule-Modbus repository:
git clone --recurse-submodules https://github.com/Wolkabout/WolkGatewayModule-Modbus.gitAfter that, install WolkGatewayModule-Modbus’s dependencies
Then change directory into WolkGatewayModule-Modbus and run the configure.sh script. This time the configure.sh script will take considerably less time to finish as OpenSSL will already be compiled and cached. Next, change the directory to WolkGatewayModule-Modbus/out/ and run make.
Now that you have built the project, the next step is to edit the configuration files needed to run this module correctly: devicesConfiguration.json and moduleConfiguration.json
moduleConfiguration.json holds information related to Modbus connectivity, while devicesConfiguration.json contains the details of Modbus registers and how to interpret them.
After configuring these files and running the WolkGateway application, you can start the Modbus module with:
./modbusModule modbusConfiguration.json devicesConfiguration.jsonStarting the Modbus module tries to poll the registers of the slave devices and sends a device registration request based on devicesConfiguration.json through WolkGateway to WolkAbout IoT Platform.
By following the same steps as for wolk_gateway.service, create a service for the Modbus module using the modbus_module.service file from the project’s attachments.
Now that the Modbus module has been registered on the Platform and the register data is being sent to the Platform, you need a way to display it and send new values and have them written into the Modbus registers of your slave devices. To achieve this, first, create a Dashboard.
Then start adding widgets that fit your slave device, Actuator widgets for coils and holding registers (read/write), Reading widgets for input contacts and input registers (read-only).
You can now send data from the Platform to the slave device.
Note: There may be slight differences between the production version of WolkAbout IoT Platform and the Tutorial
You can view and change the state of your Modbus registers from the cloud using WolkAbout IoT Platform. This solution can be expanded by using Reports to show how values of your read-only registers have changed over time, as well as by using the Rule Engine to give you notifications or change the state of read/write registers.
For more information about WolkAbout IoT Platform's features, visit our User Guides page.


Comments
Please log in or sign up to comment.