First of all, I wish I had a Amazon IoT Button. I think solution as simple as that is useful to people in their day to day life. That's what IoT should be like - anyone can use; it's not another technology people has to deal with, but something can simplify and enrich people's life.
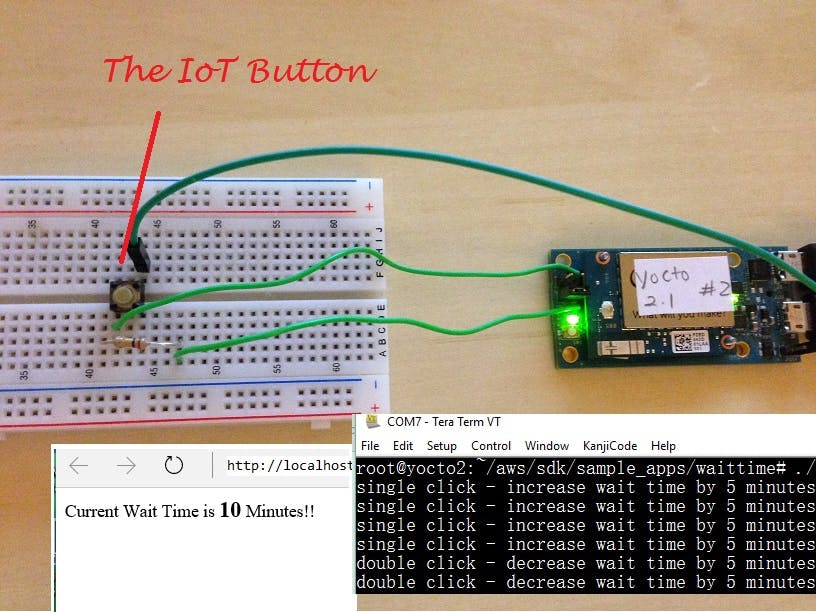
For this project, I used a Intel Edison mini board and a button to emulate the IoT button. But this can be done with almost any hardware with connectivity.
Now the project.. Going to a restaurant just to find out we have to wait 20, 30 minutes is a common issue. Worse if you have to rush back to work after lunch for a meeting. It'll be so much better we know how long is the wait for each restaurant before we get into the restaurant. This project envisions a simple way for the restaurant to provide that information to its valued customers. The server simply press the IoT Button to increase or decrease the estimated wait time by a preset amount depending how many customers are waiting. For example, press the button once to increase the wait time by 5 minutes, or a double click to reduce the time by 5 minutes. The website of the restaurant will poll the database to display the wait time on its homepage. An app can do that too. There're many ways user can get that information once it's there.
The demo system looks like the diagram below:
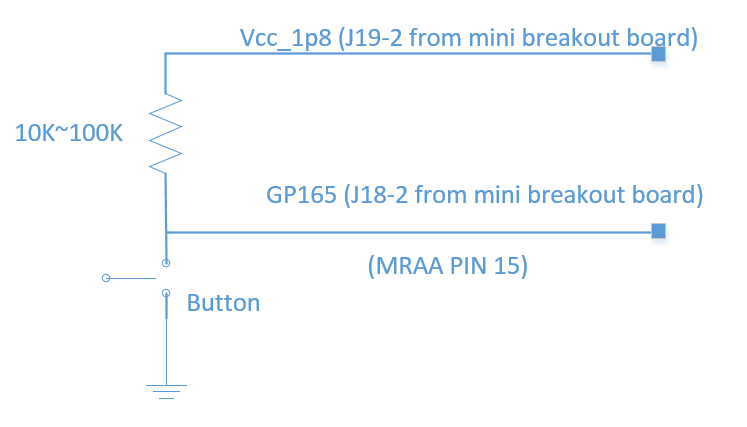
To implement this in hardware, i used Intel Edison. A button is connected to the GPIO pin. Button interrupt is setup to detect if it's a single click or double click. If it's single click, send a MQTT message to increase the wait time. If it's a double click, send a message to decrease wait time.
The code runs on Edison is based on Intel's iot devkit and AWS IoT Embedded C SDK. The Intel devkit provides GPIO functions in MRAA library; and the embedded C SDK is chosen so this can be easily ported to other platforms.
Coming into this, I wasn't very familiar with AWS DynamoDB, AWS Lambda, and AWS IoT. The Quickstart for AWS IoT was certainly helpful. But it is not exactly intuitive.
However, the web interface for the AWS console is excellent.
Starting by creating a DynamoDB and add primary key, attributes. The main attributes are 'Wait' for current wait time, and 'LastUpdate' for the timestamp.
Now create lambda function to Add/Update the data in the table. Note to minimize the scope of the demo, I'll keep using one item to update the wait time. In reality, you may add more items to the table and the client may use several items to show the trend of wait time.
Choose simple mobile backend (node.js) to create the Lambda function. The code will read the wait time in the table first, then add or subtract time based on the input to update the wait time in the table. There's some processing to make sure wait time does not become negative; and each day the wait time starts with 0. Please refer to the source code for details.
To debug the lambda code, I opened 3 browser taps to monitor Lambda code, the DynamoDB table data and the log output in the CloudWatch. I found this to be quite convenient.
Once the Lambda function works correctly, create a AWS IoT rule to trigger the Lambda function.
Optionally use MQTT.fx to test the AWS IoT triggering of the Lambda function. You can examine DynamoDB Table or Cloudwatch logs to confirm the operation.
Once this works correctly, add the code to embedded C code to send the MQTT message to trigger the update. Please refer to the source code for details.
With AWS SDK for JavaScript, web client can query the DynamoDB and show the wait time to the customers. Below is a very simple demo -
A read only AWS user Id should be created and used in the client Javascript.


_3u05Tpwasz.png?auto=compress%2Cformat&w=40&h=40&fit=fillmax&bg=fff&dpr=2)
Comments
Please log in or sign up to comment.