For my senior prom, I was determined to develop a custom LED glow up dress to light up the dance floor with. The catch was I was buried under a mountain of schoolwork the week prior, I found myself with only 4 hours to bring the dress to life. Thankfully, my friend Ayesha came to my rescue by generously sharing her beautiful constellation PCB designs. Inspired by her designs and fueled by my own fascination with space, I instantly gravitated toward a galaxy and constellation theme.
Motivated to bring this vision to life, I hastily gathered all the materials and equipment, and got ready to build!
Build Process 🛠️1. Designing a Schematic Outline
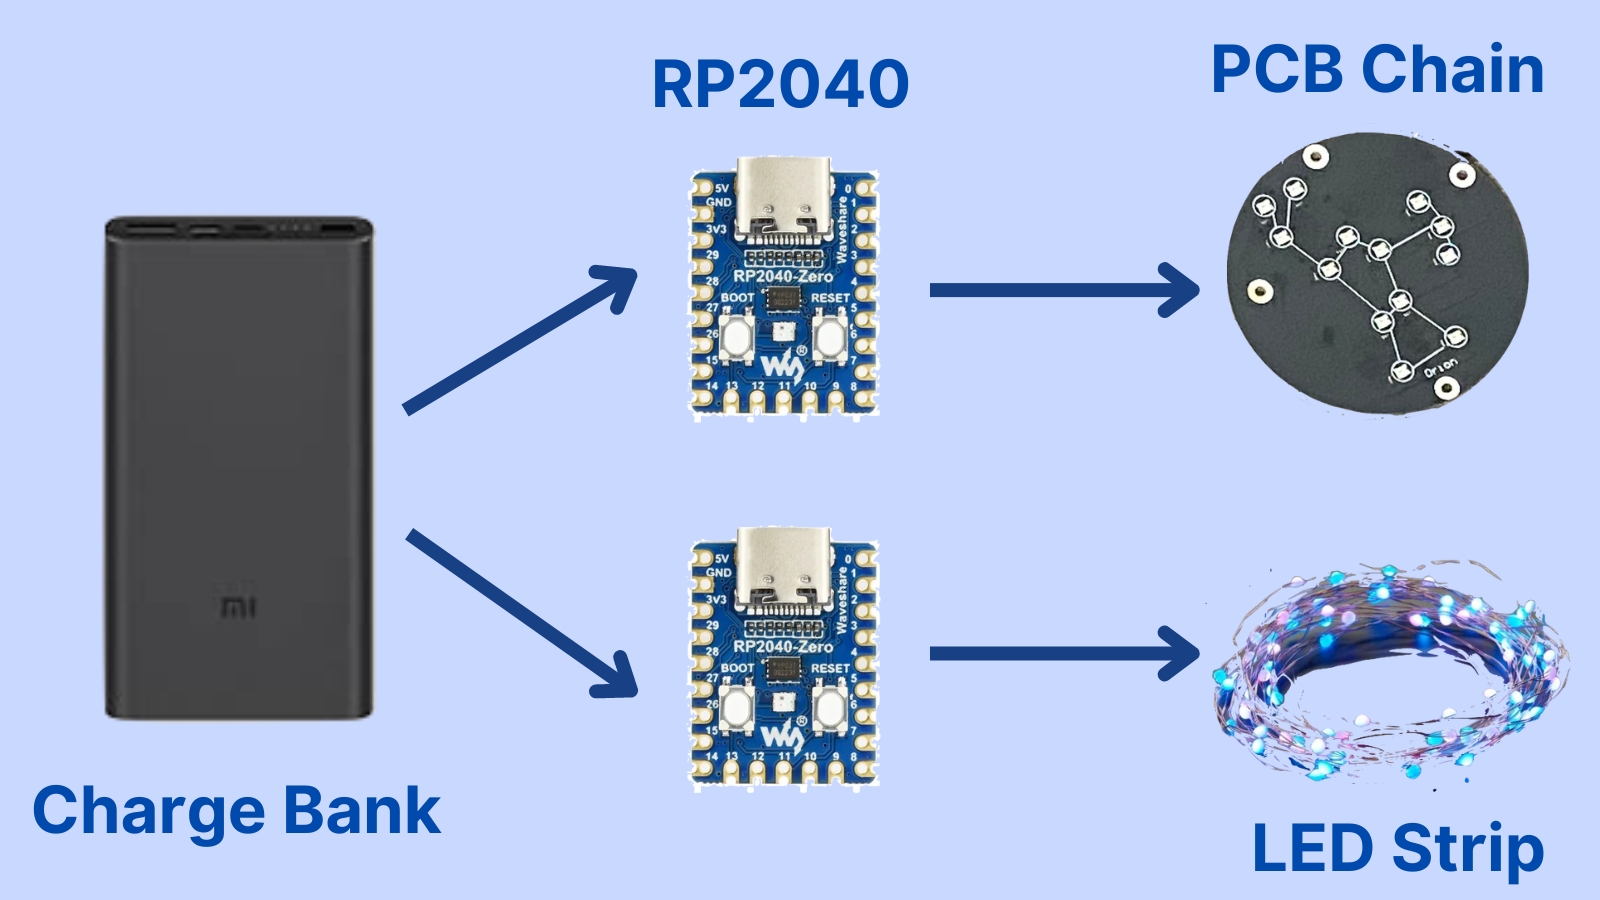
I began the build process by outlining a simple schematic of the electrical wiring in the dress. All the lightning within the dress was powered by a charge bank stowed inside my pocket. The led strip and the chain of constellation PCBs were wired independently to different RP2040 MCU modules.
2. Soldering the Constellation PCBs
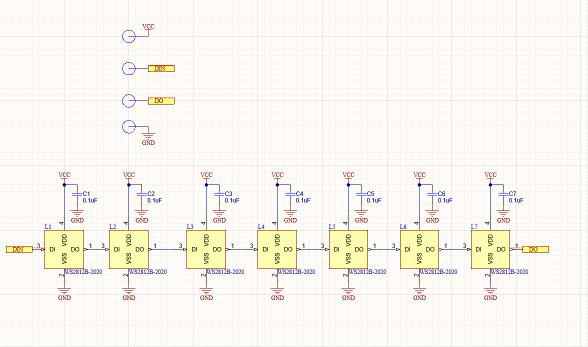
Then, I connected the constellation PCB by soldering them together following the standard Neopixel chaining wiring process according to the image below:
3. Programming the Firmware
After successfully soldering the constellation PCBs together and rigging the PCB chain to a RP2040, I was able to flash custom C code using the Adafruit Neopixel library to run custom LED animations. For the sake of simplicity, I wrote some code that shows a solid purple color and flashed it onto the RP2040 using the Arduino coding editor.
4. Rigging the Diffused LED Strip
Now that the Neopixel constellation PCBs were complete, I moved onto the diffused LED wire strip. I rigged the strip to a RP2040 preflashed with LED color animations.
5. Testing the Electrical Connections
After all the electronics were wired together, I made sure to route the wires to the charger bank.
6. Adhering Components using Superglue
Lastly, I adhered the LED strip and the PCB chain onto the dress using super glue.
Further Improvements 🔧1. Resilient LED Wiring
Although I was able to get the dress up and running for prom, the constellation LED lighting powered off at the end of the party due to loose soldering connections which detached the voltage to the circuit. To remediate this, I would recommend double-checking soldering connections and possibly using duck tape to fix up any disconnections that may occur.
2. Be Careful with the Glue!
Make sure to use a durable glue that will adhere the LEDs to the dress without falling apart. I would recommend super glue as traditional and fabric glue lack the adhesive strength to hold the LEDs. When you are applying glue to the dress, be careful with the location and amount of glue applied, as applying too much glue in the wrong spot can cause the dress to adhere to itself which can lead to nasty tears!
3. Exploring more Animations
Due to the tight timeline of this build, I only got to play around with a solid color animation for the constellation Neopixels. I would suggestion modifying the code to use different animations and colors. Check out the Adafruit Neopixel Repository for inspiration: https://github.com/adafruit/Adafruit_NeoPixel/tree/master/exampl
4. Using a Universal RP2040
In this design, I used two RP2040 MCU units to independently rig the diffused LED strip and the constellation neopixel PCBs. To remove redundancy in future iterations, I can rig the PCBs and LED strip to different GPIO pins on one RP2040 to reduce points of failure and remove redundancy when programming the dress.
Special Thanks ✨Thanks to John Cohn for inspiring me to create an LED-based prom dress alongside providing me with the diffused LED wire strip!
Moreover, a huge thank you to Ayesha Iftiqhar-Wilson for gifting me her custom constellation PCBs based on the Neopixel. They were a fantastic addition to the design!


Comments
Please log in or sign up to comment.