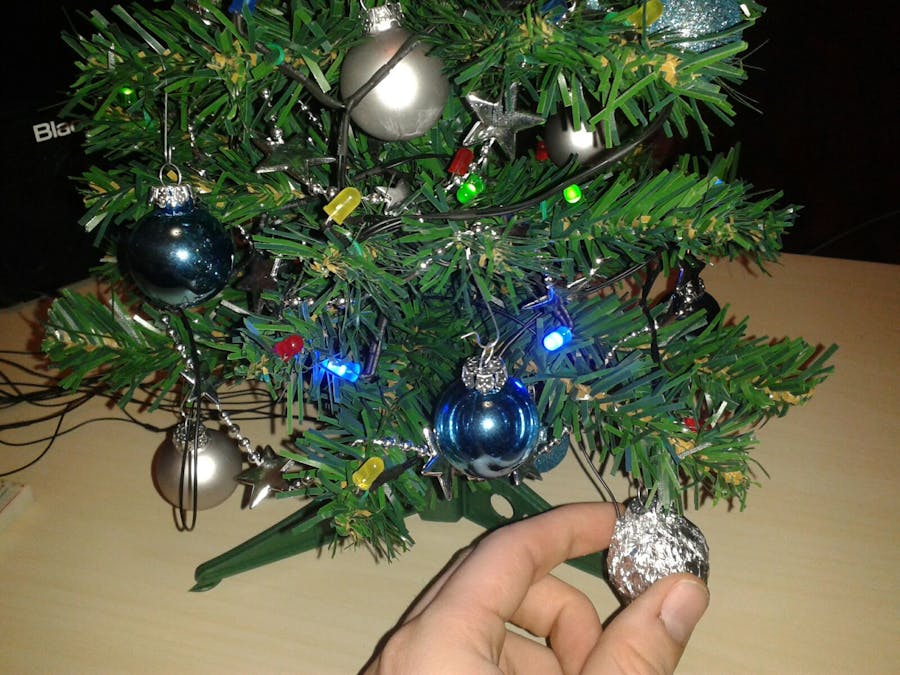
For our project we wanted to create an interactive lightning in form of a Christmas tree. In particular we used different sensors such as volume, temperature and lightning sensors to make different fairy lights interact with humans. Further, all components of the tree can be controlled via WiFi.
The Christmas Tree Lights:
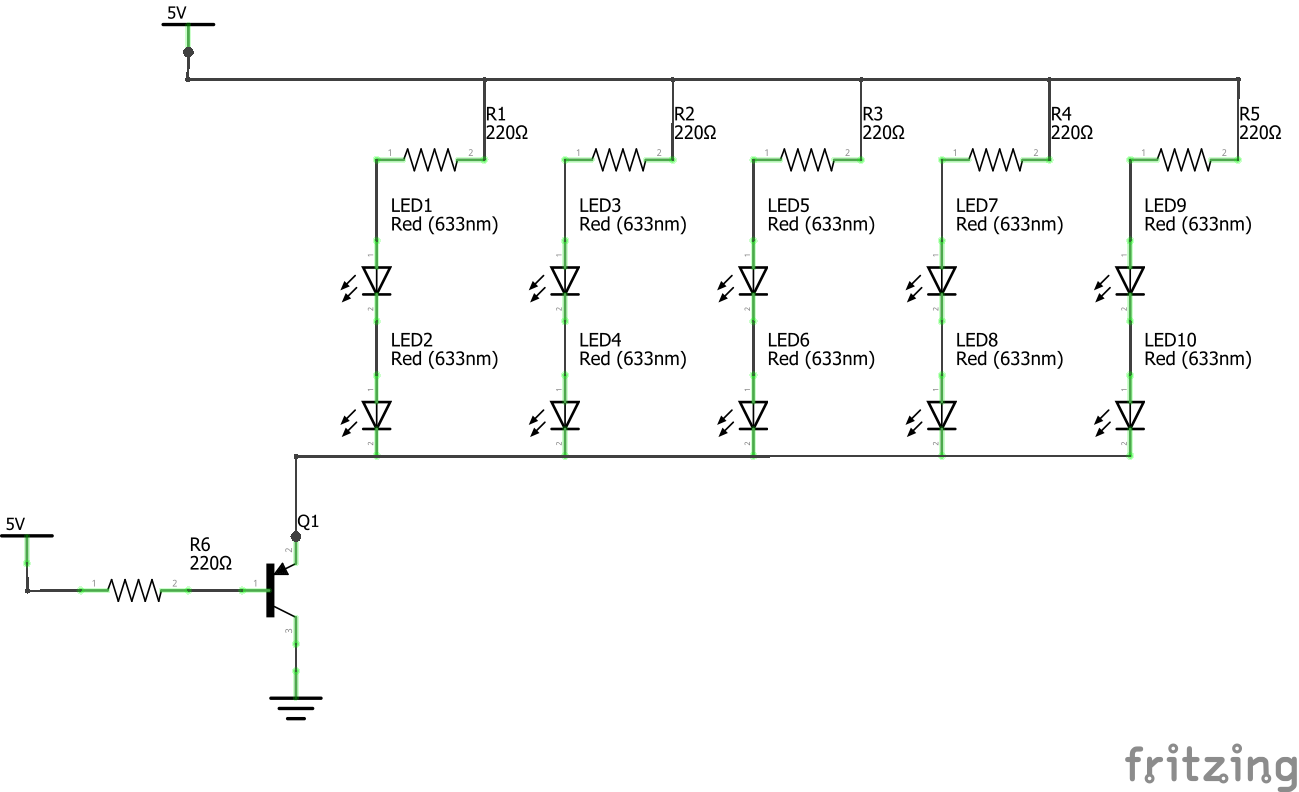
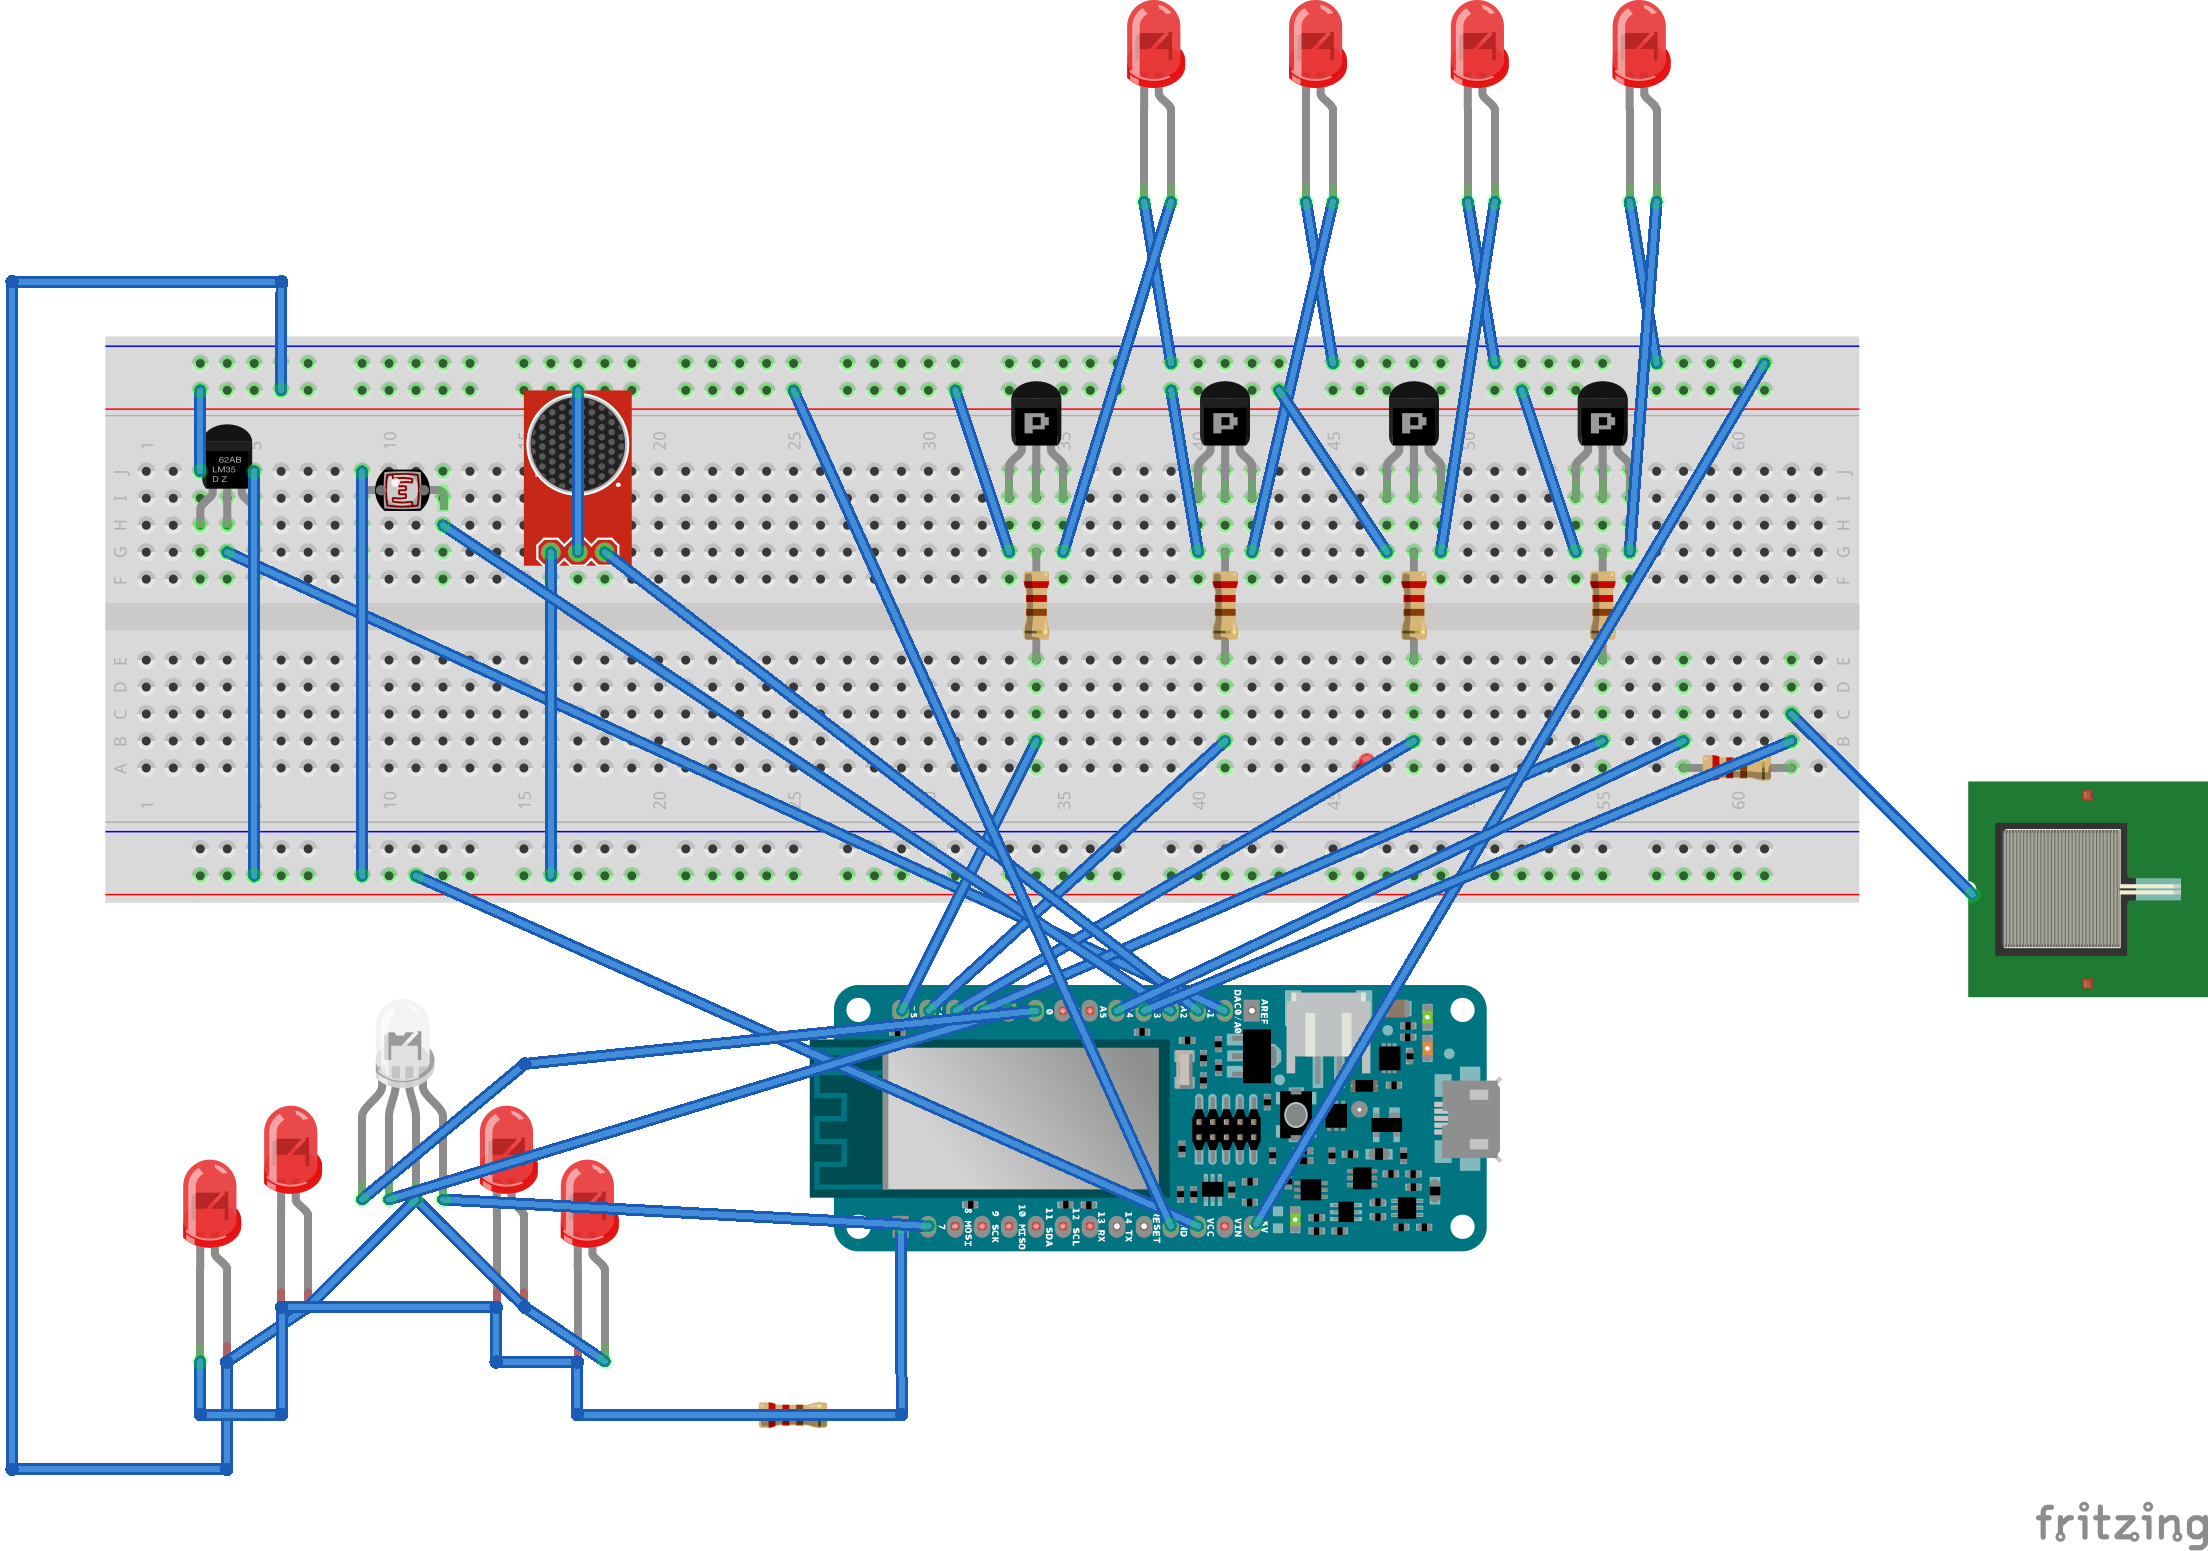
Our tree owns four different LED strings coloured in red, blue, green and yellow. Each one contains ten LED’s arranged in five sections. Each section consists of a series circuit which contains one resistor followed by two LED’s in which different coloured LED’s needed different resistor sizes. Thats why we installed resistors of 330 Ohm in the blue string, 100 Ohm in the green string and 47 Ohm in the red and yellow string. Within each string there are five parallel wired sections wired parallel to a resistor of 1kOhm, followed by a transistor and connected to one of the arduino’s 5V pins.
The Christmas Tree Star
The star is made of five single LEDs. Four of them are yellow with a preceeded resistor of 47 Ohm. The LED on top is a RGB-LED and and each pin has a resistor of 330 Ohm.
The Christmas Tree
Since space is expensive in cities, our tree is minimal sized.
The Arduino (Genuino MKR 1000)
Our MKR 1000 checks the current sensor values and controls the modes, lights and the webserver.
Tree Modes
Glow: The tree slowly change its color
Volume: Sound to Light (still work in progess, as our microphone gives pretty messy values and normalization is quite difficult for this one. )
User / Manual: All lights will be controlled by the user, typically through the Webformular.
Activity: Checks sensor data to reduce brightness in silent rooms. If you sleep, your tree will too.
WARN Mode: The tree blinks if volume is too high or the temperature is to cold/warm. The former prevents fights with your neighbours, while the latter will help you regulate your rooms temperature, so that your freezing girlffriend is not that annoying anymore.
Controlling the Tree
Web Browser: Just enter the arduinos IP in any browser and the html form showing the current parameter will pop up. Here you can easily change values.
The form is generated from the arduino. It can be used to retrieve information about the current lights and sensors, but updating values (and therefore controlling the tree) is also possible.
client.println("HTTP/1.1 200 OK");
client.println("Content-Type: text/html");
client.println("Connection: close");
client.println();
client.println("<!DOCTYPE HTML>");
client.println("<html>");
client.println("<form name=\"arduinoform\" method=\"get\">");
client.println("<br>SYSTEM DATA<hr>");
client.println("Mode:<br>");
client.println("<input type=\"text\" name=\"mode\" value=\"" + String(data.mode) + "\" min=\"1\" max=\"7\"><br>");
client.println("<br>LED DATA<hr>");
client.println("String Red:<br>");
client.println("<input type=\"" + type + "\" name=\"stringRed\" value=\"" + String(data.stringRed) + "\" min=\"0\" max=\"255\"><br>");
client.println("String Blue:<br>");
client.println("<input type=\"" + type + "\" name=\"stringBlue\" value=\"" + String(data.stringBlue) + "\" min=\"0\" max=\"255\"><br>");
client.println("String Green:<br>");
//
// ... more elements
//
client.println("<br><hr>");
client.println("<input type=\"submit\" name=\"submitbutton\" value=\"Submit\">");
client.println("</form>");
client.println("</html>");
JAVA (Android and more): A more user-friendly version than the webformular can be coded quite fast. In Java, the Apache Commons libraries have predefined classes for web access and formular control.
final WebClient webClient = new WebClient();
try {
 final HtmlPage page1 = webClient.getPage("http://" + IP);
 System.out.println("Connection established");
 final HtmlForm form = page1.getFormByName("arduinoform");
 form.getInputByName("mode").setValueAttribute(XX);
 final HtmlSubmitInput button = form.getInputByName("submitbutton");
 final HtmlPage page2 = button.click();
} catch (IOException e) {
 e.printStackTrace();
} finally {
 webClient.close();
 System.out.println("Connection closed");
}
As this is pure Java Code, it can be embedded into android projects also.
Touch Ball: Lets you switch the color without a WiFi device.
For this, we covered a Christmas Ball in aluminum foil and used the capacitive sensing library from here.
Finally:
As you can see our project is still in progress and there are some points we are still working on to improve our tree.
Surely nobody wants to spend hours of understanding how to control a chistmas tree, so that we focused on an easy and natural comunication between user and device and added some special and useful functionalities such as the volume warning mode. But still the tree should stay a Christmas tree whose most important task is to spread christmas feelings, just a little more intelligent and interactive so that the user is able to communicate and use it's abilities if needed without having to focus on the device otherwise.


Comments
Please log in or sign up to comment.