During the coronavirus pandemic, a situation arose where we had to maximize our productivity of face Shields using 3d Printing, for medical personals. The printer was situated in a room outside my house, but I spend most of the time at my house. In order to maximize productivity, I placed this Wi-Fi-based 3d print starter button for octoprint near my printer and when somebody in the household sees that the print is finished, they will go and put the next print after removing the existing 3D printed model from the heat bed. All they need to do is press the button, rather than going through the menu and choosing the model to be printed. By default, the wifi switch chooses the last selected file for printing.
To make this project, simply download code from the GitHub link attached, install Arduino (https://www.arduino.cc/en/Main/Software) and ESP32 board(https://randomnerdtutorials.com/installing-the-esp32-board-in-arduino-ide-windows-instructions/, upload the code and connect the nodeMCU to any USB port. Make sure that the octoprint instance and nodemcu are in the same network. Assign a static IP address to octopi (https://community.octoprint.org/t/set-static-ip-without-breaking-the-plugin-manager/13556)
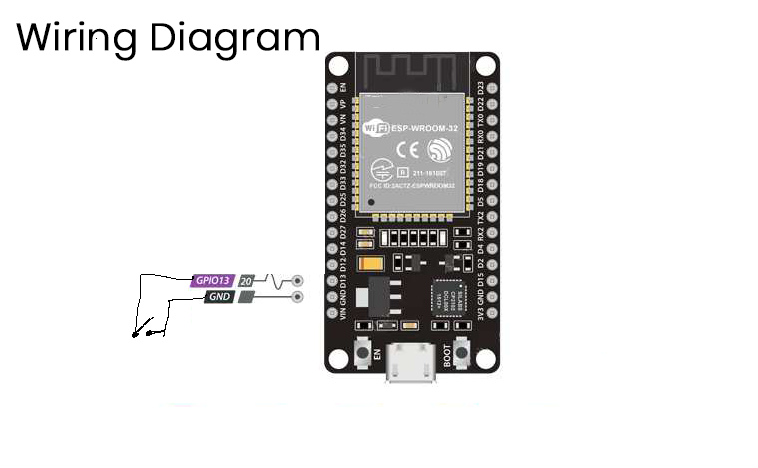
Attach any button to the pins as mentioned in the wiring diagram and you’re good to go. Make sure you select a file from the octopi dashboard and just press the button and voila!! The print starts. This device can be used more effectively in printing recurring models.
Using this, I was able to print 70 face shields per day, while sharing the work among my family😁.


Comments
Please log in or sign up to comment.