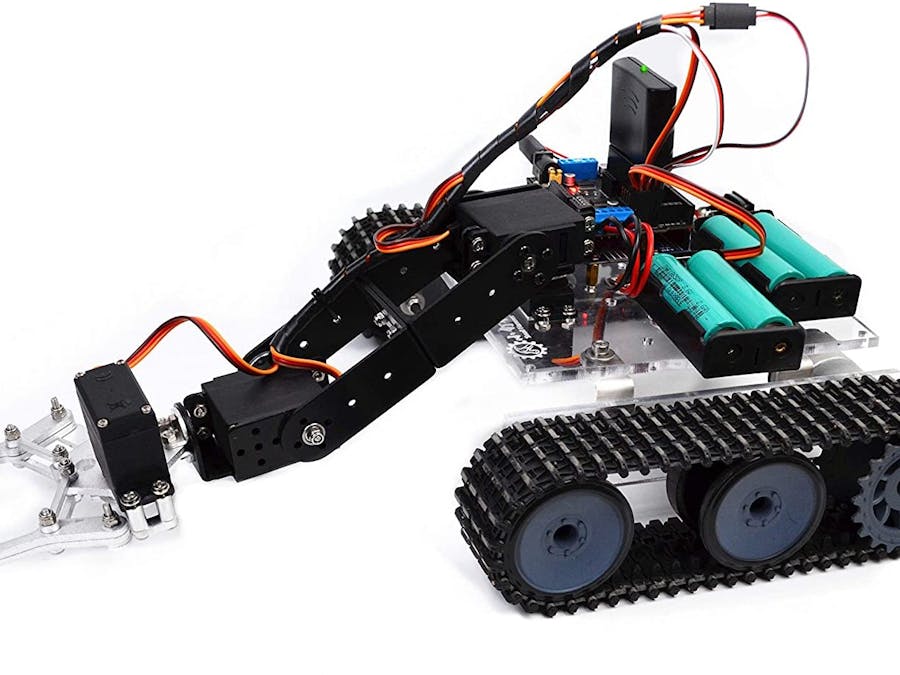
What Do I Build Next? A RC Tank with 4DOF arm operated by a PS2 Controller. In January, I was gifted "what else" an Amazon Gift Card for $100.00. Lucky for me, Amazon had an interesting RC Tank with a 4DOF Arm that caught my interest.
This kit apparently was available also as two seperate kits that some marketing guy bundled together. It required 3 different write-ups to piece together.
The SN7300 RC Arduino tank robot " https://smallhammer.cc/docs/sn7300 "
, the 4DOF Manipulator Arm " https://smallhammer.cc/docs/snar23 or https://smallhammer.cc/docs/snam5000/ "
, and then joining them together assembly " https://smallhammer.cc/docs/snar20 "
This kit was easy to build, written documentation and pictures could be clearer to understand but email support was required and quick responses followed due to missing hardware and a mislabelled battery holder- be careful- I will explain later.
The lack of clear documentation of this oversight led to three weeks of downtime and many emails. The picture above is one of two battery holders, notice the imprinted battery pictures indicating a series orientation (7.4vdc output), but both ends have solid bars across metal tabs or springs, thus making them in parallel (3.7vdc output), so when I placed the two 18650 3.7vdc batteries into this holder following the orientation indicated the battery holder caught on fire and luckily for me I dropped it on the floor and the batteries popped out stopping the fire. End result.... a melted battery holder. The seller later replied to me that I was supposed to install one battery in this holder which was slated to drive the 4DOF servos. Also, in another email, it was indicated that this battery holder was not required since the primary Arduino battery holder (7.4vdc) was adequate to drive both the tank and the arm servos.
My kit did not have all the required length screws to assemble the servos to the brackets, it did have screws but they were all same length, but too short. I was also missing one bearing assembly. The vendor ensured me of prompt reshipment but COVID 19 outbreak in China caused shipping delays in required replacement parts.
Now for the Build.
Unbox
Download-access documentation for each component assembly-URL links or QR code
SN7300 Acrylic Tank Chassis 1 " https://smallhammer.cc/docs/sn7300 "
SNAM5000 4dof ps2 rc arduino arm install guide " https://smallhammer.cc/docs/snam5000 "
SNAR20 RC Arduino tank robot arm guide
" https://smallhammer.cc/docs/snar20 "
Assemble the Tank chassis
Attach the DC Motors
Assemble and Attach the Drive wheels
Assemble Sprockets
Assemble and Attach the Tank Tracks
Prepare Electronics
Assemble and Install 4DOF Arm onto Tank chassis
Attach the servos- all servos must be set to mid position (centered) before installation to ensure proper range of motion.
http://www.bpesolutions.com/atechnical/ServoInfo.Center.pdf
https://www.rcgroups.com/forums/showthread.php?2182690-Centering-Servos-How-To
or https://www.youtube.com/watch?v=XpvVhnIrUyo
Attach Claw to servo Arm
Position/Prep Decktop
There really wasn't a definitive location to mount the Arduino board and both battery holders. The 4DOF arm attached to the chassis via a servo cutout so that determined where everything else end-up...but that Arm was added after the Tank was assembled and the Arduino and battery holders were installed. I ultimately ended up moving the Arduino board "redrilling holes" and also filing down the edges on one servo bracket so that left to right pivot/rotation would be un-impeded.
Attach Electronics
Interconnect
Schematics
Install software onto Arduino-
" http://downcdn.xiaodingchui.com/Motor_Shield.zip "
Completed PS2 controlled RC Tank with 4DOF Arm with claw DEMO
This is a fast moving RC Tank. The batteries in the PS2 controller for whatever reason kept draining on me...I suspect old "AAA" batteries on my part.


Comments
Please log in or sign up to comment.