Video version of the article:
As you may know, 2023 is the year of voice in Home Assistant, so I decided to create my own voice assistant. I didn't like the experience with random activations of Google Home, so this assistant works without a wake word. To activate it, you need to make a hand gesture in front of the frame.
Let's start by printing the parts (you need a 3D printer with a minimum working area of 300x300mm). You need to print:
- Frame - 1 piece (frame.stl)
- Gear - 10 pieces (gear.stl)
- Display element - 10 pieces (display.stl)
- Motor gear - 1 piece (stepper_gear.stl or gear_servo.stl)
- Motor mount - 1 piece (stepper_holder.stl only for stepper motor version)
- Image template 1 - 1 piece (face1.stl)
- Image template 2 - 1 piece (face2.stl)
- Image template 3 - 1 piece (face3.stl)
After printing, you need to:
- Clean the surface of the parts
- Level with two-component putty
- Sand the surface
- Paint
Assembly of the mechanical part:
- Insert the rivet
- Drill holes for the filament
- Connect the gear and display element using the filament
- (Optional) Secure the filament, gear and display element with glue
- Cut off part of the rivet
- Install the display element in place
- Glue the neodymium magnet into the slot on the stepper (or servo) motor gear
In this project, you can use a servo motor (which can rotate 270 degrees) instead of a stepper motor.
Assembly of the electronic part:
- Attach the USB Type-C connector with thermoglue
- Attach the pressure, temperature, and humidity sensor BME680 with thermoglue
- Attach the gesture sensor APDS-9960 with thermoglue
- Attach the Hall sensor A3144 with thermoglue (only when using a stepper motor)
- Attach the microphone INMP441 with thermoglue
- Attach four WS2812 LEDs with thermoglue
- Attach the stepper motor driver ULN2003 with thermoglue
- Screw the speaker with four M3 screws
- Screw the HDC1080 humidity sensor with two M3 screws
- Screw the MAX98357 I2S amplifier with two M2 screws
- Screw the ESP32 board with two M2 screws
- Screw the 28BYJ-48 motor with one M2 screw
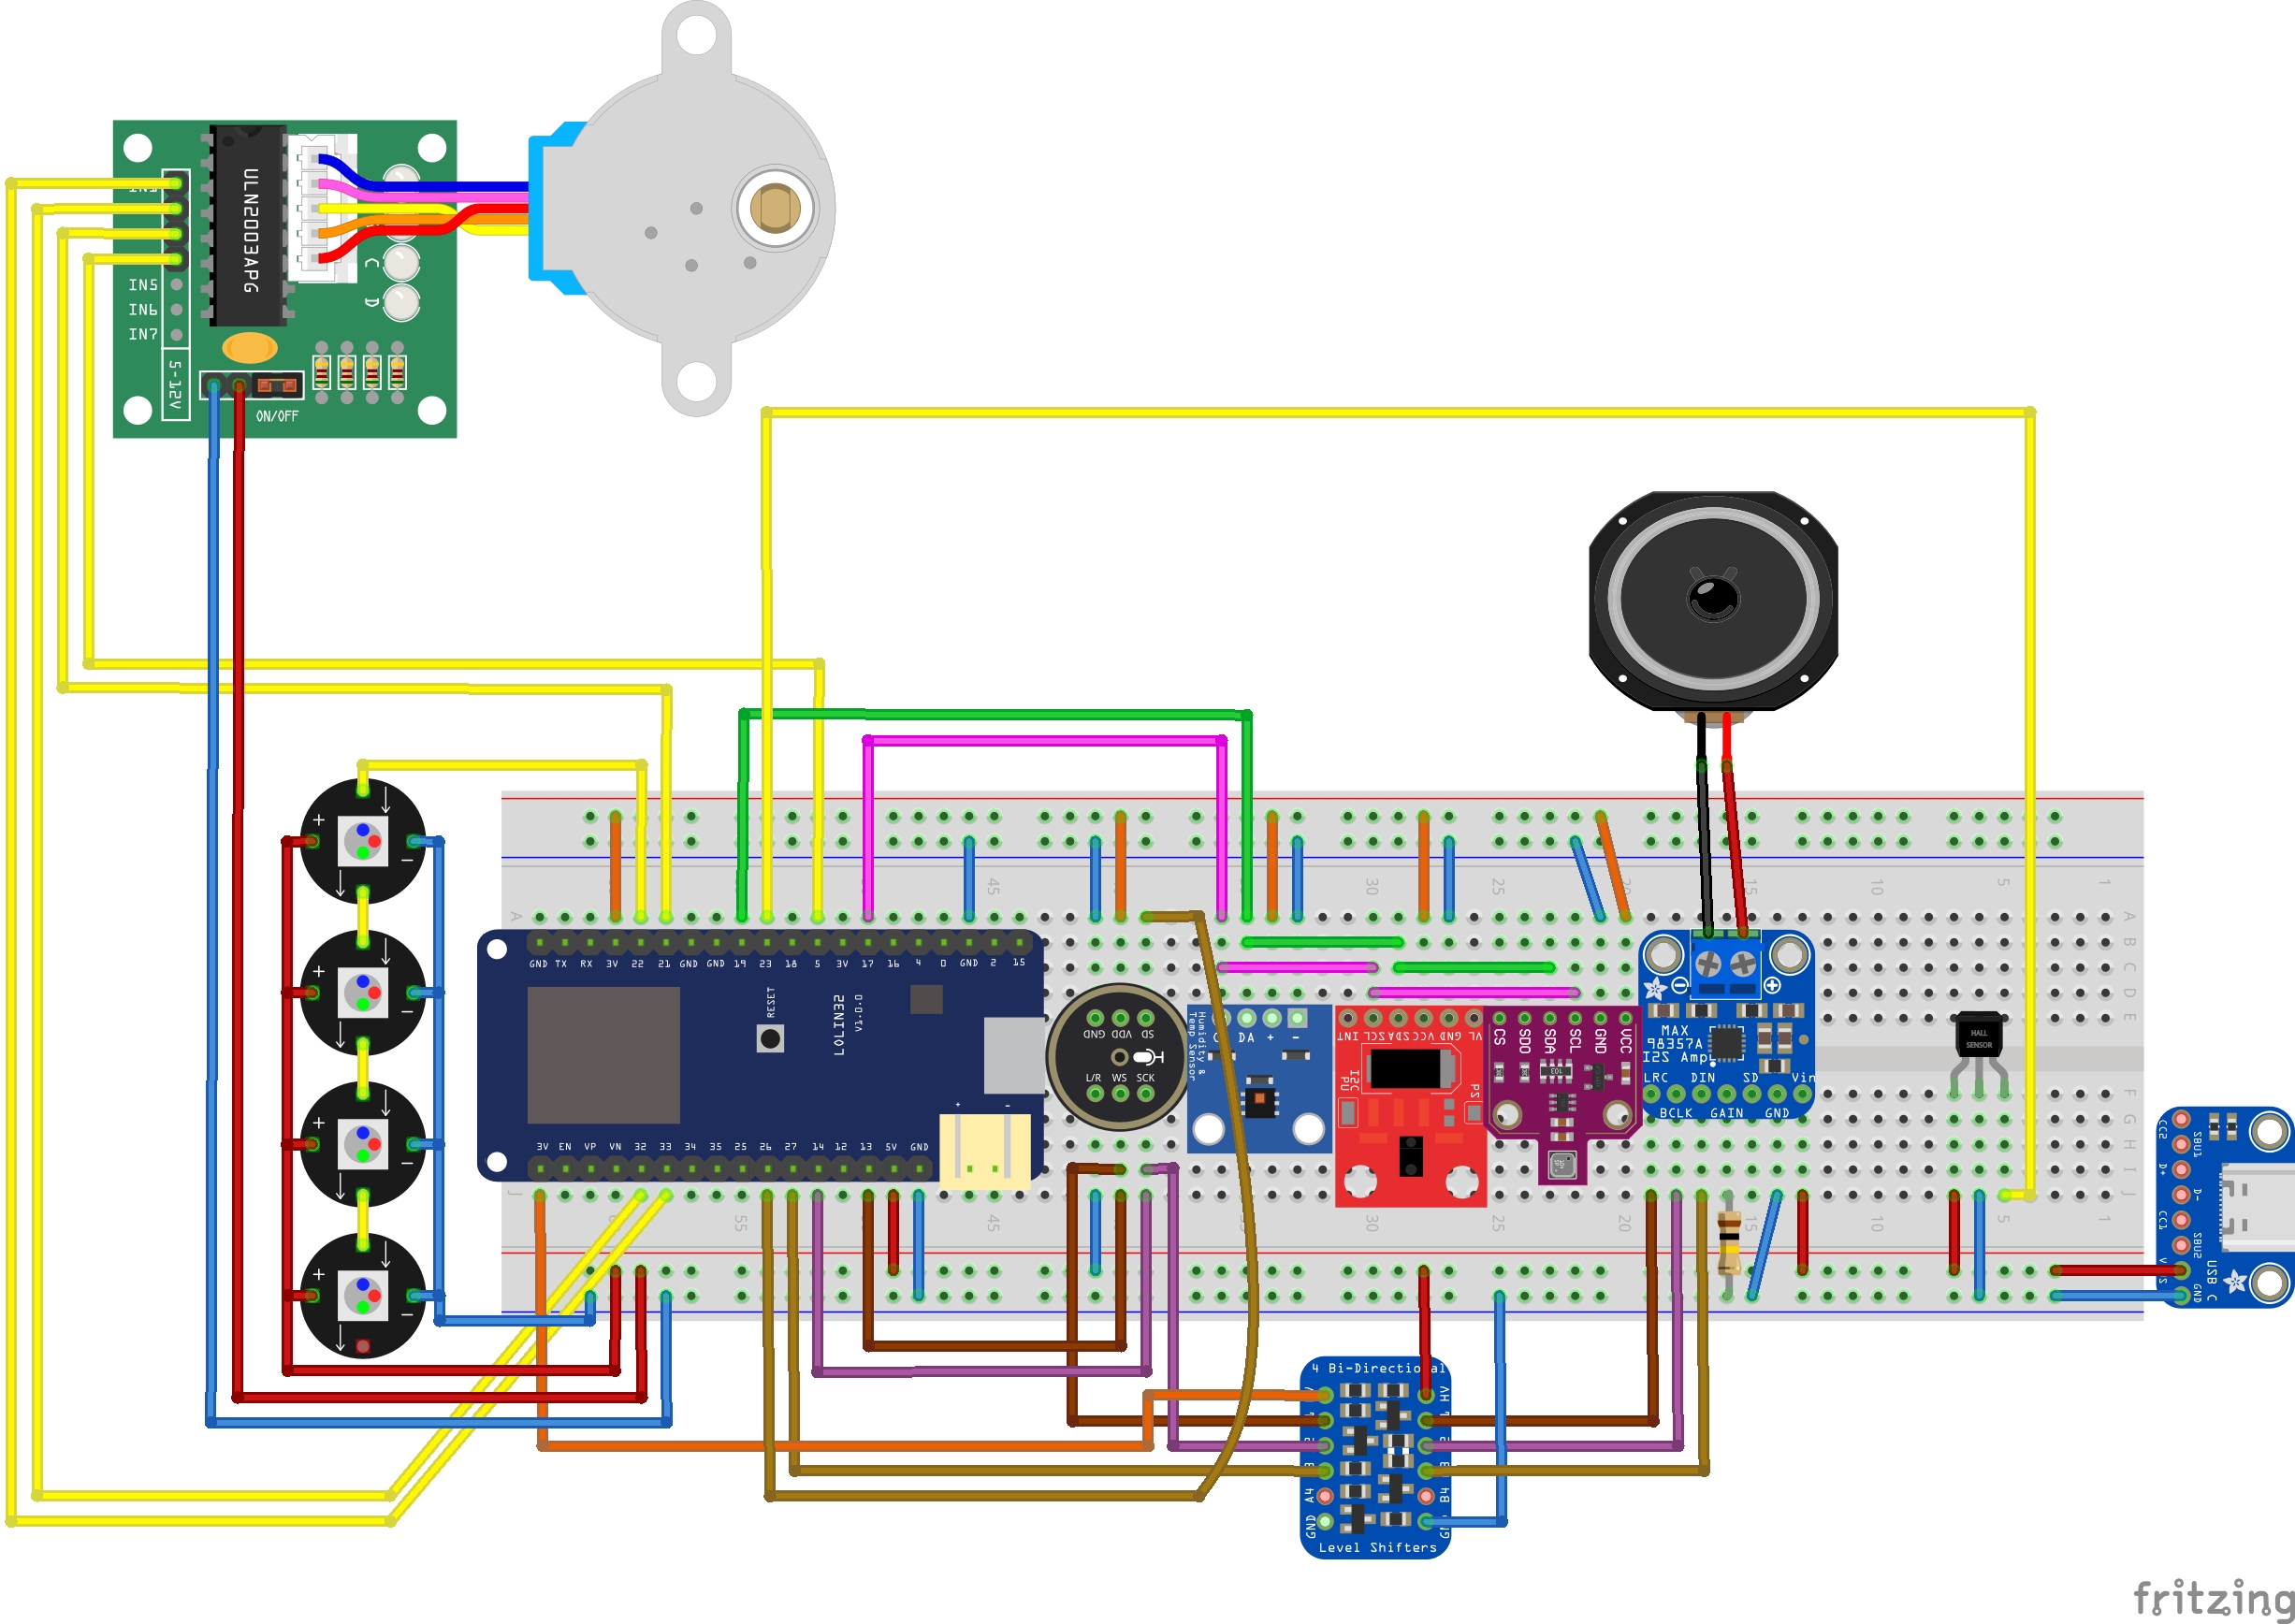
- Connect all the elements with wires
- Solder a 100K resistor between the Gain and GND pins in the MAX98357
Painting:
- Cut adhesive paper into strips of 198x60mm
- Stick the paper on the display elements, hiding the edges in the slot
- Secure the paper edges with pieces of the 3D printing filament
- Seal the main frame securely to prevent paint from seeping in
- Apply painting templates and paint with spray paint
Home Assistant setup:
- Flash ESP32 firmware (The air quality library for BME680 is proprietary by Bosch. By flashing, you agree to its use. If you don't agree, remove the bme680_bsec component and replace it with bme680.)
- Activate Nabu Casa cloud or install Whisper and Piper add-ons
- Create an assistant and select STT and TTS services and language
- Enjoy
Perhaps this assistant doesn't always recognize commands accurately right now, but from an electronics perspective, no further changes are necessary. With the improvement of the command interpreter in Home Assistant and the integration of neural networks for voice synthesis and recognition, the assistant's performance and quality will enhance.
Thank you for your attention!


_3u05Tpwasz.png?auto=compress%2Cformat&w=40&h=40&fit=fillmax&bg=fff&dpr=2)


Comments
Please log in or sign up to comment.