This period of homely isolation has made me seriously think about sustainability and ways of fending off the possibility of a zombie apocalypse. Therefore, in true "The Martian" style, I've decided to build a greenhouse and science the s*** out of it by outfitting as much automation to it as I possibly could. Oh, and it grows food as well!
I've documented the process of building the environmental monitoring device. I initially wanted something simple to measure temperature and humidity in the greenhouse and send alerts to my phone whenever something went wrong.
It seemed simple enough, so I went ahead and did what any self respecting tinkerer would do: complicate it by adding a bunch of useless features. So, in its final incarnation, the system has four temperature sensors (three in the greenhouse at different height levels and one outside). It can measure humidity, luminosity, barometric pressure, and volatile compounds. It's also solar-powered and has continuous WiFi connectivity. So, before it develops sentience and decides to starve me to death, let me show you how I've built it.
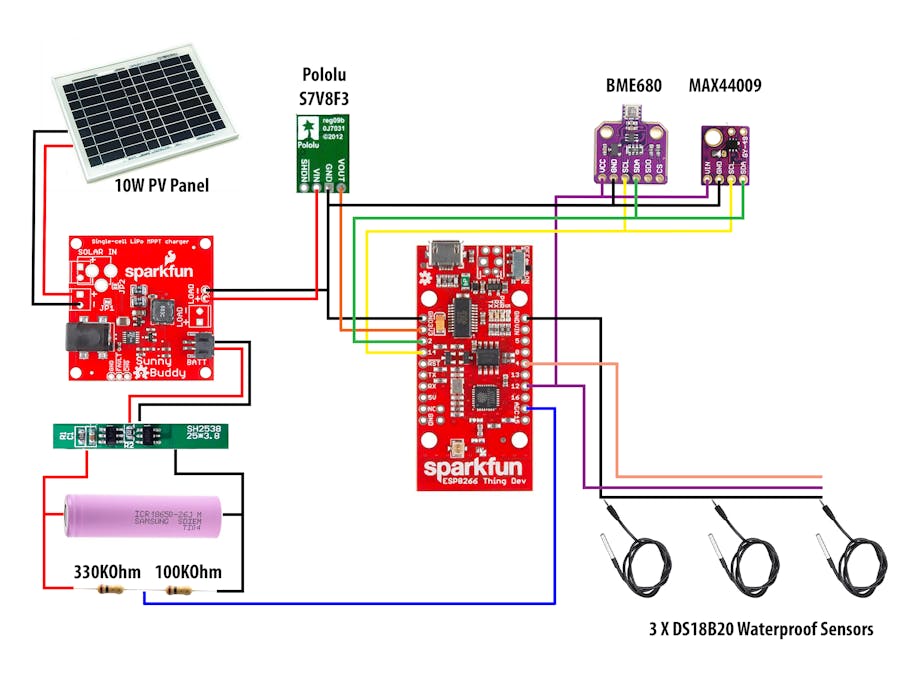
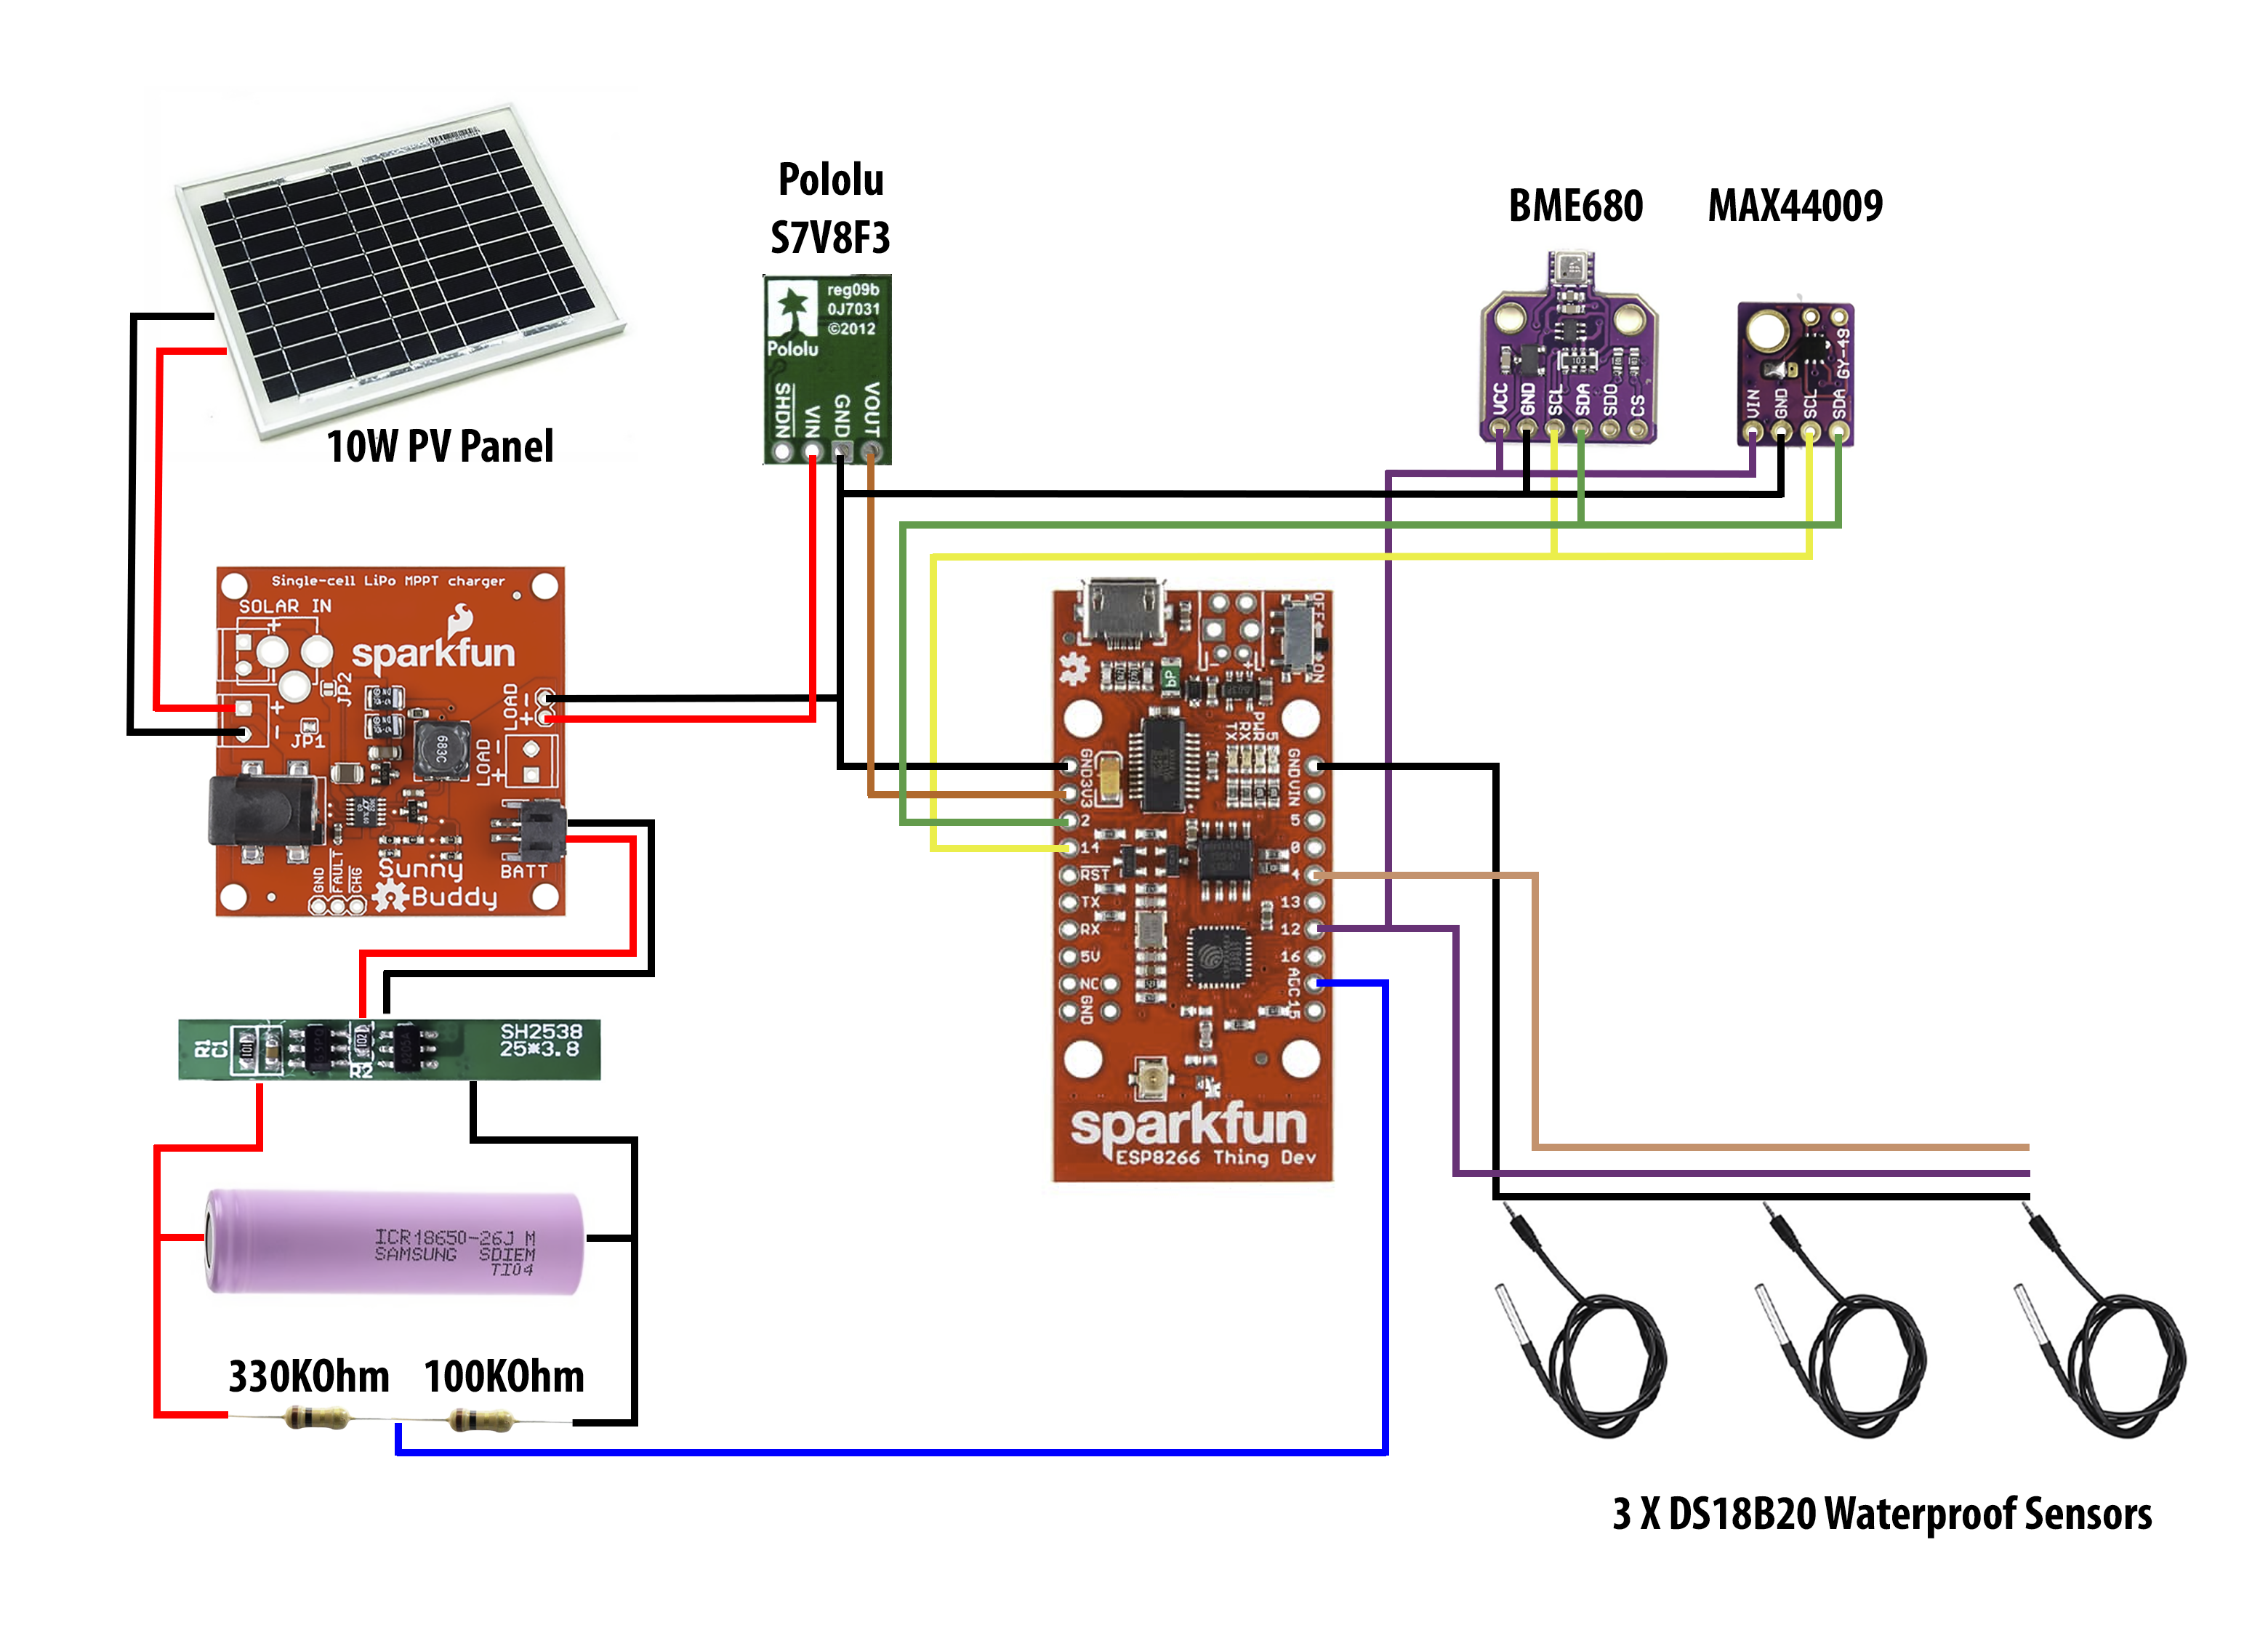
The HardwareI built the whole system around an ESP8266 Thing Dev board from SparkFun. It's got a USB programming interface so I can easily plug it in and upload a new Arduino sketch to it. It's also got most of the processor's IO pins mapped out nicely so I can start connecting sensors.
ESP8266 is a processor that can be very low-power if kindly persuaded with a few hardware and software modifications to the original board, so I went ahead and literally helped myself to a tutorial that reminded me how to do it. This step's entirely optional, but it will dramatically increase battery life, as the whole device draws very little power between sensor readings.
I powered the board from a 18650 LiPo battery as they're cheap as dirt and can hold an impressive amount of charge. Now, being cheap as dirt comes with its very own disadvantages, such as the fact that there's no over-charge or over-discharge protection. I fixed that by adding a (dirt) cheap protection circuit that would disconnect the battery whenever a fault is detected and save the greenhouse from pulling an impromptu bonfire representation. Turns out cheap things can really lead to saving (badumtssss).
ESP8266 really doesn't like being powered with anything even a smidge higher than 3.6V, so I could not just connect the battery directly to the board. Instead, I used a buck-boost DC/DC converter to take in the variable voltage of the LiPo battery and deliver a clean 3.3V to the entire circuit. Fender flames not included with the base model.
For the solar power part, I had a 10W/12V photovoltaic panel lying around that was just perfect with the job. I hooked it up to a SunnyBuddy LiPo charger that uses MPPT for squeezing every ounce of energy from the panel, even on those gloomy winter days.
For the sensing part, I've used the Swiss army knife of all environmental sensors, BME680. It does almost everything, measuring temperature, humidity, pressure and volatile organic compounds. What it doesn't measure is luminosity, but I had a MAX44009 board lying around so, why not put it to some good use. They're both connected via I2C to the ESP8266 board.
I also wanted to measure temperature outside the greenhouse and in the soil, so the DS18B20 1-Wire sensors were perfect for the job. I bought three, each wearing some very nice waterproofing at the end of a log wire. I used 3.5mm audio jacks to connect each sensor to the box where the rest of the electronics were housed.
All sensors are powered through a GPIO pin of the ESP8266, so I can switch them off when they're not needed.
I also wanted to measure how much juice was available in the battery, so I connected the battery voltage through a resistive divider to the ADC input of the ESP board.
Lo and behold, the hardware is complete!
If hardware was hard, software was too easy. This IoT revolution has brought in literally tons of applications that any regular Joe can use to connect their Smart Tidy Whities™ to the Internet.
Not wanting to stand out of the crowd, I went ahead and used one such solution. Now, I can talk a lot about what Blynk is and what it isn't, suffice to say it gets the job done without any headaches. It's also got a very nice Arduino library that can be used with ESP8266 (yay), a mobile app.that runs on Android and iOS in which you can create awesome looking dashboards (even more yay) and it costs "energy points" which you can buy with real American pesos to create a more intricate dashboard (nay, but everybody's gotta make a living, I guess).
I've added the Arduino sketch to this tutorial, it's a disorganized, hardcoded mess that I'm probably never going to spend the time to properly refactor, but it gets the job done!
The code rests entirely in the setup() function for Arduino, where initialization of the sensors is done, then we establish a connection to the Blynk server, read sensor data and send it over with blynkRoutine() and then enter deep sleep for 300 seconds using ESP.deepSleep(). When exiting deep sleep, the microprocessor automatically resets, so the whole setup() function is executed all over again.
Over on the Blynk mobile app, data can be seen streaming in.
It's really cool to see the greenhouse heating kicking in during low temperature periods.


_1x_bGT19vVAby.png?auto=compress%2Cformat&w=40&h=40&fit=fillmax&bg=fff&dpr=2)


_3u05Tpwasz.png?auto=compress%2Cformat&w=40&h=40&fit=fillmax&bg=fff&dpr=2)
Comments
Please log in or sign up to comment.