


Hardware components | ||||||
 |
| × | 1 | |||
 |
| × | 1 | |||
 |
| × | 1 | |||
 |
| × | 1 | |||
 |
| × | 1 | |||
Software apps and online services | ||||||
 |
| |||||
 |
| |||||
| ||||||
Hand tools and fabrication machines | ||||||
 |
| |||||
 |
| |||||
This project is an evolution of "IoT Cat Food Scale Streaming to Google Cloud". It still collects the data to monitor how much our cat is eating, but is more usable. The previous project had two main issue to be used properly:
- the Data could only see on the cloud once was ingested and elaborate.
- The GCP (Google Cloud Platform) is a great cloud solution, but for the current need was over-killing. Plus, any real-time analysis would have been very expensive.
Therefore, this project overcome the two issue by adding a LCD display to show in nearly real time what was the amount of our cat eating.
Then instead of using the GCP we switch to a different cloud solution ThingSpeak and Ubidots. They both allow to collect and display IOT data in nearly real time, and at the scale I was operating they are free of charge.
Cloud Differences and |Analysis (ThingSpeak vs Ubidots).Both the cloud services, allows to stream the measurements automatically on an API using a certification for the authentication.
Both the cloud service allow to store the measurements for a "more than enough amount of time".
The main difference is how the back end is organised between the two cloud services.
The ThingSpeak is based on MATLAB language, which potentially could allow to enrich the Time-series of the upload measurements. Unfortunately, I was not using that language for a long time, so implementing it was not straightforward.
Anyhow, if you just need to visualise the upstream measurements you can use the standard visualisation.
The Ubidots is based on a set of pre-build widgets that allow to build nice dashboards. For my experience the widgets are quite customizable and better looking that the ThingSpeak.
Below both the dashboards created with ThingSpeak and Ubidots.
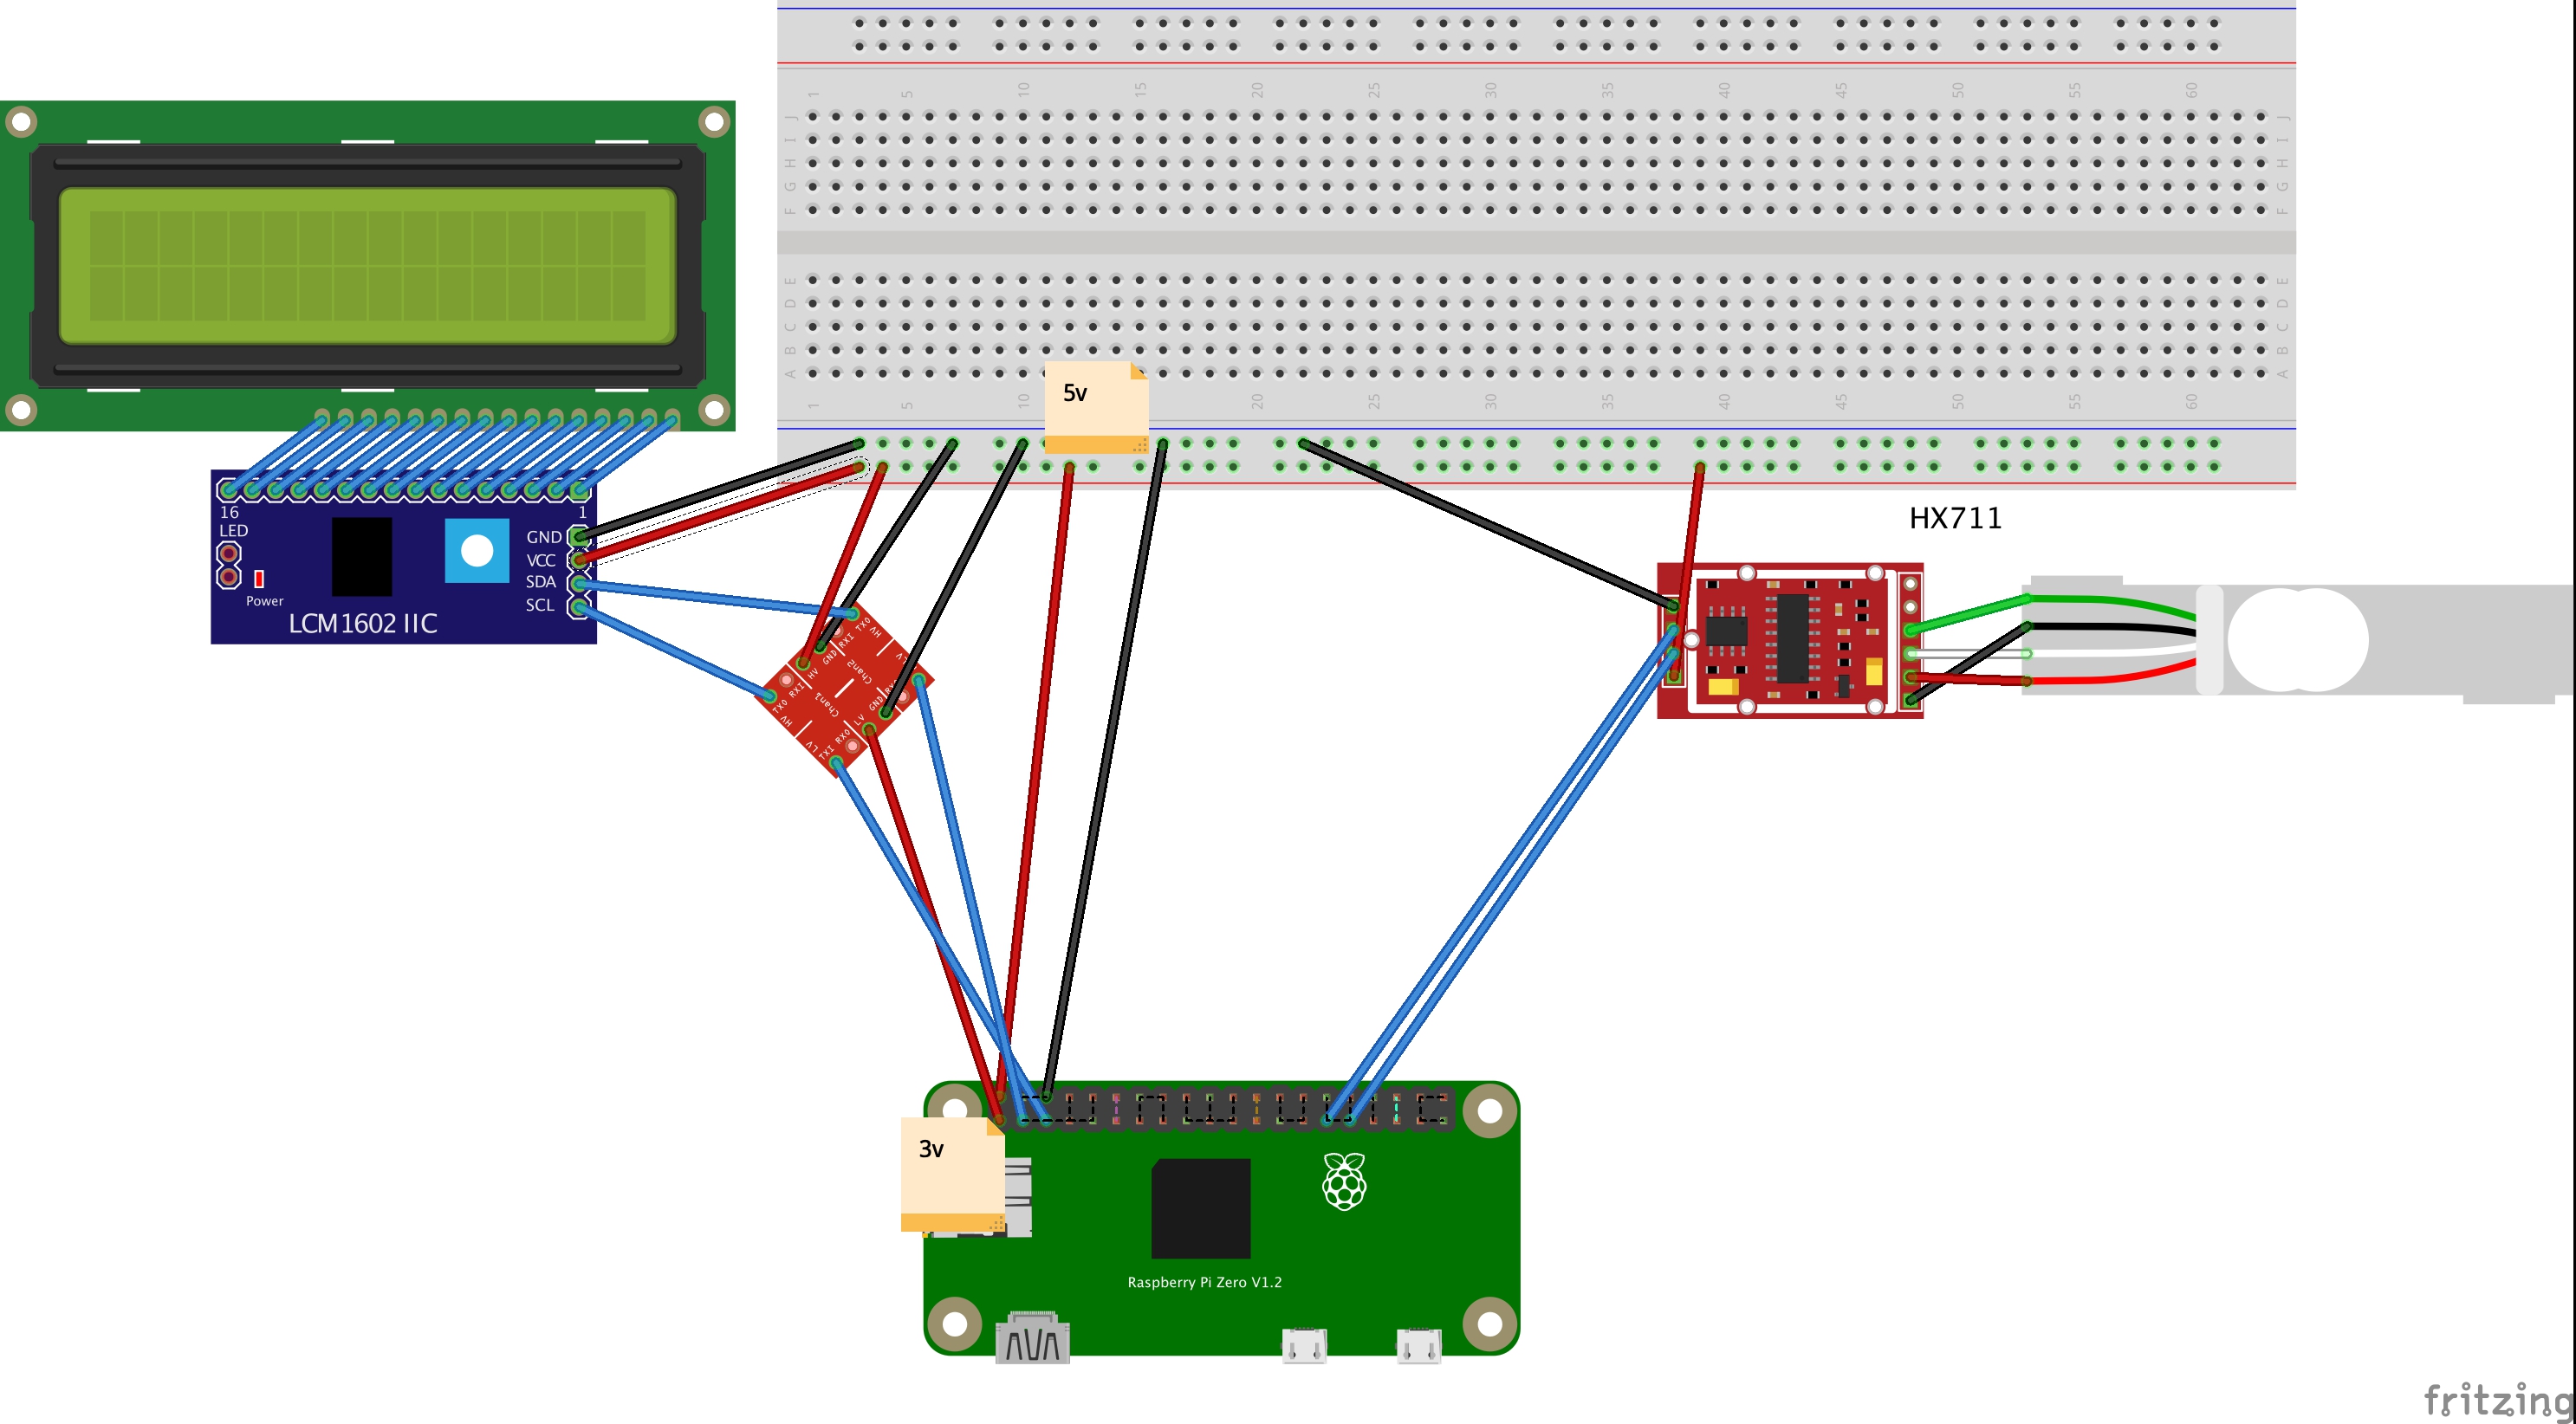
The electronic implementation is based on Raspberry PI zero, and it has two main components:
- Load cell & HX711 (to measure the weight over time)
- LCD & logic level converter (to display what is measured)
All the electronic connections are quite straightforward.
Just one note about why we need to use the logic level converter. The Raspberry Pi GPIO pins work with 3.3V logic levels and are not 5V tolerant. However, you can easily use 5V sensors if you convert their 5V outputs to 3.3V using a level converter. This ensures the GPIO pins on the Pi only see a maximum of 3.3V.
below a few images of the electronic set up:
Below all the elements in the final position.
The main part of the code is on the file https://github.com/EnzoCalogero/catfeeder_local/blob/master/appli_v2.py1
The loop is constantly taking a measurement of the scale, and it show the value on the LCD, then after 20 reading, it calculates the median and upload the values to the two clouds services.
3D enclosuresAll the enclosures used in the project are included in the attachments.


_t9PF3orMPd.png?auto=compress%2Cformat&w=40&h=40&fit=fillmax&bg=fff&dpr=2)


_3u05Tpwasz.png?auto=compress%2Cformat&w=40&h=40&fit=fillmax&bg=fff&dpr=2)
Comments
Please log in or sign up to comment.