- There are some recently developed working robots that can carry out disinfecting tasks, which are huge in shape, the hardware they use are costly, which can be a huge hindrance for mass production and to deploy them in hospitals/ clinics/ public places.
- These robots can’t be used in certain places where maintaining desiccated environment is a must like ICU, research labs, factories, production houses and not all of them are fully automated. Moreover these robots require some kind of human help to guide themselves, walk across a crowded area etc.
- For those under-developed country like ours can't afford to build those robots. Such reasons make people to do disinfecting process by their hand without proper protective gears in hospitals, clinics etc.
Ultraviolet germicidal irradiation (UVGI) is a disinfection method that uses short-wavelength ultraviolet (ultraviolet C or UVC) light to kill or inactivate microorganisms by destroying nucleic acids and disrupting their DNA, leaving them unable to perform vital cellular functions. UVC is absorbed by RNA and DNA bases and can cause the photo-chemical fusion of two adjacent pyrimidines into covalently linked dimers, which then become non-pairing bases.
UVGI is used in a variety of applications, such as food, air, and water purification. UVGI can be used to prevent the spread of certain infectious diseases. Low-pressure mercury (Hg) discharge lamps and LEDs are commonly used in UVGI applications and emit shortwave ultraviolet-C (100–280 nano-meter) radiation, primarily at 254 nm । Source
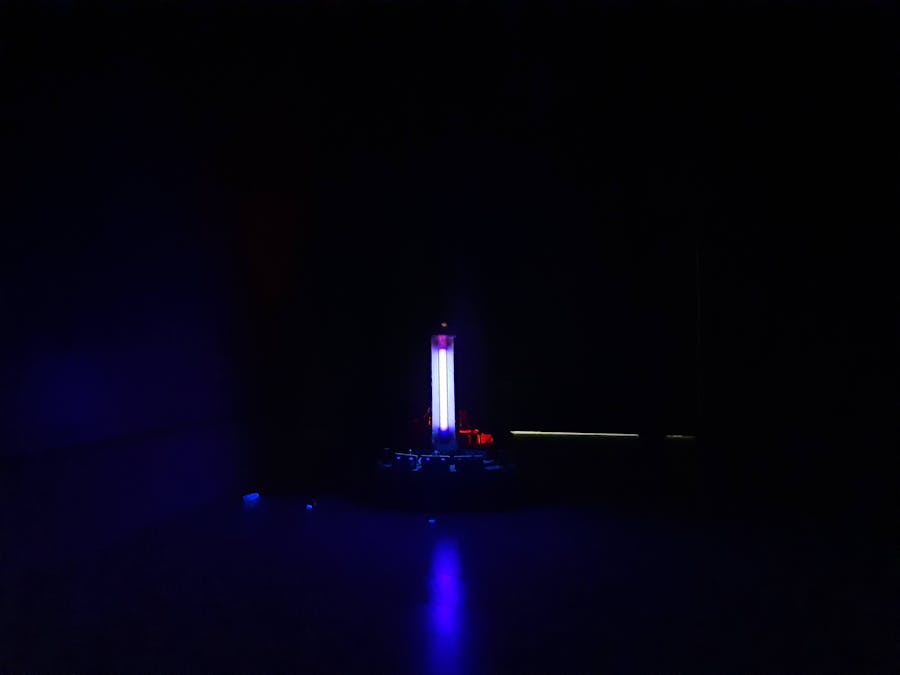
Our SolutionIR-Beacon guided autonomous dis-infector robot using UVC and junkyard material.
Functionality of the Robot:- Disinfecting Process: Sunlight contains three types of UV. First there is UVA, which makes up the vast majority of the ultraviolet radiation reaching the Earth’s surface. It’s capable of penetrating deep into the skin and is thought to be responsible for up to 80% of skin ageing, from wrinkles to age spots.Next there’s UVB, which can damage the DNA in our skin, leading to sunburn and eventually skin cancer (recently scientists have discovered that UVA can also do this). There is also a third type: UVC. This relatively obscure part of the spectrum consists of a shorter, more energetic wavelength of light. It is particularly good at destroying genetic material. To use UVC safely, you need specialist equipment and training. The World Health Organization (WHO) has issued a stern warning against people using UV light to sterilize. Here comes our fully automated system, which is capable of operating itself on it’s own.
- Autonomous Guided Path: There will be two IR beacon stations on the entry-exit locations of a room that will guide the robot to go in or come out. And then a volunteer can collect it without going in.
- Autonomous movement: Implemented autonomous movement with ultrasonic sensors around it, which makes it capable of avoiding obstacles coming into its path.
- Manual Drive: We implemented an web app with integrated keys where live video feed will be available to manually control the robot. | link
- Physical Dimension: All the measurements can be found in the design file that we attached in the attachment section.
- Safety(Lamp Auto Shut-Off): We have used a dedicated battery(3s LiPo 1100mAh) to power up the lamp. But We are not motion sensing yet. Instead, we are maintaining a timing sequence about 30 minutes each activation. After that, the lamp is going to turn off. And it needs to be manually turned on.
- Safety(Steady state push force): Our robot weights about 2kg in total. And we are using two dc brushed gear motors with 1kg torque at each. So it requires less force to move it, which is also less than 8kg.
- Safety(UV On Indicator): We have integrated relays with micro-controller to turn on UV. So this way relay board indicates whether UV is turned on or not.
- Automation Interface Software/Use: Web-app.
- Control: Web-app for manual control and IR beacon guided autonomous drive.
- Cost - Total Unit BoM: Around 200$( Bangladesh currency: BDT-16,000).
- Lamp Life Counter: As the UVC lamp is triggered through a relay board. So, we can maintain the life counter by knowing when it's turned on and when it's turned off.
- Operation Log: Our system involves raspberry pi from which the user can keep track of time. Also for live feed we are using android phone, which has inbuilt GPS to know the location but not like lidar or VSLAM technology.
- Power Source: Operate on primary 11.1volt 3300mAh 3s LiPo battery for motor drive, also for powering sensors and micro-controller. Another 11.1volt 1100mAh 3s LiPo battery for lighting up the UVC lamp.
- Projected Lamp Reliability: Around 9000 hours | source
- Maintenance Lamp Changes: Our UVC lamp housing enables user to replace the lamp very easily. Such that the maintenance person need not to be highly qualified.
- Weight: About 2.0kg
- Reliability: We have used plywood to built our chassis. At normal conditions the plywood has high strength and durability. We have also applied waterproof coating to make it protected against water. This way we are thinking the robot will be able to hold together for 6months(at least) if we have our micro controller and other sensors working perfectly.
Chassis Design:
Used AutoCAD design software to make measurements and adjust fabrication process. Design file is attached at the end.
Chassis Fabrication:
Chassis is made of plywood which is easily available in most of the hardware stores. Had it built in such a way that it can traverse in all areas and all the equipment can fit easily. For this, the preferable shape should be circle/oval shape. The chassis circular shape radius is 5 inch.
Drive motor and Wheels Installation:
All measurements can be found in the AutoCAD design(.dwg) file.
Caster Wheel Installation:
Mounting Sonar Sensors on the chassis:
Used Glue gun to mount sonar sensors on the chassis body and card-board paper is used to make them elevated and balanced.
Final Sonar Assembly And Soldering :
Mounting IR receiver on the chassis:
Used female header pins soldered on the Vero board to attach IR receiver and hot glued it on the chassis and the connecting white wires works as VCC, gnd and Signal.
The Ir beacon Housing assembly:
The IR beacon/transmitter circuit is extracted from an old tv remote which has some button malfunctions. To keep the beacon always working, had to short a button. The beacon generates frequency at 38KHz and the robot tries to follow that path.
UVC light Installation:
We Had to purchase 4watt UVC tube light. As the light needs to be portable while it's moving along side the body, so an inverter circuit is required. The schematic diagram is found on the contributor link. The circuit harvests power from a 3.7volt 1100mAh lipo battery and powers the light.
UVC Dose Calculation:
In most research papers and articles, research groups have mentioned the required UV light for the sterilization process in terms of "Joule per square meter" or "Joule per square centimetre". But when considering the parameters and specifications of the UV light, the manufacturers have given UV light intensity in terms of "Micro-watt(uW) per square centimetre" at a distance of 1 meter.
Dose(J) = Intensity(W) × Exposure Time(s) ... (1)
The result of this calculation will be a value expressed in μWSec/cm² | Source
Intensity at Distance r ∝ 1/r^2 ... (2)
Equation 1 shows the relation between the dosage and the intensity. It concludes that different dosages can be achieved by varying the exposure time to the same UV light source.
The relation between the UV intensity and the distance is shown by Equation 2. According to that, it can be concluded that UV intensity gets lower with the distance from the light source.
Final Circuit Assembly:
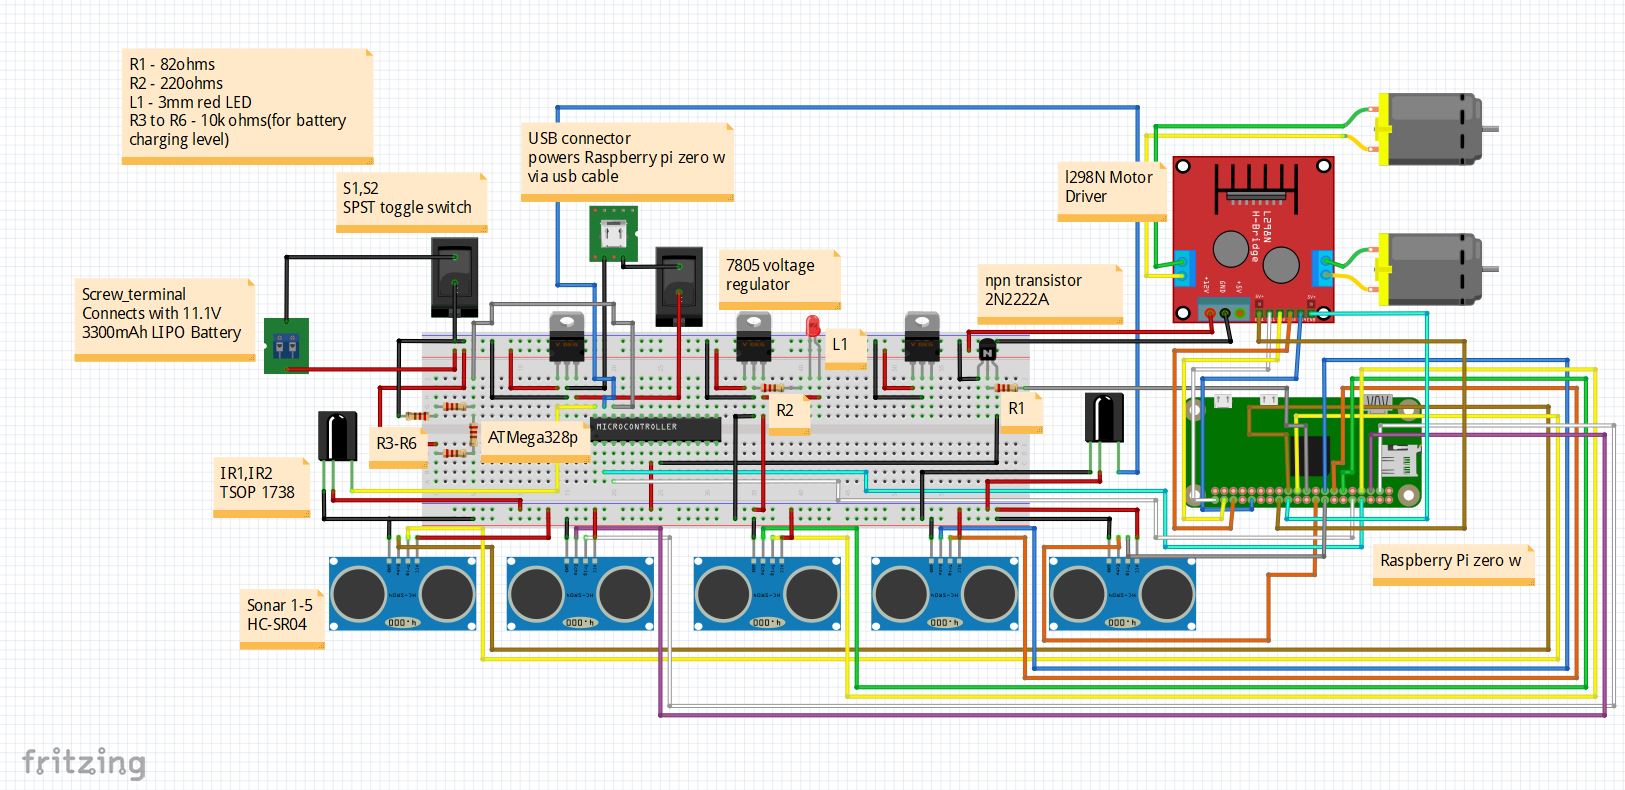
Circuit Diagram can be found on the fritzing file.
Some Instructions:
- We have used analogue sensor like, IR receiver, for reading the sensor value ATMega328p is used.
- ATMega328p extracts sensor data, executes Arduino code and generates motor control strings like:forward, left, right which goes to raspberry pi using serial port (reading tx pin from micro-controller).
- Serial communication setup procedure between raspberry pi and Arduino, can be found on the contributor link section.
- We used inverter circuit to to light up the 4W UVC lamp. Schematic Diagram can be found on the contributor link as well.
- We used external wifi adapter for better connectivity. It's not mandatory to have an external adapter, one can use the built in too.
- Can maintain desiccated environment
- No fluid filling overhead, No volunteer involved
- Fully powered on electricity, only charging required
- IR-Beacon guided path for autonomous control
- Also able to avoid obstacle along its path
- Cheap junkyard material ensures low cost & fast mass production
- Small size and round shape makes it more flexible to move around


_3u05Tpwasz.png?auto=compress%2Cformat&w=40&h=40&fit=fillmax&bg=fff&dpr=2)
Comments
Please log in or sign up to comment.