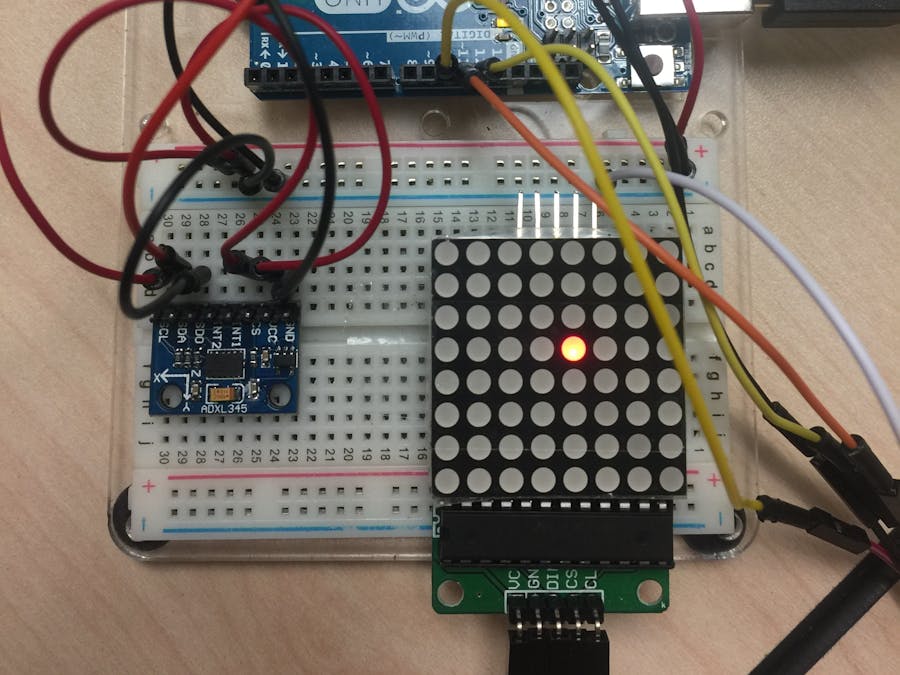
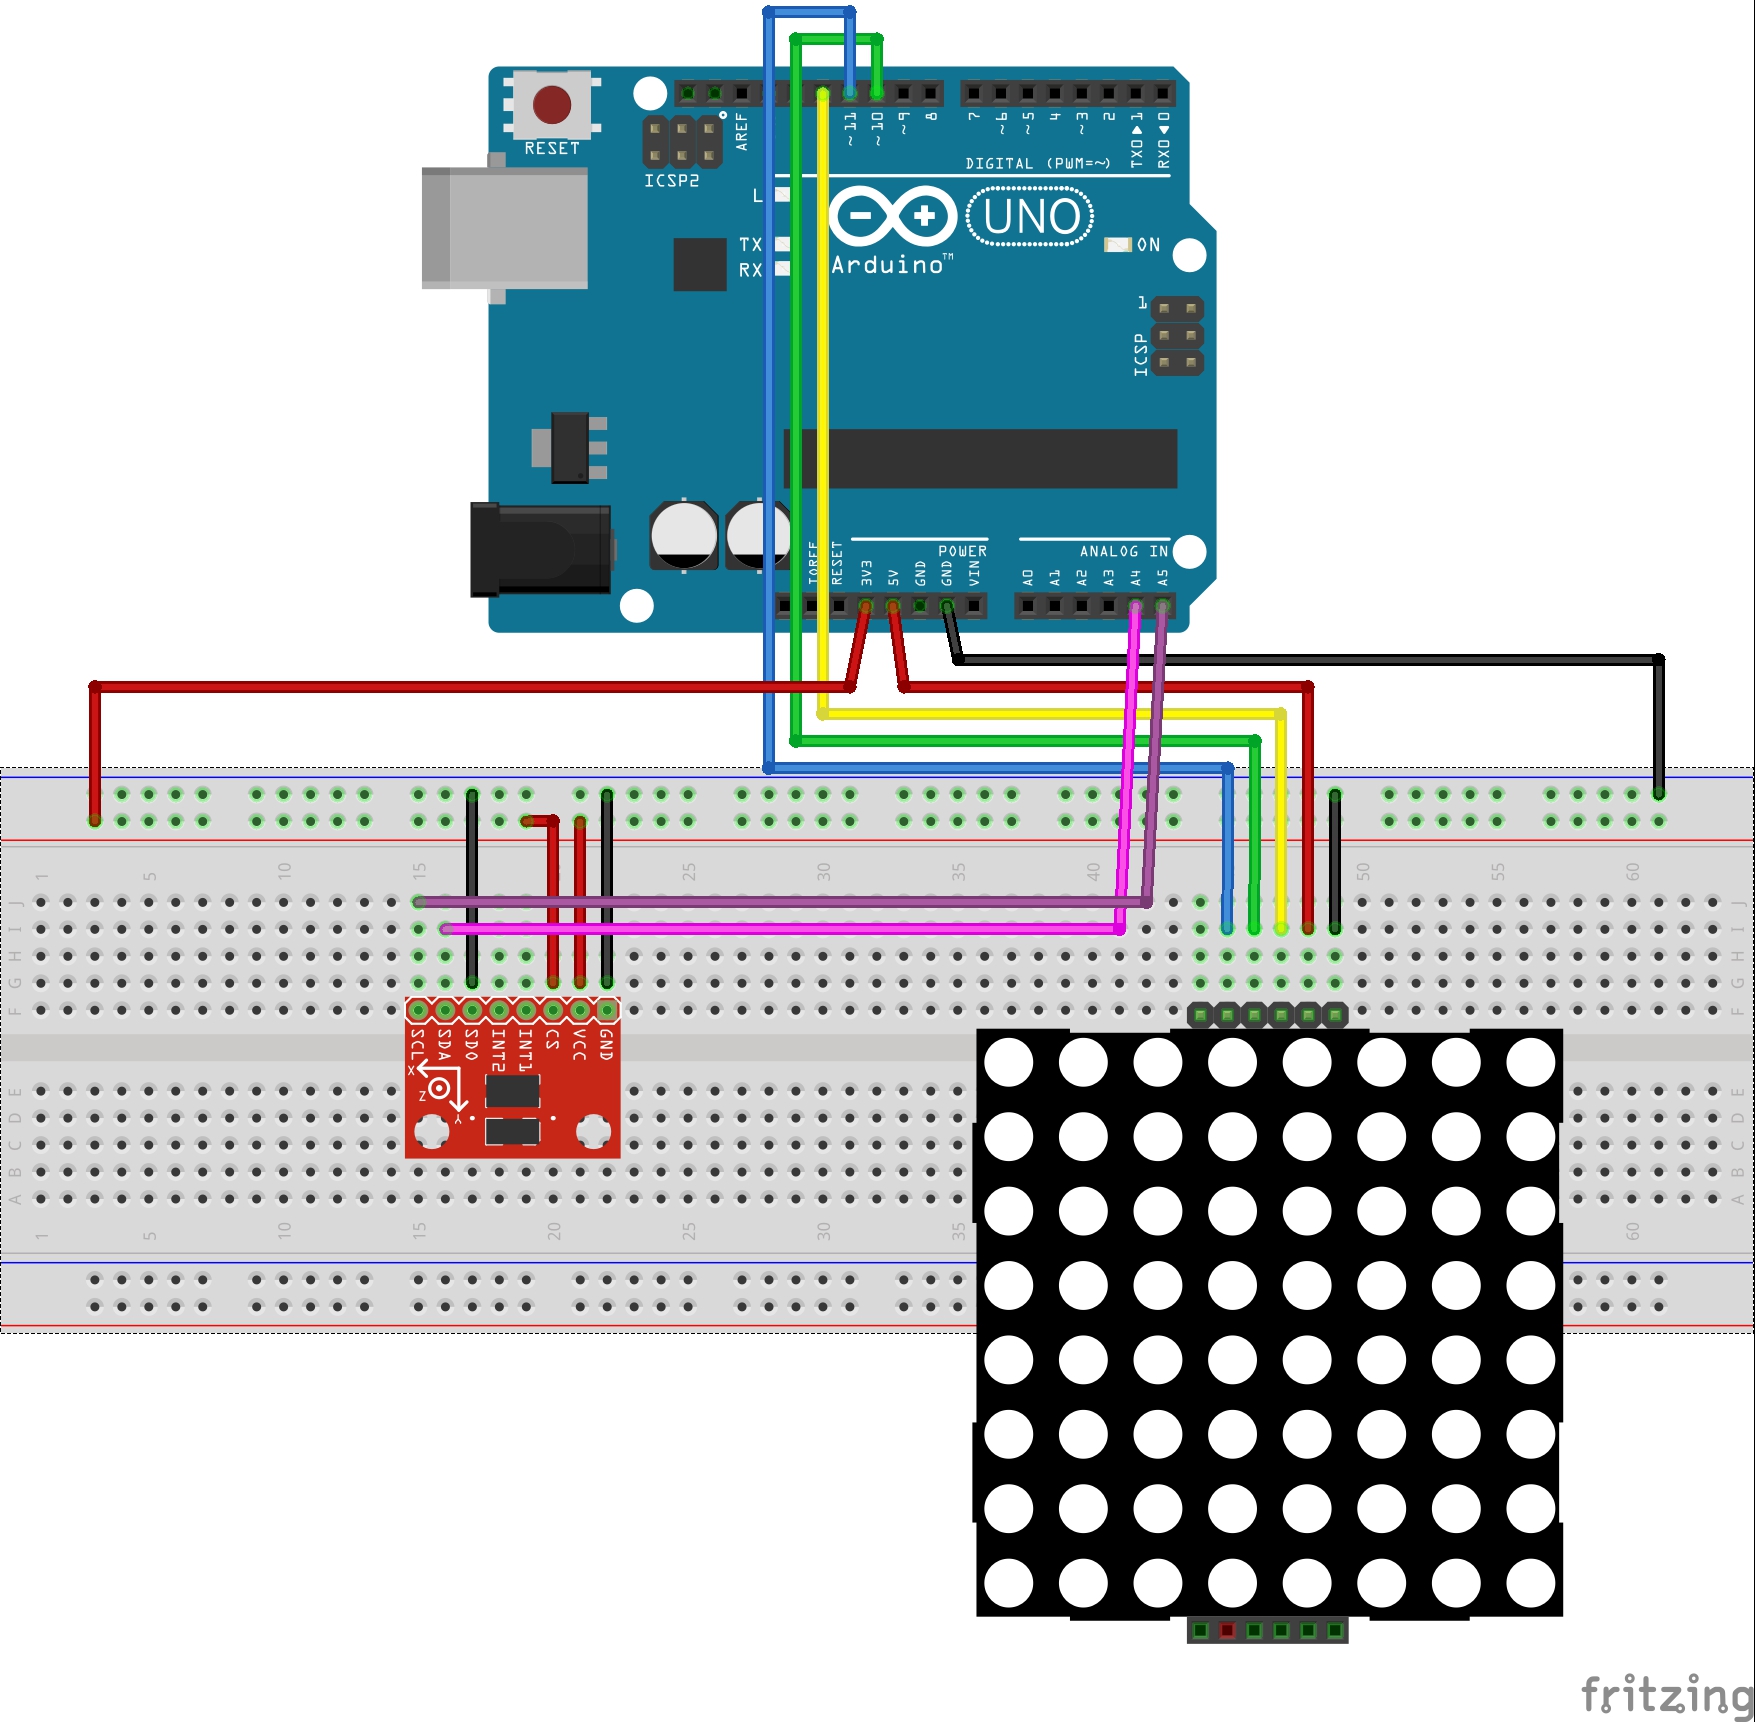
To run this project, simply follow the wiring diagram, and then run the code in your Arduino IDE.
I made this project as a stepping stone toward larger projects that involve the ADLX345 accelerometer. This was made as a demonstration of how you can utilize both the chip, and how to display its results in the Serial monitor and physically through the LED matrix.
I decided to use the MAX7219 LED Driver to minimize the setup and the number of wires needed. It also happens to take up only 3 pins on the Arduino Uno which is a plus. As for how we orientate the matrix, unfortunately for it to follow the orientation of the accelerometer, I was not able to secure it, instead I taped it down to the board to hold it securely.
ChallengesThe biggest challenge in my opinion when building this was understanding exactly what each address represents internally in the accelerometer chip. I will provide a sheet sheet that I found online that helped in setting up which addresses to READ and WRITE to.


_ztBMuBhMHo.jpg?auto=compress%2Cformat&w=48&h=48&fit=fill&bg=ffffff)


_3u05Tpwasz.png?auto=compress%2Cformat&w=40&h=40&fit=fillmax&bg=fff&dpr=2)
Comments
Please log in or sign up to comment.