Hackster is hosting Hackster Holidays, Ep. 2: Livestream & Giveaway Drawing. Start streaming on Friday!Stream Hackster Holidays, Ep. 2 on Friday!
Matthew HaleyAnkit Musham
Published © GPL3+

Automated Food Dispenser

Be able to feed your pet from anywhere, or have them feed themselves!

IntermediateShowcase (no instructions)5 hours501
Automated Food Dispenser

Things used in this project

Hardware components

Argon
Particle Argon
×2
PIR Motion Sensor (generic)
×1
Jumper wires (generic)
×15
Gravity:Digital Push Button (Yellow)
DFRobot Gravity:Digital Push Button (Yellow)
×1

Software apps and online services

ThingSpeak API
ThingSpeak API

Hand tools and fabrication machines

3D Printer (generic)

Story

Read more

Custom parts and enclosures

Servo Adapter

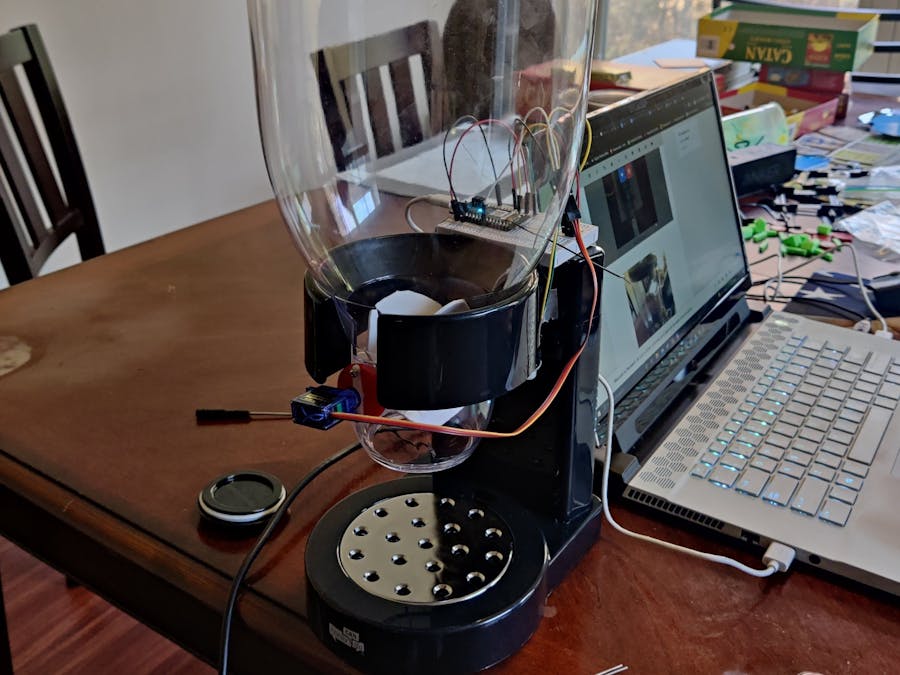
This custom 3D printed part allows the servo to attach to the rotating drum to allow food to dispense.

Schematics

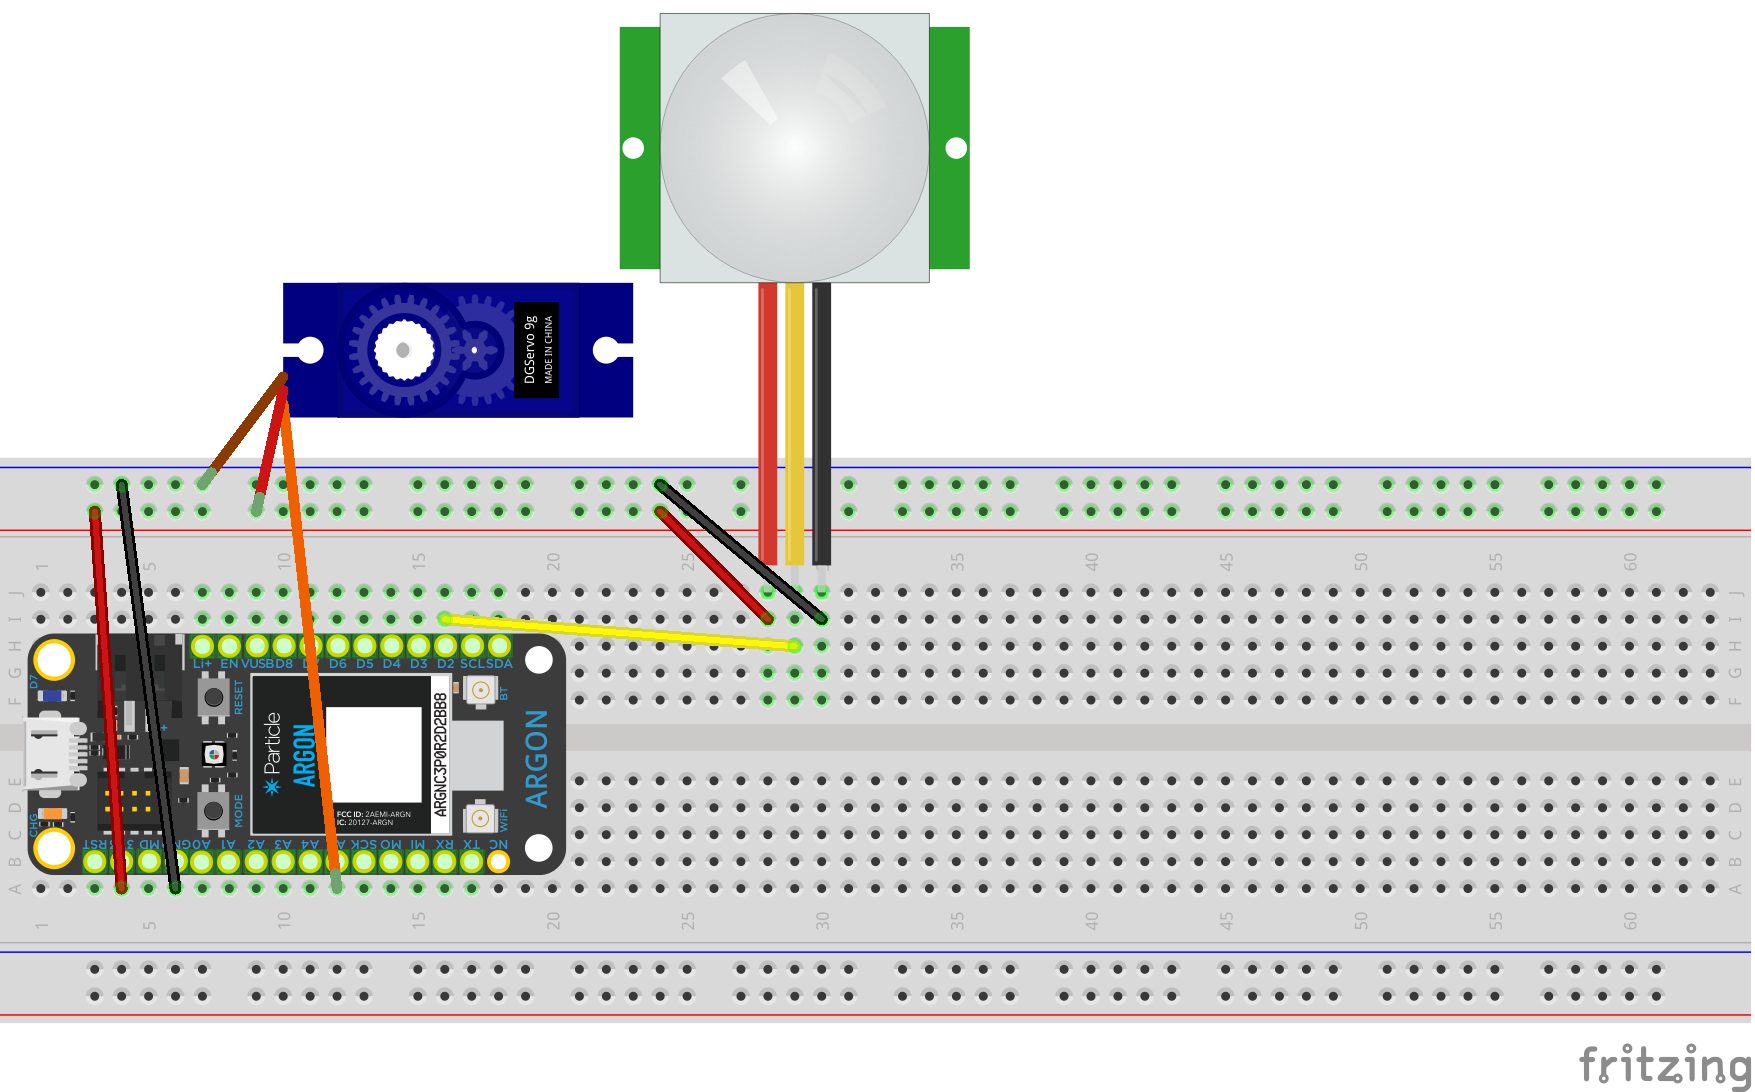
Dispenser Circuit Diagram

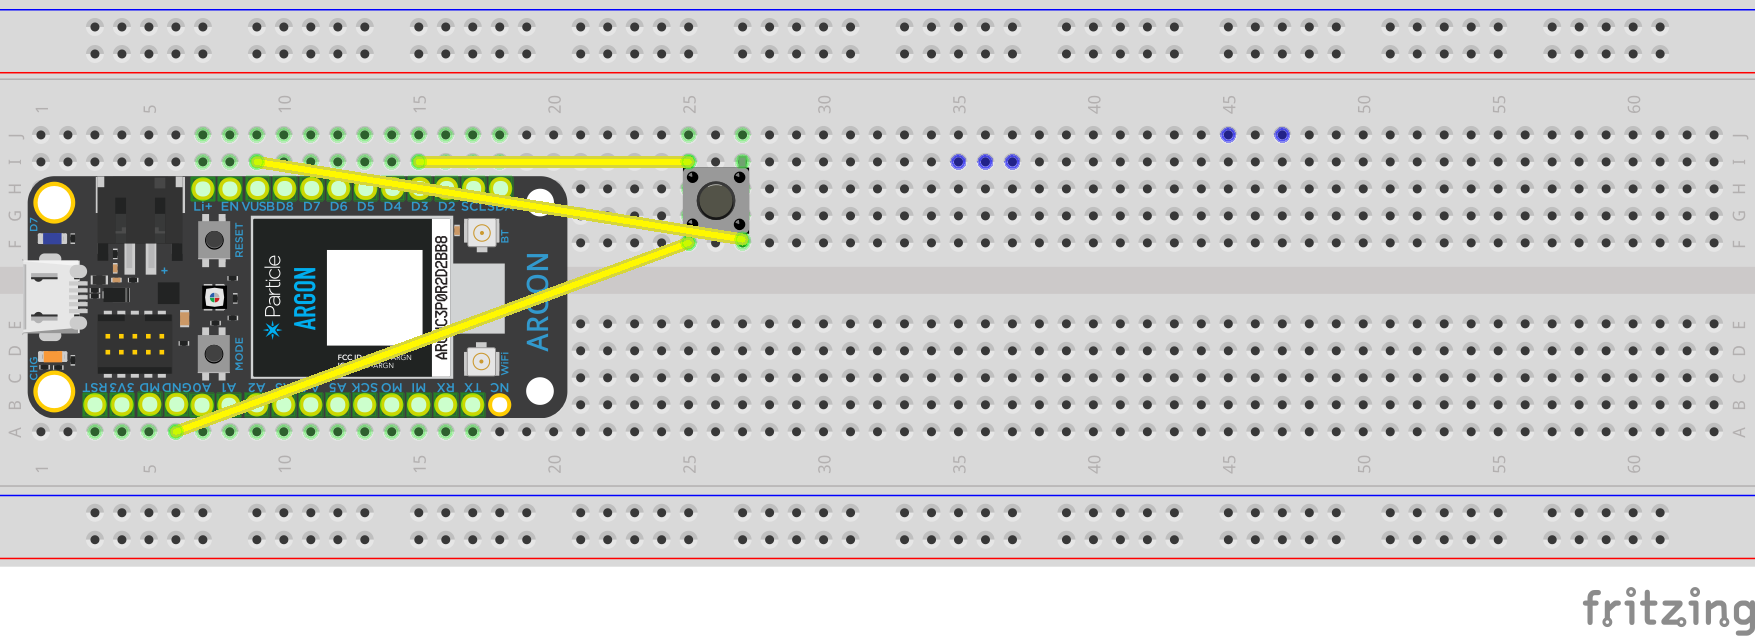
Remote Control Circuit Diagram

Code

Dispenser Code

C/C++
This is the code for the argon connected to the food dispenser. The food dispenser will trigger if motion is detected, or when it receives an input from the button.
int sensorPin = 2;                  //Sensor pin
int servoPin = 5;                   //Servo pin
int motionsensorInput = 0;          //This reads the motion status
Servo myservo;

void setup() {
pinMode(D2, INPUT);                 //sets the motion sensor pin as an input
pinMode(A5, OUTPUT);                //sets the servo to be an output
myservo.attach(A5);                 //attaches the servo to the A5 pin
myservo.write(10);
delay(10000);                        //Calibration Delay for Motion Sensor
Particle.subscribe("Food", Food);    //subribes to the "Food" event
}

void loop() {
 motionsensorInput = digitalRead(D2);       //reads the input value
 if (motionsensorInput == HIGH){	        //checks to see if there is an input. 
    myservo.write(180);                     //rotates servo 180 degrees
    delay(1000);                            //delays 1 second
    myservo.write(10);                      //rotates the servo back to 10 degrees
    delay(1000);
}
else (motionsensorInput == LOW);{           //this else statement serves to break the loop and keep the servo at the 10 position
    myservo.write(10);
    delay(4000);
  }
}

void Food(const char *event, const char *data)      //this is the dispenser recieving the event from the button, it will trigger the same action as motion
{
    myservo.write(180); 
    delay(1000);
    myservo.write(10); 
    delay(1000);
}

Button Code

C/C++
This is the code for the remote control button. The button allows the user to override the need for motion and instead activate the dispenser willingly. The button will send an event to the dispenser for the dispenser to activate. The button also records activations from both the motion sensor and button and sends it to thingspeak.
int button = D3;            //assigns button to D3
int val = 1;                //creates the val variable
int counter = 0;            //sets counter to 0

void setup()
{
pinMode(button, INPUT);     //assigns button to input
}

void loop() {               //this loop will read the value of the D3 pin, and publish an event to the dispenser if the button is activated.
    
    val = digitalRead(button);
 
    if (val == HIGH) {
        counter = 5;
        Particle.publish("Food", String(counter));
        delay(1000);
    }
   else 
   {delay(100);
   }
}

Credits

Matthew Haley

Matthew Haley

1 project • 1 follower
Ankit Musham

Ankit Musham

1 project • 0 followers

Comments