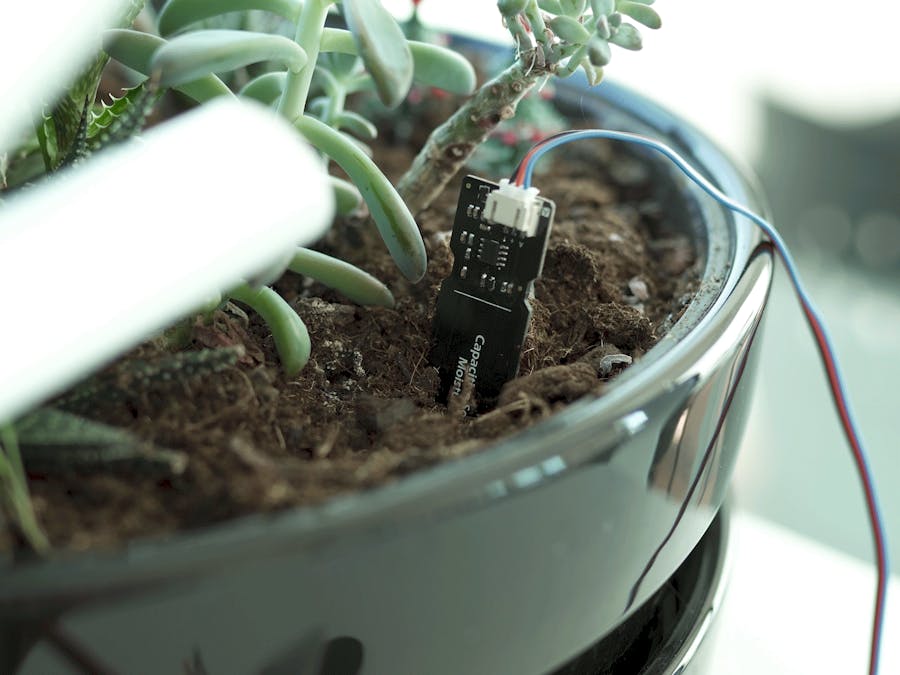
Dying houseplants are a thing of the past with this soil moisture sensor hack.
In this guide, we’ll show you how to create a very simple moisture sensor for measuring soil moisture content. This can be used to monitor real-time volumetric water content in your houseplant soil so you know when to water it to keep it at the optimum moisture level.
This soil moisture sensor uses the Ynvisble Display Kit and Arduino Nano.
Read on to learn how to do it yourself.
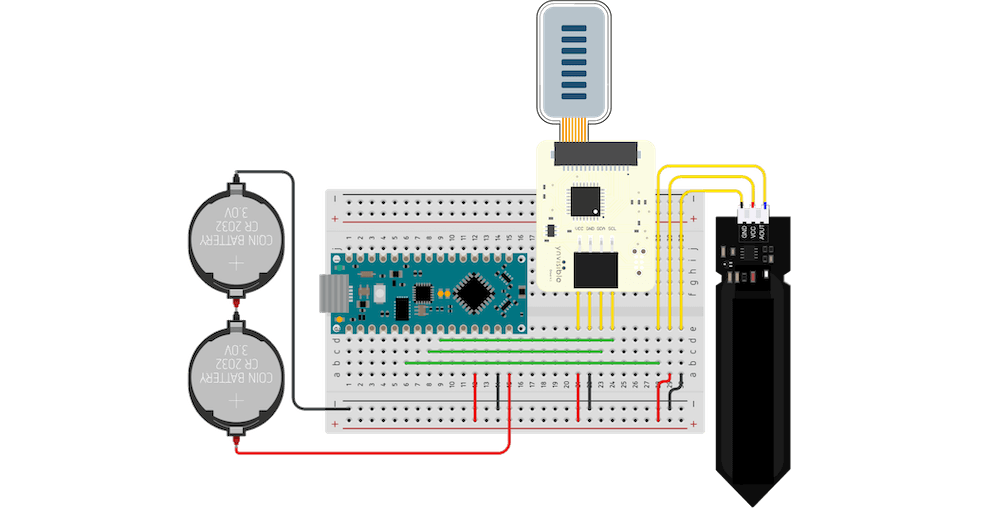
CONNECTING THE COMPONENTSFollow these simple steps to build your own soil moisture sensor:
1. Connect the Arduino to the breadboard
2. Connect the Ynvisible driver to the breadboard by using the 4 pin 90° IDC adapter
3. Connect the bar display to the driver (The leftmost display electrode must be connected to the leftmost electrode in the connector).
4. Connect the DFROBOT Capacitive Soil Moisture Sensor V1.0 to the breadboard by using the 3 pin 90° IDC adapter
5. Connections that need to be made using jumper wires:
- 5V from Arduino to VCC on the driver and to + on the moisture sensor
- GND from Arduino to GND on the driver and to – on the moisture sensor
- SDA from the driver to pin A4 on the Arduino
- SCL from the driver to pin A5 to the Arduino
- Pin A from the sensor to pin A2 on the Arduino
- Connect the Power supply + to the Arduino VI pin and the – to the GND
Follow these steps to program the Arduino for your soil moisture sensor:
ADD THE LIBRARY TO THE ARDUINO IDE
- Install and open ArduinoIDE
- Download Arduino Library for the driver 4.2, Ynvisible_Driver_4.2-1.0.0 (download here)
- Click "Sketch"/"Include Library"/"Add.ZIP Library..." in the main menu
- Go to your downloads folder and choose Ynvisible_Driver_4.2-1.0.0.zip
UPLOAD THE CODE TO ARDUINO
- Connect the Arduino to your computer with a USB cable
- Create a new file in the Arduino IDE
- Replace the code in the editor with the code below
- Click "upload" (the right arrow on the upper left in the Arduino IDE)
- Congratulations you now have a functional moisture sensor. You can now add your soil sensor to your plant to begin monitoring the water content of the soil - and how happy it is!
Now you have your own soil moisture sensor, you have everything at your fingertips to start exploring the code and making changes to the hardware to turn your ideas into prototypes.
You could try switching up the display from the Ynvisible Display kit and change the moisture sensor to a light sensor, for example. The sky is your limit.
Check out Ynvisible University for more inspiration and how-tos.


Comments
Please log in or sign up to comment.