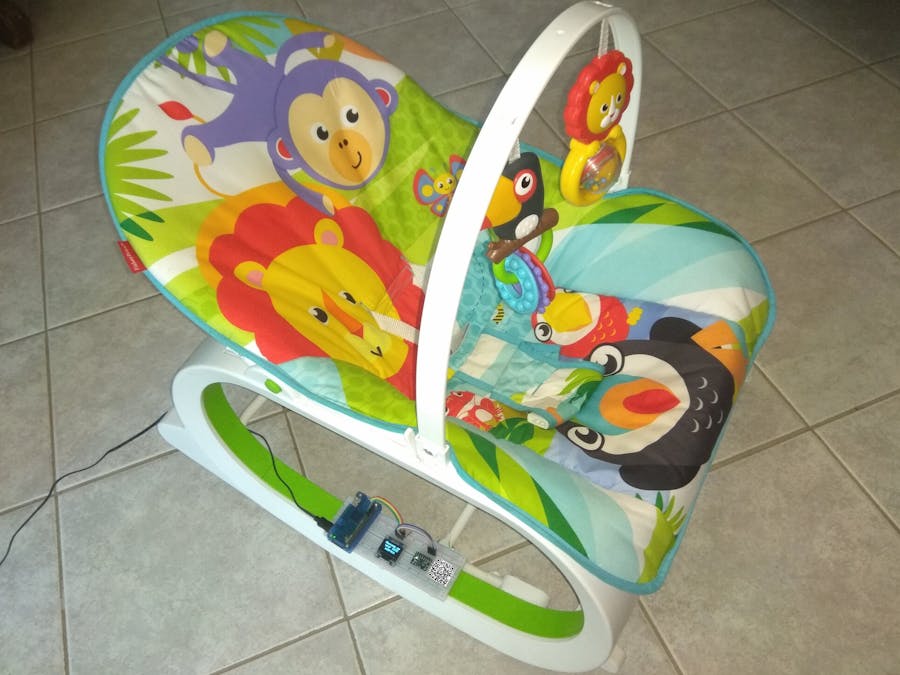
Baby rockers are great products for babies to sit, rock and relax. However, newborns (0-3m) cant rock by themselves so, an adult must help by giving a push.
The IOTA Powered Baby Rocker gives you extra motivation to help the baby rock by sending you IOTA tokens for every rocker's move.
How to use itThe rocker must have an account with some IOTA tokens available
1) The user sends his receiving IOTA address with a message to the printed address of the Rocker
2) When the message is received, the counting begins; the OLED display shows the moves and the user starts pushing the Rocker
3) When the user stops the pushes, the Rocker sends IOTA tokens to the user's address, depending on how many moves were made.
4) Finally, the baby is happy and the user has earned some IOTA tokens! A win win situation! :-)
Getting hardware readyFirst of all solder the GPIO pin header to the Pi Zero W or you can use the Pi Zero WH which has pre-soldered the GPIO header.
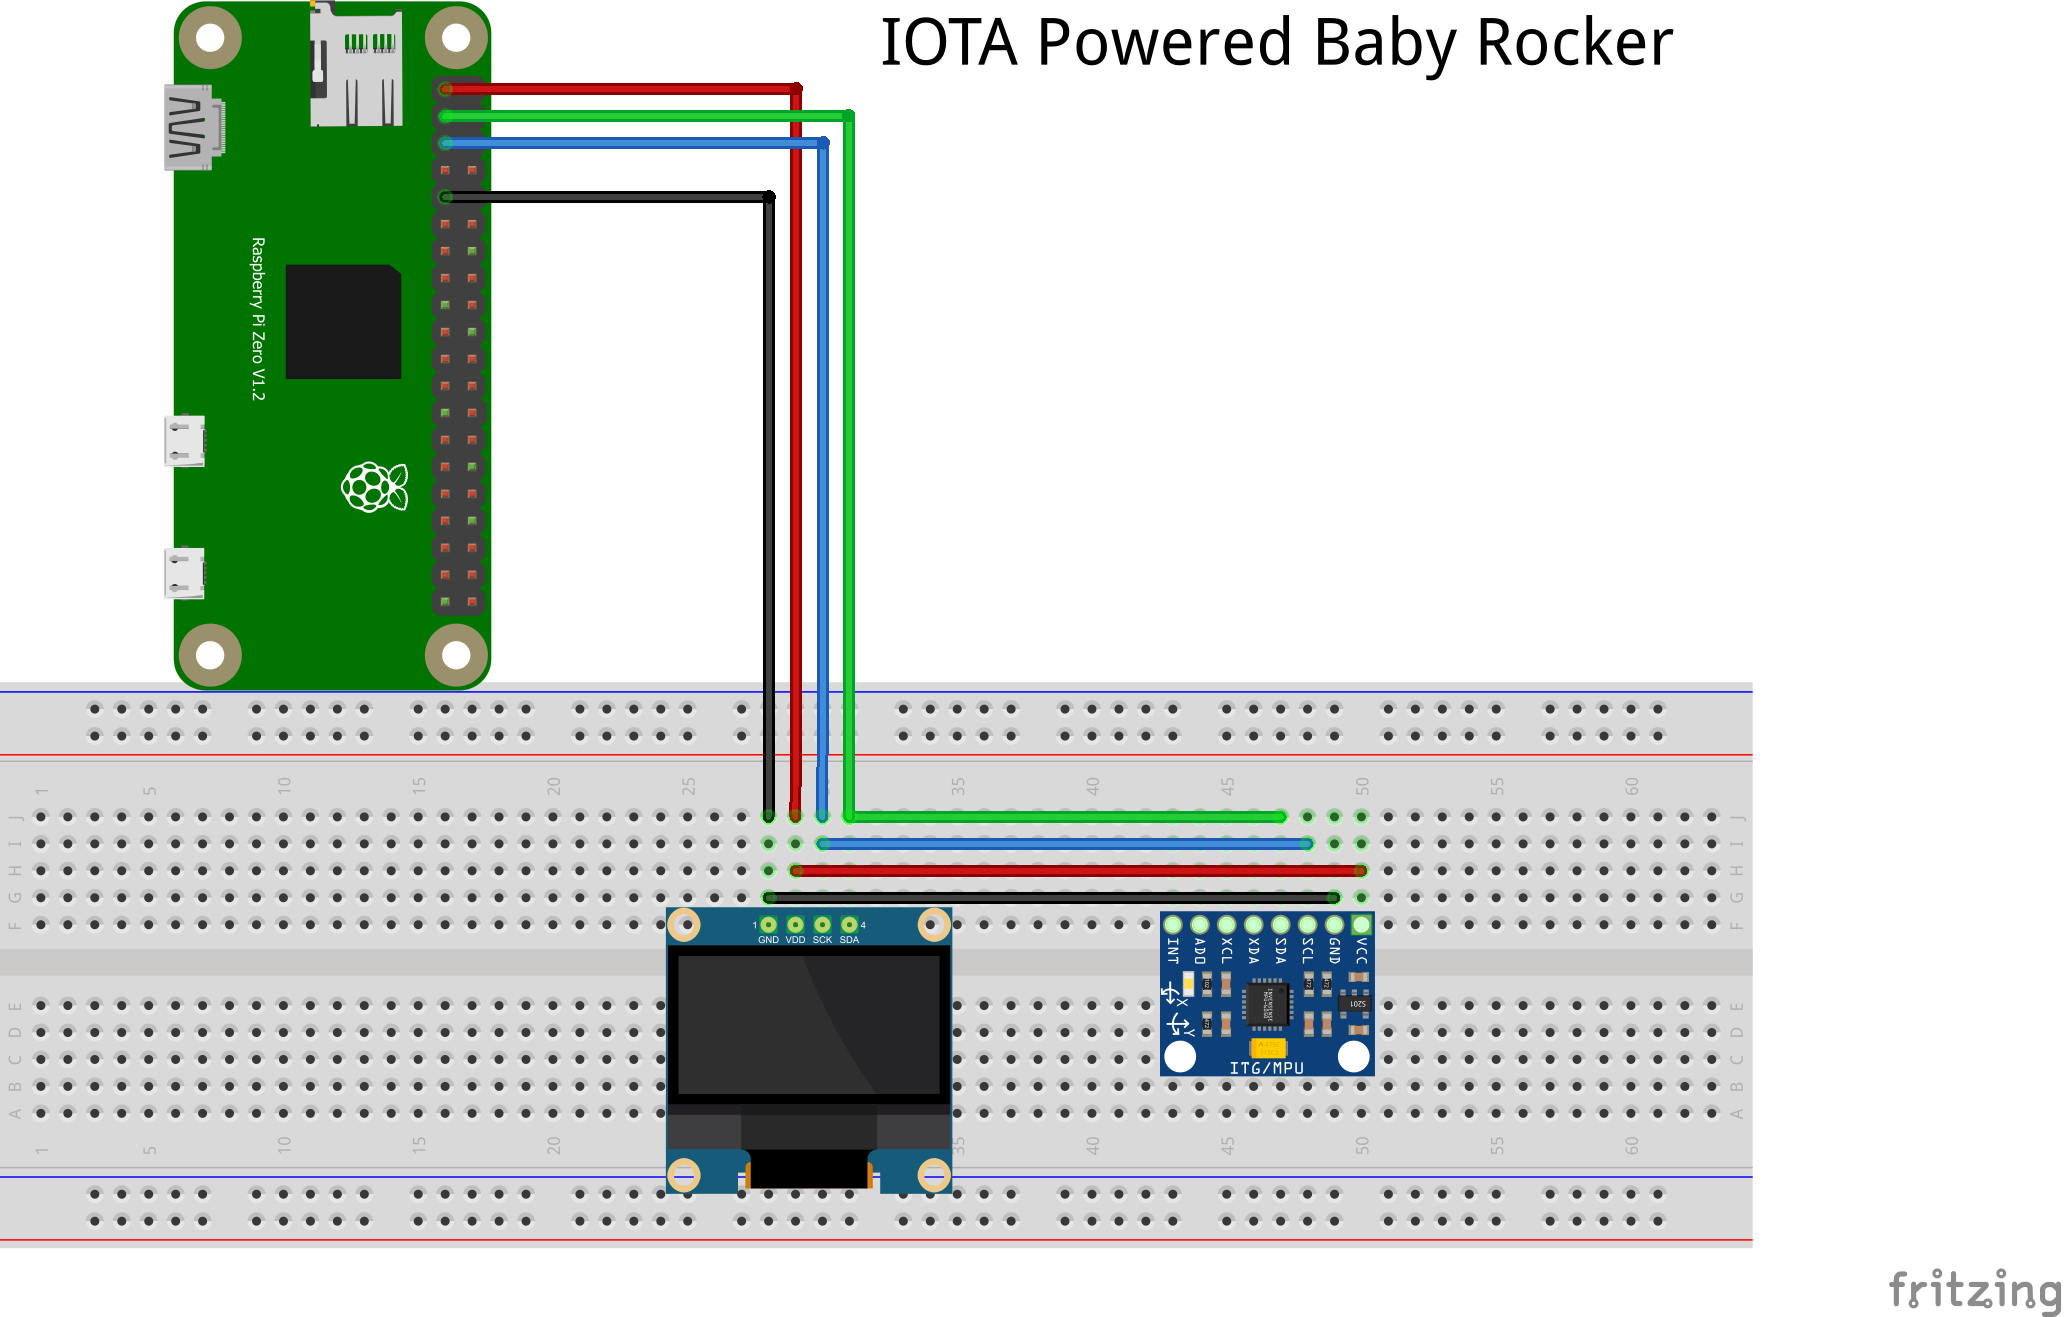
For this project we need 2 modules, an MPU6050 accelerometer+gyroscope for counting the moves of the rocker and an OLED screen for displaying messages to the user. Both modules are connected to the Pi Zero's I2C bus.
For the Raspberry Pi Zero W the pinouts are:
PIN1 -> VCC
PIN3-> SDA
PIN5 -> SCL
PIN9 -> GND
The components can be connected according to the schematic below.
Finally, attach the the components to the rocker. I used double sided tape to put them in place.
Raspbian and Node.js have to be installed. If you haven’t installed them yet, follow the following tutorials:
Also you have to enable I2C bus for the communication with the OLED display and the MPU6050 gyro, by following the instructions below.
sudo raspi-config
Getting the project repository
The project files are publicly availabe at github. You can clone the repository by
git clone https://github.com/simvoulos/IOTArocker.git
Installing required libraries
npm install @iota/core
npm install i2c-bus
npm install oled-ssd1306-i2c
npm install oled-font-5x7
npm install i2c-mpu6050
Creating IOTA addresses for the rocker
Raspberry Pi Zero has limited processing power and sending IOTA tokens from standard addresses (Security Level 2) takes a lot of time to sign the transfer. So to make things easier for our Pi Zero we have to use Security Level 1 addresses. To create these addresses we can can use the CreateRockerAddress.js of our project (don't forget to set the seed of our rocker). CreateRockerAddress.js will create 2 addresses, one address for receiving the user messages and one for funding the rocker's account.
Setting the parameters
In our main project file IOTARocker.js we have to set the following variables
- seed : The seed of the rocker's IOTA account. Remember that the account must have some IOTA tokens.
- msgAddress : The address that the rocker will be listening for incoming messages
- IOTAperMove : How many IOTA tokens will be sent to the user for each move of the rocker
The code (IOTARocker.js)
The code is divided in 3 sections. The first section is the place that the rocker listens for an incoming message transaction. The message must contain the user's IOTA address which the payment will be sent to. When a message arrives, the code moves to the second section where it starts counting the moves by checking the rotation of the rocker with the MPU6050 module. When no moves are detected for a while, the third section of the code starts. In the third section the Pi Zero sends the IOTA tokens to the user. The amount of tokens is calculated by the formula TokensToSend = moves * IOTAperMove.


Comments
Please log in or sign up to comment.