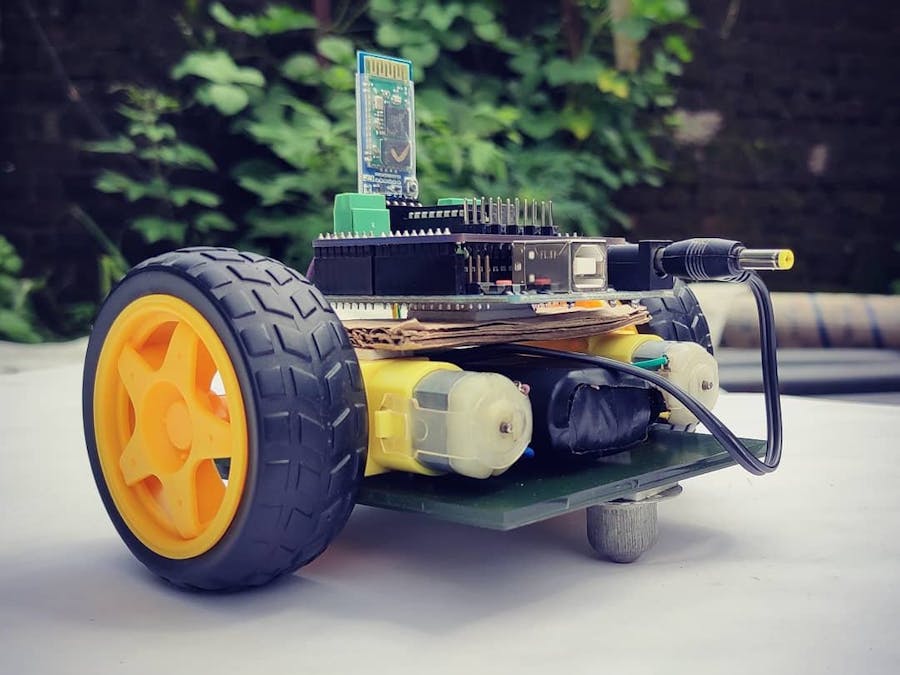
Let's make an Awesome cellphone controlled car in Super Easy way. I showing here The easiest way to make A Bluetooth Controlled RC Car. with detail explained Progragraming.
Components Used:
1. Arduino Uno - x1
2. HC-05 Bluetooth Module - x1
3. L293D Motor driver - x1
4. BO Motors - x2
5. Wheels -x2
6. 7.4V 2S LiPo Battery - x1
7. Piece of Acrylic Sheet
8. Castor Wheel -x1
9. Basic robot Shield (PCB) : https://www.pcbway.com/project/shareproject/How_to_Make_Arduino_Based_Edge_Avoiding_Robot.html
The piece of Acrylic Sheet is going to use as a base of the robot car. Draw a line on the base plate in such a way so that the shaft of motors are comes in the center of the length of the base plate. Using foam tape stick both motors on base plate according to the marked line. Make sure that shafts of both motors are aligned in the same axis. Solder Wires to the bothe motors.
Stick Castor Wheel on the opposite side of the motors in such a way that the max weight of motors coming on that wheel. Now put Plastic wheels in motors shaft.
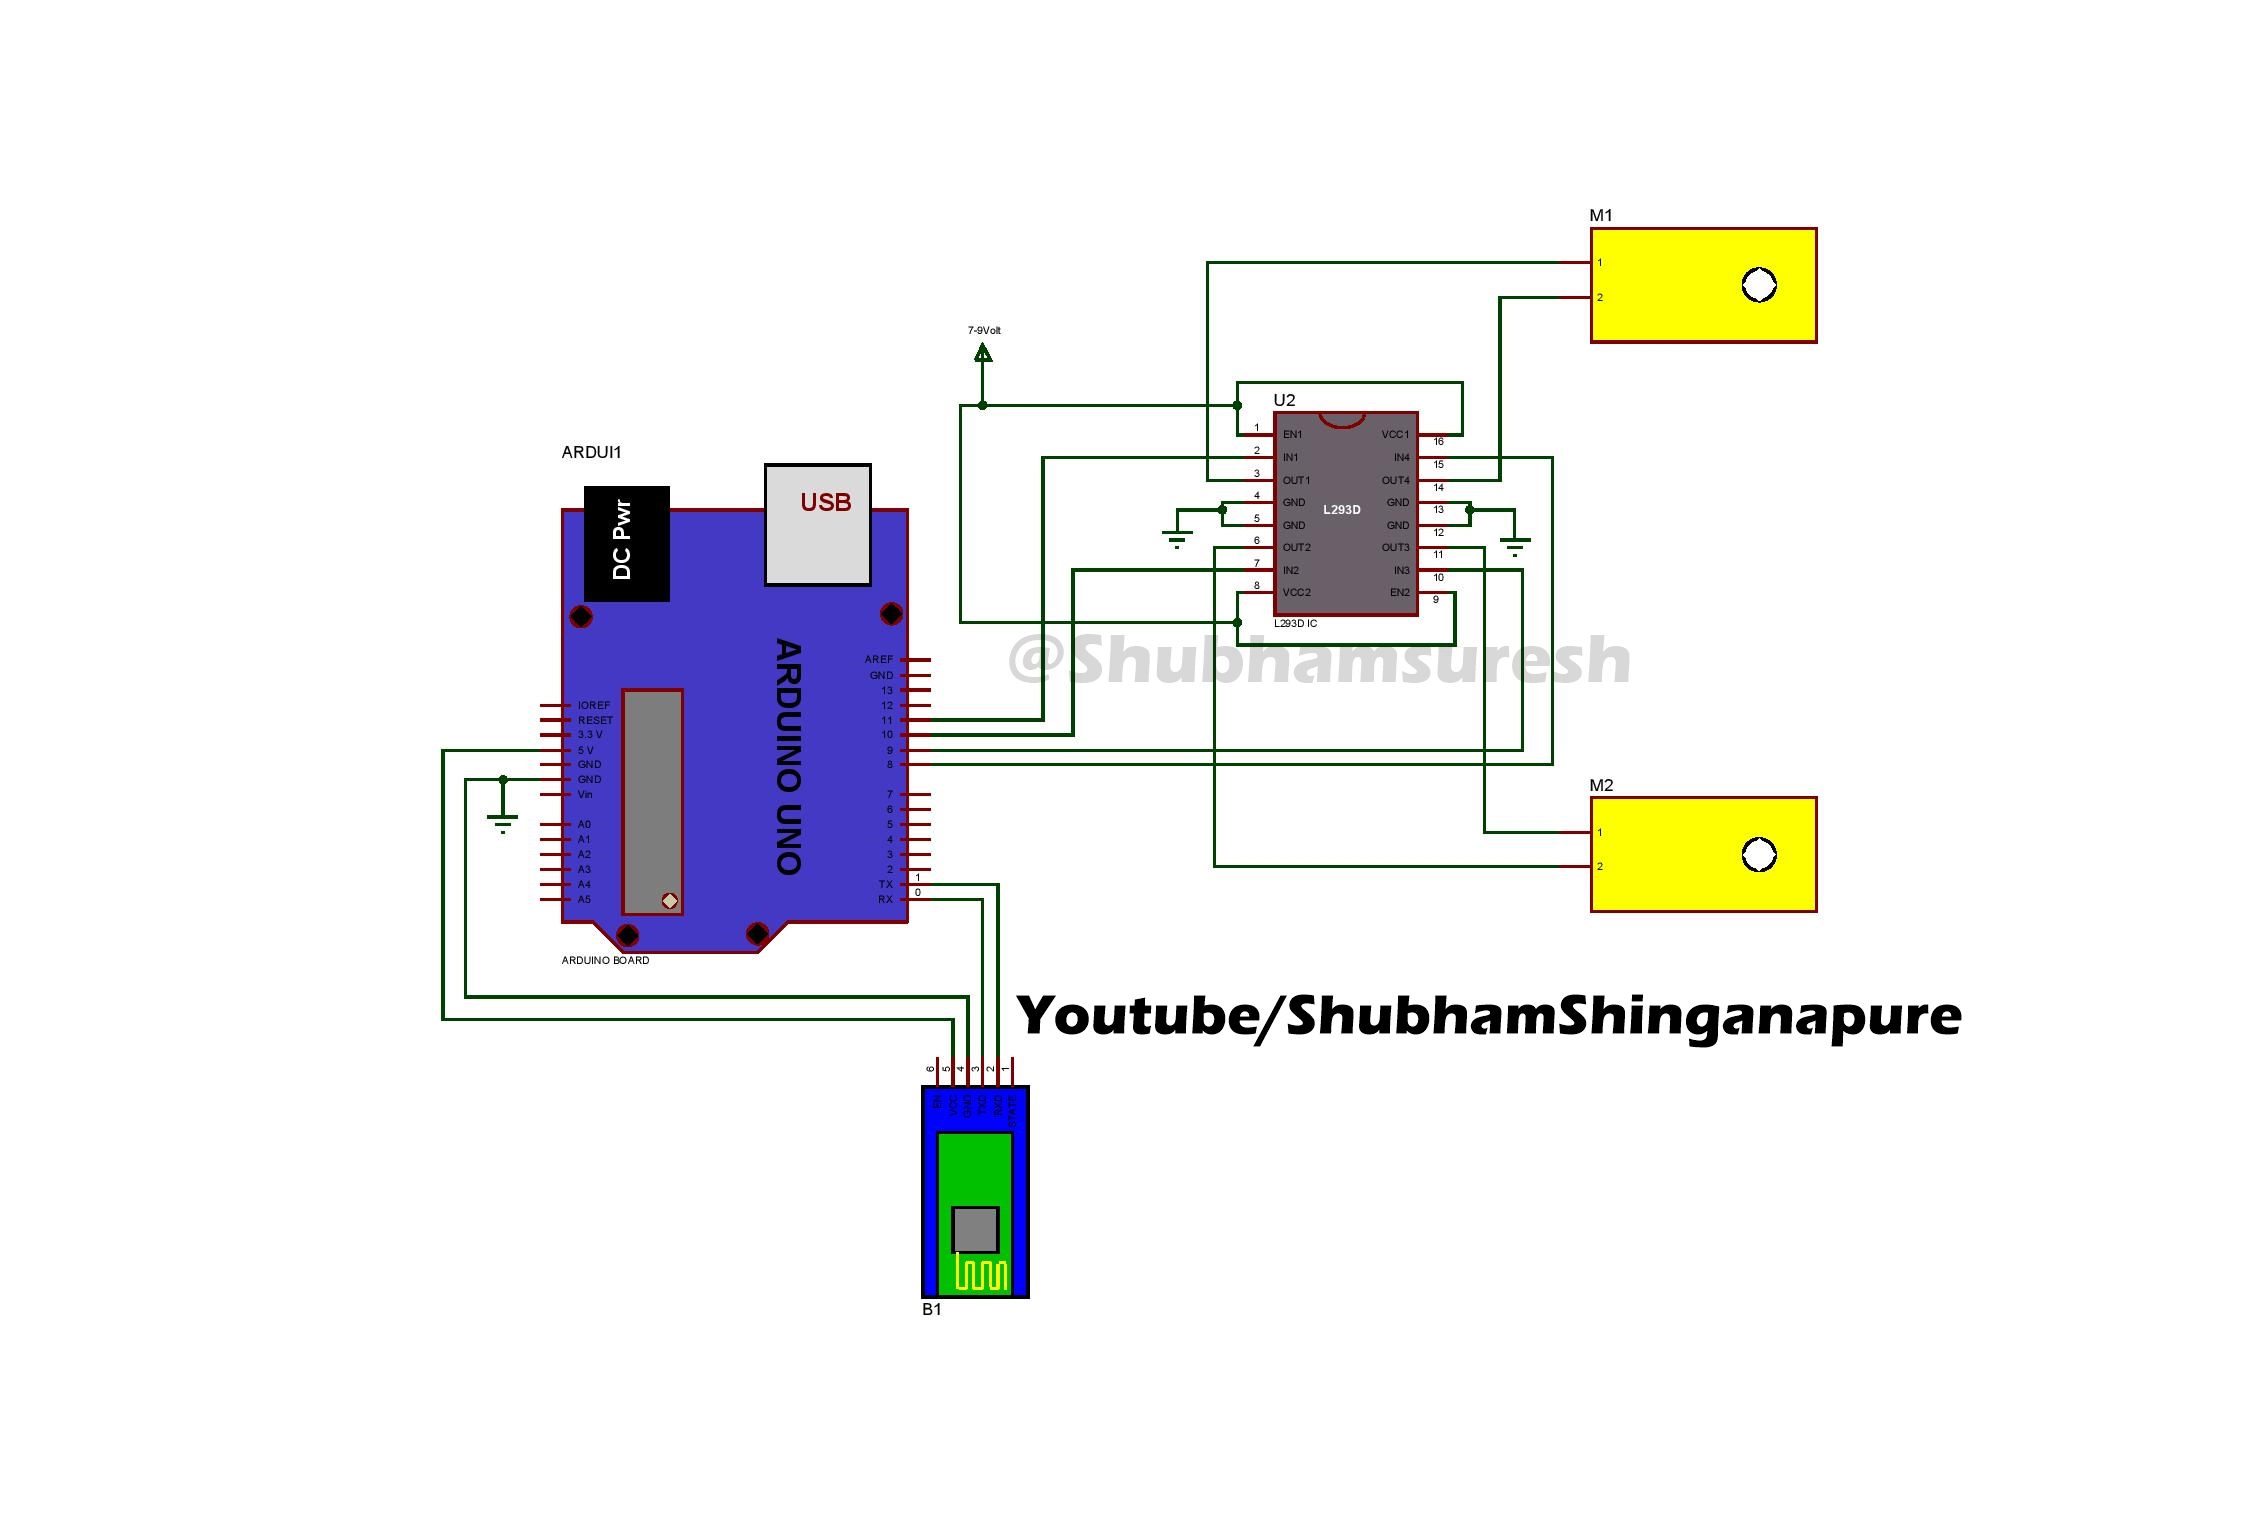
Put Battery inside of it. Stick Arduino Uno on Suitable position using Foam tape. Insert Robot shield in Arduino. if you do not have that shield make all connections like this circuit diagram.
And it's ready for programming:
Connect it with PC using USB cable. Copy the given code and pest it in Arduino's new code. and simply upload it to Arduino by selecting the correct com port and board type. Note one thing before uploading the program. disconnect the battery and remove the Bluetooth module. And after successfully uploading of program put it back on its position.
//program by Shubham Shinganapure on 28-09-2019
//
//for Blutooth controled Robotic Car
int lm1=8; //left motor output 1
int lm2=9; //left motor output 2
int rm1=10;  //right motor output 1
int rm2=11;  //right motor output 2
char d=0;
void setup()
{
pinMode(lm1,OUTPUT);
pinMode(lm2,OUTPUT);
pinMode(rm1,OUTPUT);
pinMode(rm2,OUTPUT);
Serial.begin(9600);
sTOP();
}
void loop()
{
if(Serial.available()>0)
{
d=Serial.read();
if(d=='F')
{
ForWard();
}
if(d=='B')
{
BackWard();
}
if(d=='L')
{
Left();
}
if(d=='R')
{
Right();
}
if(d=='S')
{
sTOP();
}
}
}
void ForWard()
{
digitalWrite(lm1,HIGH);
digitalWrite(lm2,LOW);
digitalWrite(rm1,HIGH);
digitalWrite(rm2,LOW);
}
void BackWard()
{
digitalWrite(lm1,LOW);
digitalWrite(lm2,HIGH);
digitalWrite(rm1,LOW);
digitalWrite(rm2,HIGH);
}
void Left()
{
digitalWrite(lm1,LOW);
digitalWrite(lm2,HIGH);
digitalWrite(rm1,HIGH);
digitalWrite(rm2,LOW);
}
void Right()
{
digitalWrite(lm1,HIGH);
digitalWrite(lm2,LOW);
digitalWrite(rm1,LOW);
digitalWrite(rm2,HIGH);
}
void sTOP()
{
digitalWrite(lm1,LOW);
digitalWrite(lm2,LOW);
digitalWrite(rm1,LOW);
digitalWrite(rm2,LOW);
}Now its time to make a remote control for this.
To do it just get your phone and go to play store, install the application by name Car Bluetooth RC, now pair your phone with Bluetooth module. To do this, connect the battery to the bot, you will see the red led blinking on the Bluetooth module. It means HC–o5 is ready to pair. Now go to the Bluetooth settings of your phone, search for a new device, and you will see HC-05 or something like this. just click on that. if it will ask for the password, enter 1234 or 0000 it is the default password for the HC-05 Bluetooth module. Now open the app which we installed before. click on the play button and select HC-05 from the dropdown list. As it connects with the phone. The red led on the module will blink slower. Now it is ready to play.
Android App link: https://play.google.com/store/apps/details?id=com....
Hope you find this useful. if yes, like it, share it, comment your doubt. For more such projects, follow me! Support my Work and Subscribe to My Channel on YouTube.
Seeed Fusion PCB Assembly Service offers one-stop prototyping for PCB manufacture, PCB assembly and as a result they produce superior quality PCBs and Fast Turnkey PCBA from 7 working days. When you prototype with Seeed Fusion, they can definitely provide Free DFA and Free functional tests for you! Check out their website to know about their manufacturing capabilities and service.
https://www.seeedstudio.com/prototype-pcb-assembly.html
Thank you!


_ztBMuBhMHo.jpg?auto=compress%2Cformat&w=48&h=48&fit=fill&bg=ffffff)


Comments
Please log in or sign up to comment.