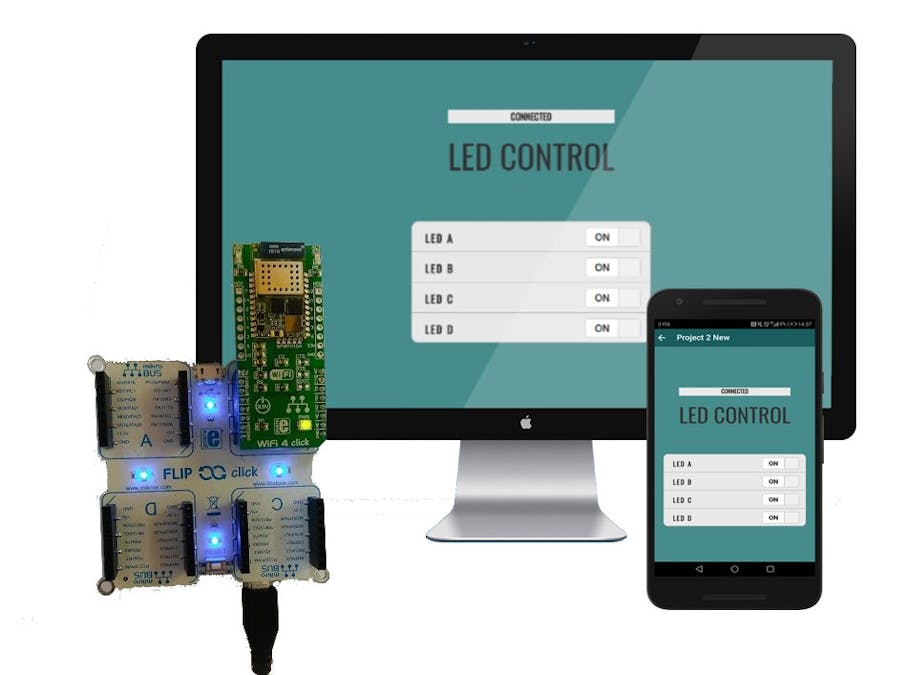
If you are new to the IoT world, this is a very simple and complete step-by-step example from which you can take inspiration. What we will do is simple: we are going to program a Flip&Click in Python and control the four LEDs of the board via WiFi. At the end of this tutorial you will be able to turn the LEDs on and off whenever you want with your smartphone.
All of this will be possible in a very simple way, thanks to the tools that Zerynth offers (that will be mentioned in step 1).
Step 1: Required MaterialsThe project requires a few elements:
- Zerynth Studio: a cross-platform Python development environment with board management features. No matter which OS you use, Zerynth runs! Just download Zerynth and install it (http://www.zerynth.com/zerynth-studio/).
- Zerynth App: the Zerynth mobile interface for smart objects and IoT systems. Any mobile will become the objects display and remote controller. Download: http://www.zerynth.com/zerynth-app/
- Flip&Click by Mikroelektronika (available here: https://www.mikroe.com/flip-n-click-sam3x): two-sided development board expandable with up to four click boards (out of hundreds available). It's similar to Arduino Due and it can also run Python (for more info see here).
- WiFi 4 click by Mikroelektronika (available here: https://www.mikroe.com/wifi-4-click): a complete standalone WiFi module with a single-chip (for more info see here).
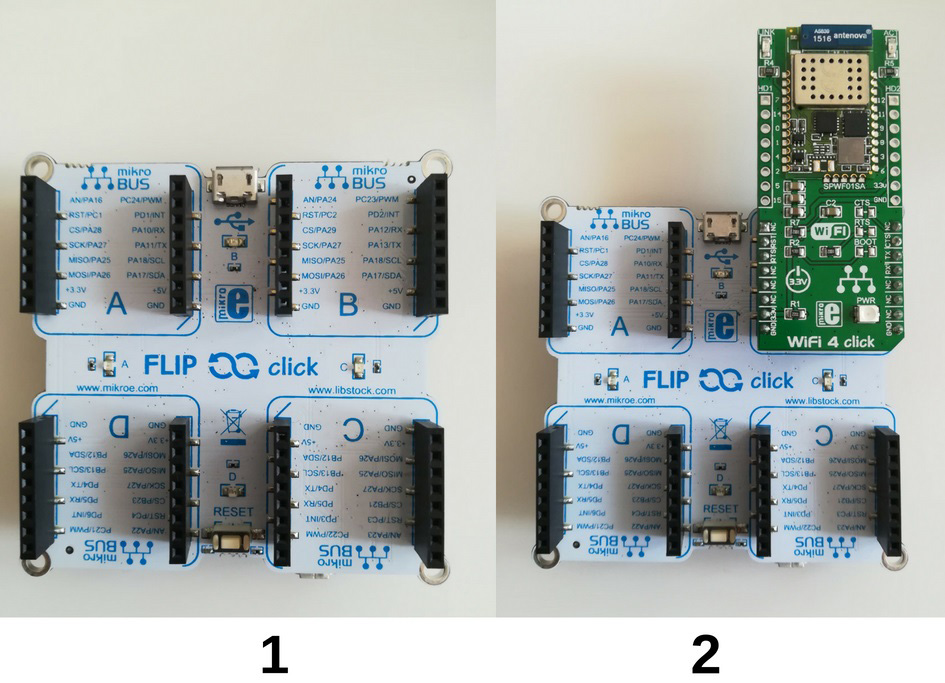
It's really simple, just place the WiFi 4 click on slot B of the Flip&Click board (make sure to align the pins correctly).
If you have problems connecting to the Internet, you may need to configure the baud rate of your WiFi 4 click. For this purpose you could clone and uplink the Zerynth's example "find and set baud" and then try again with this example (if you don't know how to clone and uplink Zerynth's example, see here).
Step 3: ProgrammingNow that everything is set, connect the Flip&Click with the micro-USB cable to the computer and launch Zerynth. Remember to install drivers, which are required for Windows and Mac platforms!
It could be useful to watch this short video.
- Create a Zerynth account and login.
- Select the Flip&Click SAM3X as device from the dropdown menu.
- Register and virtualize it using the buttons near the dropdown menu. You're ready to write the program!
- Download the repository and create a new project copying the files of the repository.
- Go to the ADM panel on the left and create a new device with UID and token device. Remember also to create and set the template by clicking on the plus button near "Template:" and choosing the template inside the "template" folder of the repository. More info here: https://www.zerynth.com/blog/getting-started-with-the-zerynth-app-how-to-build-an-iot-thermometer/
- Make sure to set your Wi-Fi credentials, your UID and token device inside the "main.py" file.
- Compile and uplink. Make sure it says "Uplink done!"
- Download Zerynth App on your smartphone and login with your Zerynth account.
- Run the Zerynth App and enjoy!
With the interface on your phone you can play with the switches by turning on/off the LEDs of your Flip&Click board. Moreover, you can customize the interface at your leisure, just by revising the file named "style.css", which is inside the "template" folder. It's also possible to run the HTML/JavaScript interface directly from your browser: just go to the ADM panel on the left and, on the list of connected devices, click the eye icon next to the name of your device!
What's next?
We have seen that the device can be controlled remotely both on a desktop computer or on a mobile app (thanks to the Zerynth ADM). Now you could proceed by adding a new component to your IoT background simply by exploiting another Flip&Click slot. If you are curious, see here!
Remember to install Zerynth Studio and the Zerynth App because you will be needing all of them to finish this one or other similar projects:


_xIl5PcEdnz.png?auto=compress%2Cformat&w=40&h=40&fit=fillmax&bg=fff&dpr=2)
Comments
Please log in or sign up to comment.