1. BBC micro:bit
2. micro:bit Prototyping Shield
3. 1 x PIR motion sensor
4. 1 x piezo buzzer
5. 1 x LED module
6. Jumper wires
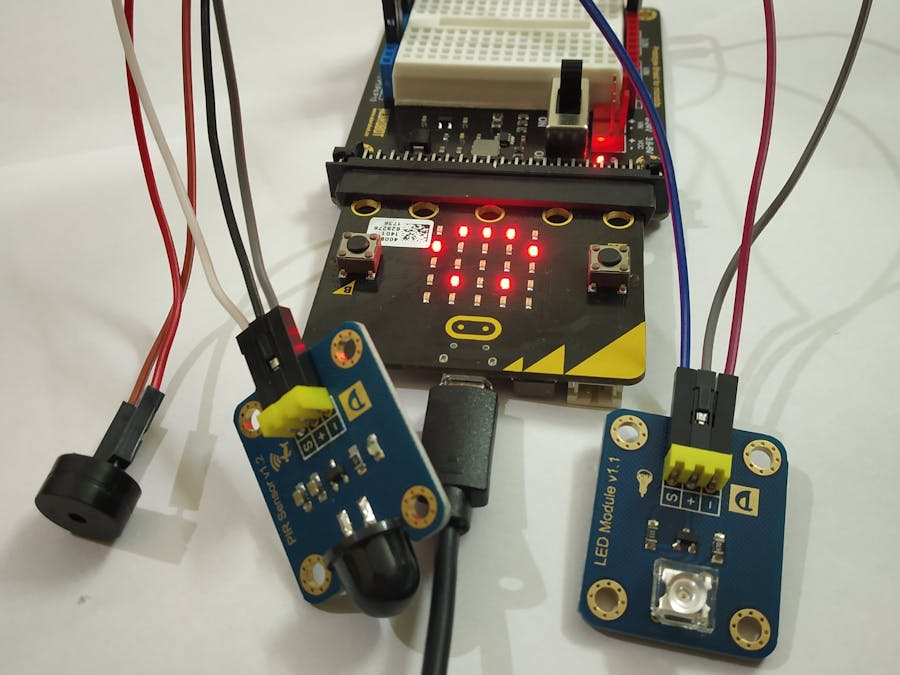
Images- Plug in the micro:bit into the micro:bit Prototyping Shield
- There are 3 pins coming off the PIR sensor and LED module ( S, +, -), Connect the positive (+) pin of both to the 3.3V pin of micro:bit Prototyping Shield using jumper cables.
- Similarly, connect the negative ( - ) pins of both to the ground (GND) of micro:bit Prototyping Shield
- Now, connect signal pin of PIR sensor to pin 0 (P0), signal pin of LED module to pin 2 (P2)
- The piezo buzzer should have a positive and a negative leg or wire. Connect the positive ( + ) leg or wire of the piezo buzzer to pin 1 (P1) on the micro:bit Prototyping Shield and the negative ( - ) leg or wire to ground (GND)
- Plug in the micro:bit
- Navigate to microbit.co.uk/app
- Click on Let's Code. The Following window will appear in which you'll be provided with the languages you have to select one you want to code with.
- Click on Java Script and start Dragging and dropping.
The code is:
- At last, Download the hex file and paste it on the connected microbit.
//Note : I've attached the hex file, You can directly download it and paste it on your microbit. //
Step 3: Test and PlayYou can adapt it to suit your purposes.You can also adjust how long the buzzer for in response to the movement.
One more thing is that you can also change the image that your BBC micro:bit displays. Simply click on the show leds block and change it to whatever you like.


Comments
Please log in or sign up to comment.