Introduction
One of the most common problems today is a saturation of parking spaces. Vehicles continue to outnumber existing parking spaces, thus clogging roads. Incidences of violence over occupancy, deformed cars due to a space crunch, and overcharging for parking are some problems that result.
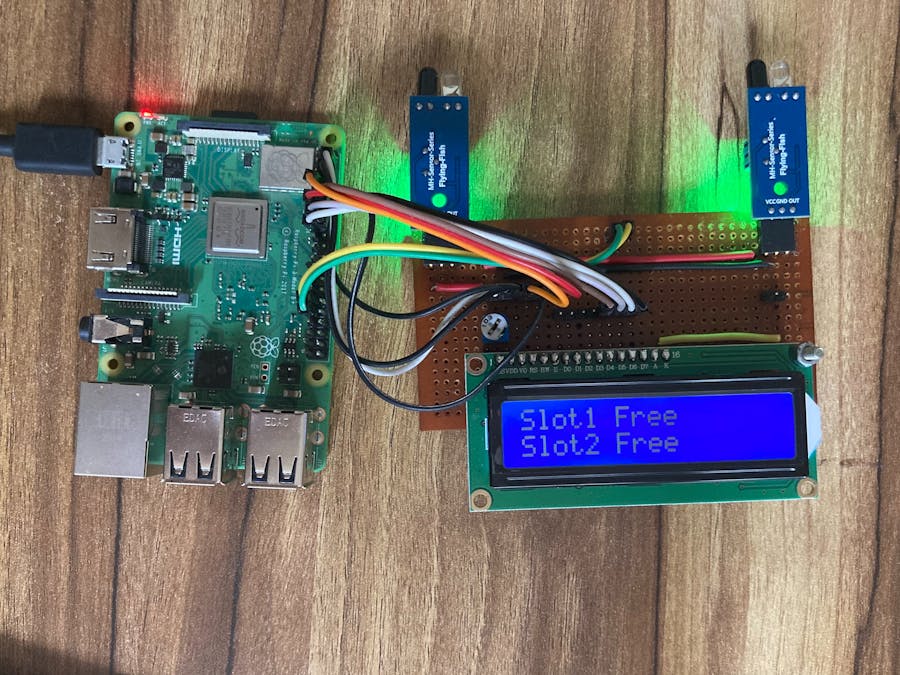
Most cities propose increasing parking spaces to combat the problem. Parks and vacant plots are used as potential parking spaces and multi-level facilities are being built, irrespective of the limited land space and resources. But their exists a silly problem. People enter the parking and then came to know that it's full. Should n't it automated ? Don't you think, we should already know if the parking has space for us or not ? Yeah, isn't it a good thought ? This project will help us show the availability of car slots to park the vehicle. This is implemented by using Raspberry Pi 3 B+ and IR Modules.
IR Proximity Module
If you want to make your own IR Module, then here is the schemetic for it.
An IR proximity sensor works by applying a voltage to a pair of IR light emitting diodes (LED’s) which in turn, emit infrared light. This light propagates through the air and once it hits an object it is reflected back towards the sensor. If the object is close, the reflected light will be stronger than if the object is further away. The sensing unit, in the form of an integrated circuit (IC), detects the reflected infrared light, and if its intensity is strong enough, the circuit becomes active. When the sensing unit becomes active, it sends a corresponding signal to the output terminal which can then be used to activate any number of devices. For the purpose of this exercise, a small LED will turn on when the sensor becomes active. Click here to download Gerber File for IR Module
MQTT
MQTT stands for Message Queuing Telemetry Transport. It is a communication standard for IoT devices. This protocol is an open standard, which means anyone can access it and implement it in a networked application.
The system of MQTT is not a software package but it can be used by the developers of new software as a standard to send messages to IoT devices and receive responses back. This opens up the possibility of writing new control instruction systems and also creating IoT device monitoring tools.
The MQTT system was first created in 1999, so it has been around for more than two decades. It was written as a standard to communicate with oil pipeline equipment. As an industrial communication system, MQTT was written within the framework of the Supervisory Control and Data Acquisition (SCADA) framework. The SCADA architecture is designed to communicate with shopfloor equipment in factories and sensors and controllers in process control.
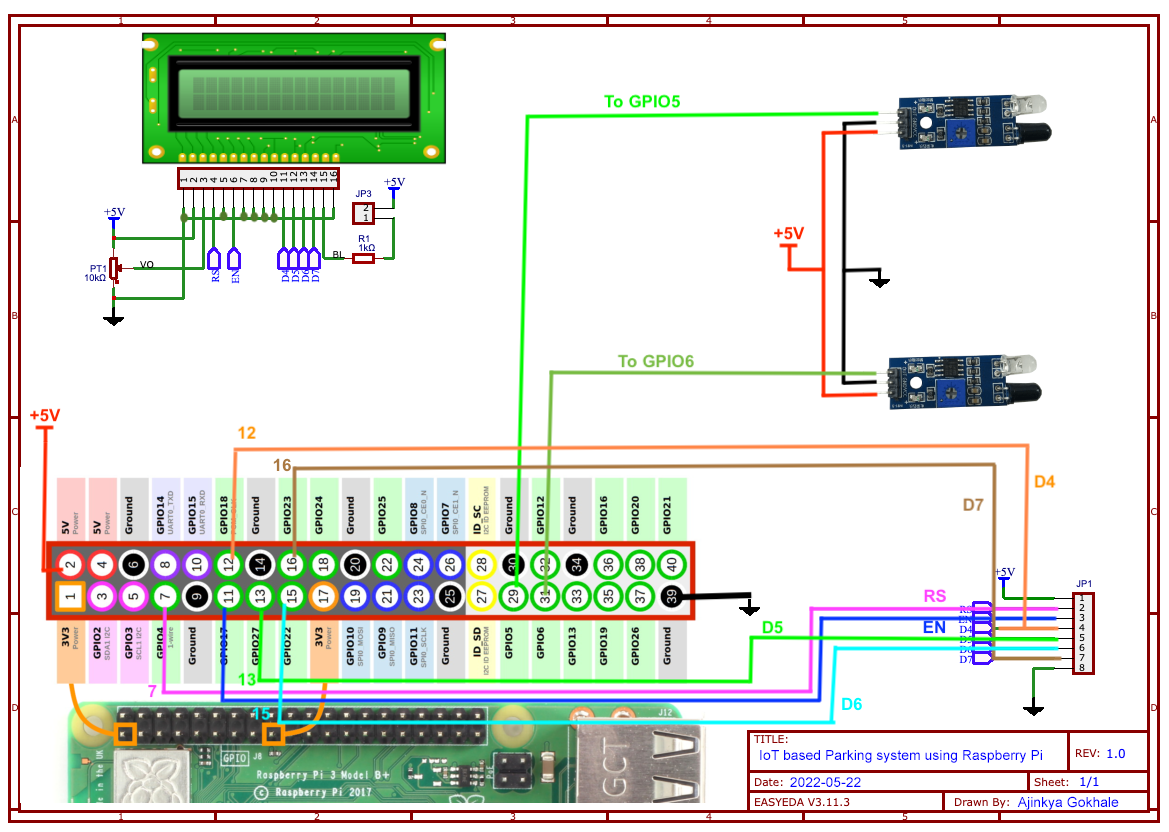
Hardware Implementation
MQTT APP SETUP
Step 1: Download MQTT Dashboard App from Playstore
Step 2: Add broker with the following parameters in your MQTT Dashboard App
Step 3: Add Toggle to the Project and rename it as slot1 and select ON value as '1' and OFF value as '0'. Select Red color for ON and Green Color for OFF with car icon.
Step 4: Everything is done, here are the examples of how it works.


Comments
Please log in or sign up to comment.