


This project uses a PIR (passive infrared) motion sensor. It detects motion when Porchy the Chipmunk sallies forth onto Sally's porch.
Background
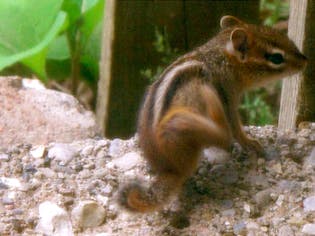
Let's say this little dude lived under your back porch:
Cute, right? Wouldn't you want to know any time he's outside doing cute stuff? Me too! This is a simple project that serves as a good framework for — let's face it — more practical projects. The high level idea is:
Sensor data on one Scout triggers an action on another Scout. That data is graphed on a web page. And it's all wireless!
I used 2 Field Scouts, and 1 Lead Scout to bridge the project to the Web, though I could've easily done it with just a Starter Kit — 1 Field Scout, 1 Lead Scout.
Ingredients
- Field Scout 1:Set up outside on my back porch as a chipmunk detector. I used a PIR motion sensor to detect chipmunks.
- Field Scout 2:Set up inside my house as a wireless alarm. I used a Piezo buzzer and a blinking LED to alert me when the chipmunk was active.
- Lead Scout:Bridges this all to the Web for graphs of historical chipmunk activity. I could have combined the Lead Scout and Field Scout 2 into just one Lead, but I had three Scouts to play with and I wanted to do more mesh networking fun times!
- 3.3V PIR Motion Sensor - $10
- Piezo Buzzer - $2
- Breadboard and jumper wires
Wire it Up!
There's the initial working prototype. You see that Field Scout 1 is plugged into USB for power. At the time I only had a 5V PIR, and Pinoccio is natively 3.3V. I ordered a 3.3V friendly PIR so now this project is all wireless.
Real-time Sensor Data on Pinoccio HQ
Below you can see my Pinoccio HQ dashboard spitting out an alert every time there's a chipmunk. This is a quick and easy way to debug and make sure your sensor data is coming through. As I make code tweaks, I don't have to click "Upload" and wait for things to compile. Working with HQ gives me immediate feedback on hardware and really speeds up prototyping.
I made a janky enclosure out of a plastic Bento box — I mean, it's Hack Day after all. Some day, this could be 3D printed and beautiful!
Code - ScoutScript
Here's the code that I loaded onto each Scout using ScoutScript, typed directly into the Console on HQ:
Field Scout 1 - PIR Chipmunk Detector
function on.d2.low {blinker};
function blinker {
message.group(1);
led.torch(1000);
hq.print("chipmunk");
};
Field Scout 2 - Wireless Alarm with Piezo buzzer
With my Piezo plugged into D5, I went to HQ > Pin settings, and set D5 to Output. Then I plopped this into the HQ Console:
function on.message.group {
if (arg(1) == 1) {
pin.write("d5",127);
led.torch(1000);
}
}
Lead Scout - Bridge to the Web
No code necessary on the Lead Scout! What amazes me is, you're doing mesh networking without having to know or care what the heck a "mesh network" is.
Next Steps - Project Enhancements
I'd like to receive Twilio-based SMS notifications on my phone when there is an active chipmunk. This should be pretty straight-forward. Once that's working, I'd like to hook all of this up so I see alerts on my Pebble watch.


Comments
Please log in or sign up to comment.