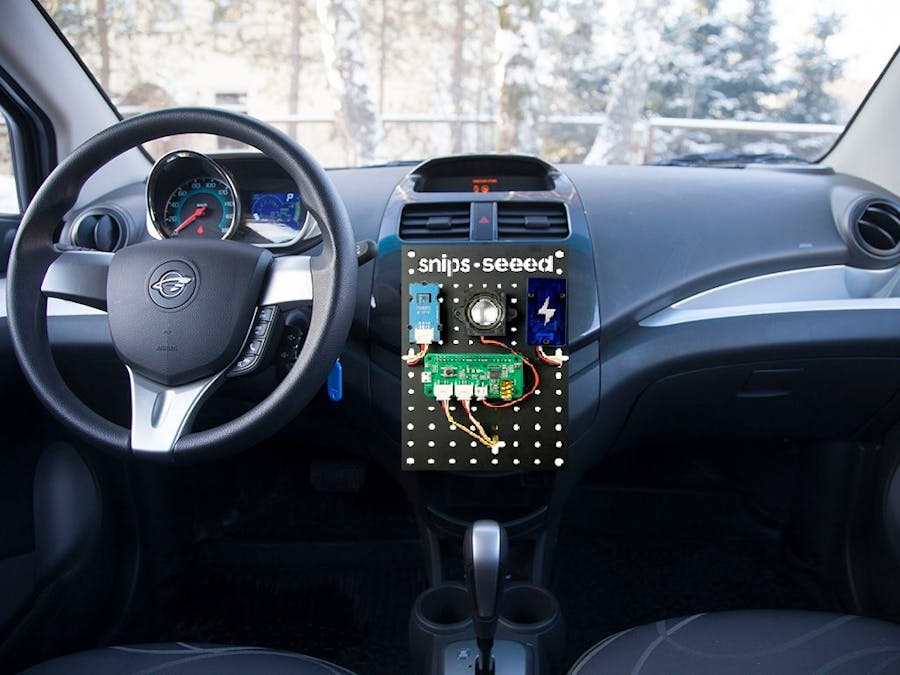
Driver do a lot of operation on road, look on road sign, look on gesture road police, pedestrian detection, driving around obstacles. He need assistant. I will write in this article about voice assistant.
Unboxing and AssemblyThe Base Kit includes the latest Seeed hardware components to easily build a powerful AI Voice Assistant, develop customized apps, and deploy to your connected devices.
For assembly use follow instruction:
My result:
Install an OS
Raspberry Pi don't have self hard disk storage, as elder fellows of computers. So your SD card will play the role of a hard disk. The OS we’ll install is a special version of Debian Linux for Raspberry Pi that is called Raspbian. You just need the lite version of it because we won’t need the Raspbian graphical interface.
Download the image
Official images for recommended operating systems are available to download from the Raspberry Pi website Download page.
You need choose Raspbian, after Raspbian Stretch Lite and it choose convenient method download.
You also need to download Etcher, a tool that will burn the OS on your memory card.
Unzipp downloaded Raspbian img, use 7Zip (Windows) or The Unarchiver (Macintosh). Let’s now get access to your memory card from your computer’s card reader and launch Etcher. Select the unzipped image file to burn and hit “Flash”.
Once your card is flashed, remove it and put it back in your computer.
You need to enter inside "Boot" volume and create 2 files at its root (its base directory). You’ll call the first file ssh and the second one wpa_supplicant.conf. Or you can just run the following commands from your terminal:
cd /Volumes/boottouch sshtouch wpa_supplicant.conf
You’ll need to paste the following content in the wpa_supplicant.conf to set up the Raspberry’s wifi connection. Don’t forget to replace the ssid and the psk with your wifi network’s name and its password, paying attention to spelling mistakes, case sensitivity, etc.
ctrl_interface=DIR=/var/run/wpa_supplicant GROUP=netdev
network={
ssid=”<Your wifi network name>”
psk=”<Your wifi network password>”
}
Install Snips platform
Step 1.Install SAM.
In this step, you will install Sam. Sam is a CLI (Command Line Interface) that you will be using to create, manage, and deploy your assistants, to configure your hardware, to view the logs of your assistants on the Raspberry, as well as to run your application locally for quick prototyping.
We will be installing SAM on personal computer and work with Raspberry Pi remotly. Your Raspberry Pi must be connected to your network.
You need at least Node v. 7.5.0. You can get them from the Node.js website. Also need install NPM.
Windows users need to additionnaly install Git. You can get it from Git’s website.
From a command shell on your local machine, run the following command:
sudo npm install -g snips-sam
In Rpi command line Enter:
ifconfig
you will know your Rpi, after need Enter command your PC:
sam connect 192.168.1.3

? Enter username for the device: pi
? Enter password for the device: [hidden]
Connected to 192.168.1.3
ip need change on self.
You can check at any time the device status with sam status:
sam status
Connected to device raspberrypi.local
OS version ................... Raspbian GNU/Linux 9 (stretch)
Status ....................... Snips Platform not installed
You may install the Snips Platform using sam init
To install specific components, check the help using sam init --help
Step 2: Installing Snips
Start the installer using sam init:
sam init
Installing Snips Platform components. This may take a few minutes...
Successfully installed Snips Platform components
This will take a few minutes, after which the device will reboot. Once ready, you can check again the status of your device. You should see the Status field updated accordingly, as well as a list of newly installed components:
Please note that some services’ status may be different from the example below. Most of them will become active later in the installation process, as soon as an assistant is installed.
sam status
Connected to device raspberrypi.local
OS version ................... Raspbian GNU/Linux 9 (stretch)
Installed assistant .......... Not installed
Status ....................... Installed, not running
Service status:
snips-analytics .............. 0.55.2 (not running)
snips-asr .................... 0.55.2 (not running)
snips-audio-server ........... 0.55.2 (running)
snips-dialogue ............... 0.55.2 (not running)
snips-hotword ................ 0.55.2 (not running)
snips-nlu .................... 0.55.2 (not running)
snips-skill-server ........... 0.55.2 (not running)
snips-tts .................... 0.55.2 (running)
Step 3: Installing softfor support Respeaker board.
For install this soft, make instruction like this or follow
Get the seeed voice card source code. and install all linux kernel drivers:
git clone https://github.com/respeaker/seeed-voicecard
cd seeed-voicecardsudo
./install.sh
sudo reboot
Step 4: Testing your microphone
You can check that your microphone is working:
sam test microphone
Testing microphone
Say something in the microphone, then press Enter...
...
Assuming you have a speaker, if you can clearly hear what you just said, you can move on without further microphone configuration. If you can’t hear yourself, start the interactive microphone setup guide:
sam setup audio
Starting microphone setup...
What microphone do you use?
[1] Generic USB
[2] ReSpeaker 7-Mic Array
...
Step 5: InstallAction
https://github.com/snipsco/snips-app-relay-switch
I make this manually:
sam install actions -g https://github.com/snipsco/snips-app-relay-switch.git
I make first test
I want to access the GPIO but it's not working.
snips-skill-server restricts access to the app it's running. It is to prevent any misuse from an app that a user will use on its Pi at home. The user _snips-skills runs the apps, you'll need to add this user to the group GPIO on the Pi: sudo usermod -a -G gpio _snips-skills
I use instruction for create in Snips console my App.
This I show screenshots process creating.
1.Sign Up or Login console.snips.ai
2. Create a New Assistant (I called simple - "assis")
3. Create a New App(I called - "CarAssistant")
4. Create an intents (I created two intents)
5. Create Slot - "direction" is custom type. You can look top image on left side.
Import the assistant model from the ConsoleOnce you have created your assistant, log in to the console from the terminal window by running:
sam login
You will be asked to enter your Snips Console credentials.
Next, install the assistant:
sam install assistant
If you have created several assistants in the Console, you will be asked to choose which one to install from a list.
Before adding actual handler code, let us first check that the assistant understands your voice commands. Enter the following:
sam watch
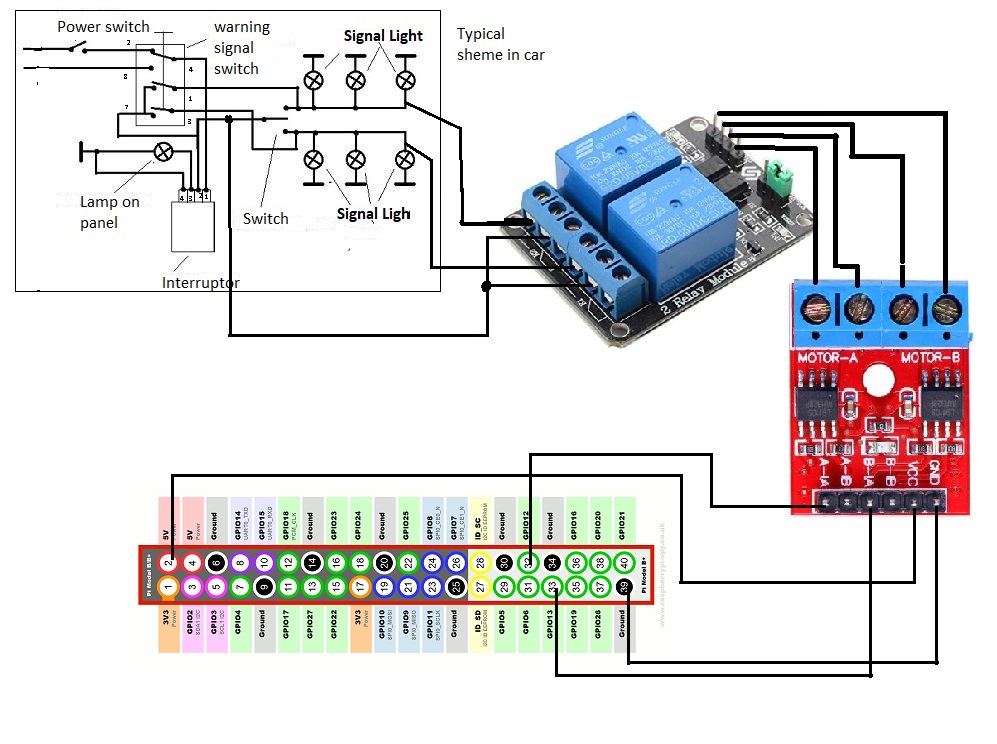
I don't use Respeaker 2 mic board because unfortunately it have one output GPIO. In my project use PB12 and PB13 output. There is in foto accumulator on 12V, charger for phone - supply RPi, speaker and microphoone connected to USB-Audio.
Demo videoNext StepPut into the case, and installed in car.
I want add control by window in car, open and close window. After will add control power on and turn off High Beam, Dipped Beam.


Comments